Beginner Guides

Auto Added by WPeMatico

Myofascial Release Explained: The Secret to Muscle Recovery & Flexibility

Myofascial Release Explained: The Secret to Muscle Recovery & Flexibility Ever feel tight, sore, or stiff after a workout? Myofascial release might be the game-changer your muscles need for faster recovery and better flexibility. Many people experience muscle tightness that stretching alone can’t seem to fix. The culprit? Fascial restrictions—deep knots and adhesions that limit movement and cause discomfort. This is where myofascial release comes in. It’s a simple, science-backed manual therapy that helps release muscle tension, improve flexibility, and speed up recovery—all without needing an expensive physical therapist. I learned about self-myofascial release in 2014 when I was plagued with some bad low back pain. Along with infrared light therapy, it eliminated my pain. Now I practice myofascial release every day as a part of my quick morning routine that I will share with you in a video below. But if you have no idea what it is, keep reading! I’m going to break down what myofascial release is, why it’s essential for your body, and how to do it using foam rollers and trigger point massage balls (spoiler: the ball is a game-changer for deep knots!). What Is Myofascial Release Your body is wrapped in a web-like connective tissue called fascia, which surrounds your muscles, joints, and organs. When fascia gets tight due to stress, repetitive movements, poor posture, or intense workouts, it creates knots, stiffness, and pain. Myofascial release is a hands-on technique that uses gentle, sustained pressure to loosen these tight spots, restoring natural movement and reducing discomfort. How Self Myofascial Release Works Unlike traditional stretching (which lengthens muscles), myofascial release targets trigger points—small, tight areas in the fascia that can cause pain and restrict range of motion. Applying pressure with tools like foam rollers and massage balls helps: Increase blood flow Reduce muscle soreness Improve range of motion Break up adhesions in the fascia Think of it like untangling a knot in a shoelace—instead of pulling harder (stretching), you work directly on the knot to loosen it. 5 Benefits of Myofascial Release for Recovery & Flexibility Whether you’re an athlete, an active walker, or simply someone who experiences muscle tightness from sitting too much or daily stress, myofascial release therapy is one of the most effective ways to keep your body feeling loose, strong, and pain-free. Let’s talk about some of the amazing benefits! 1. Speeds Up Muscle Recovery & Reduces Post-Workout Soreness Faster After exercise, your muscles experience micro-tears, which is part of the normal repair and strengthening process. But when fascia tightens around those muscles, it can trap tension and prolong soreness. Myofascial release accelerates recovery by: Breaking up knots and adhesions that restrict movement. Increasing blood circulation, which flushes out lactic acid and delivers nutrients for faster healing. Allowing your muscles to return to their natural, relaxed state more quickly. This means less soreness, better mobility, and a faster return to your favorite workouts! 2. Increases Flexibility & Mobility Helping You Move Freely Without Stiffness Tight fascia can limit your range of motion—making it harder to bend, twist, squat, or even reach overhead comfortably. By regularly performing self-myofascial release, you are: Unbinding restrictions in your fascia, which allows for smoother, more fluid movement. Helping your muscles lengthen properly, so they don’t feel stiff or restricted. Improving joint mobility, making everyday activities (like walking, yoga, or lifting groceries) feel effortless. Many people think flexibility only comes from stretching, but myofascial release is the missing piece that helps unlock true mobility and can relieve chronic pain. 3. Prevents Injuries Keeping Your Muscles Balanced & Healthy When fascia becomes too tight, it pulls on surrounding muscles and joints, creating imbalances that can lead to pain or injury. Regular myofascial release helps: Even out muscle imbalances, reducing strain on weaker areas. Prevent compensation patterns (e.g., if your right hip is tight, your left side won’t overcompensate). Decrease the risk of overuse injuries, like runner’s knee, IT band syndrome, and lower back pain. Think of it as body maintenance—just like changing the oil in your car, keeping your fascia loose prevents breakdowns before they happen! 4. Improves Circulation & Reduces Inflammation Helping You Heal Faster & Feel Better Poor circulation can lead to stiff, achy muscles, fluid retention, and sluggish recovery. By breaking up fascial adhesions, myofascial release: Boosts blood flow, delivering oxygen and nutrients to tired muscles. Helps flush out toxins and metabolic waste, reducing soreness and inflammation. Stimulates the lymphatic system, which supports immune function and tissue repair. This natural detox effect can leave you feeling lighter, looser, and more energized. 5. Relieves Tension & Stress Helping to Calm Your Nervous System Tension isn’t just physical—it’s neurological. Stress, anxiety, and poor posture can cause fascia to tighten and hold onto tension, making you feel stiff and fatigued. Myofascial release activates the parasympathetic nervous system, helping you: Relax and release stored tension from stress and poor movement habits. Reduce muscle guarding (when your muscles stay involuntarily tensed due to stress). Improve breathing patterns, which naturally relaxes tight fascia. Many people instantly feel calmer after a session because they’re releasing not just physical tension, but mental stress stored in their body. If you struggle with stress, explore the tips I used to reduce stress from everyday life. Why You Should Add Myofascial Release To Your Self Care Routine Most importantly—myofascial release is simple, effective, and accessible. You don’t need an expensive massage to experience these benefits. With just a foam roller or a trigger point massage ball, you can take control of your recovery, flexibility, and overall well-being in just a few minutes a day. Anything you can do yourself at home to take care of your body is key to longevity. It’s not easy or affordable to schedule weekly massages or chiropractor appointments. But if you can do pain management at home, you’ll be better off in the long run. If you’re new to myofascial release, start with just 5-10 minutes a day and notice the difference in how your body moves and feels! My Exact Myofascial Release Routine I use myofascial release every morning with a massage ball to loosen the tension in my fascia and muscles surrounding my low back and along my Quadratus Lumborum. I lay on my bathroom floor with a mat and just do my 5-10 minutes of my own physical therapy along with deep breathing. At my age, it’s pretty common to wake up with a stiff or tight back. For
Read More »

Interval Walking Training: A Smart Way to Burn Fat After 50

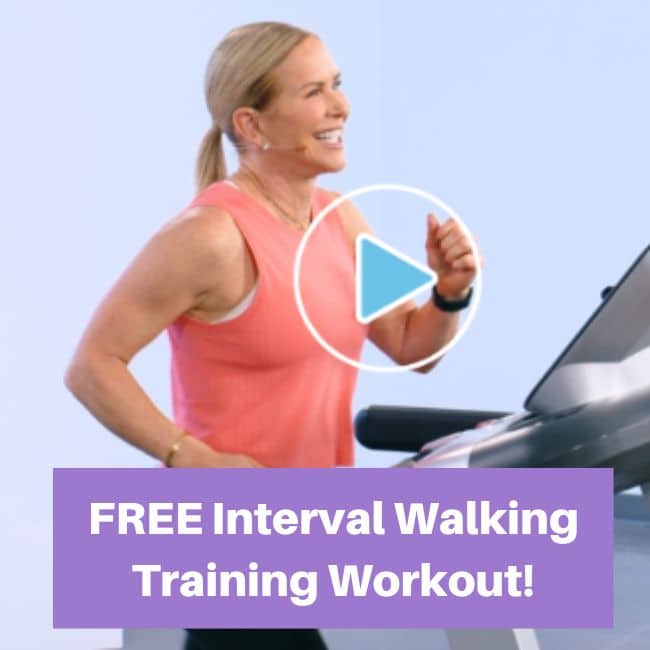
Interval Walking Training: A Smart Way to Burn Fat After 50 Let’s be real—there are a lot of women in midlife who are not looking to jump, sprint, or crush burpees anymore. And guess what? You don’t have to. If traditional HIIT feels a little too intense or your joints are saying “no thanks,” you’re not alone. That’s exactly why I fell in love with Interval Walking Training (IWT). It’s walking—with purpose. You alternate between brisk and moderate paces, and suddenly, your daily walk becomes a fat-burning, heart-boosting workout that actually feels doable. No fancy equipment. No pounding. Just results. Don’t get me wrong… HIIT training is great for all ages depending on your fitness level. But if jumping and sprinting isn’t your thing, you might just find that IWT becomes your new BFF. As a personal trainer and a middle age woman, IWT has become something I do weekly! What Is Interval Walking Training (IWT) Think of IWT as the best of both worlds: the ease and accessibility of regular walking with the fat-burning, heart-pumping benefits of interval training. It’s simple—you alternate between periods of faster-paced walking and slower, more moderate recovery walks. You’re still walking (yay for joint-friendly movement!), but you’re strategically pushing your pace to boost your fitness and results. Here’s a beginner-friendly example of what IWT could look like: Warm-up: 3–5 minutes at an easy pace Intervals: 1 minute of brisk walking (a pace where talking becomes challenging), followed by 2 minutes of moderate walking (where chatting feels effortless) Repeat the cycle for 20–30 minutes Cool-down: 3–5 minutes of relaxed walking That’s it! Just walking with an extra push. Keep reading to get a FREE WORKOUT with me below! Benefits of Interval Walking Training Interval walking offers a powerful yet joint-friendly way to boost metabolism, improve cardiovascular health, and enhance endurance—making it an ideal fat-burning workout for women over 50. Let’s explore some of the top benefits! 1. Low-Impact, High-Reward Walking is already one of the most accessible and sustainable forms of movement out there. Add in intervals, and you’ve got a recipe for better heart health, calorie burn, and endurance—without straining your knees, hips, or back. If you’ve got cranky joints (hello, menopause-related joint stiffness), IWT is a game-changer. It keeps you moving without beating up your body. 2. Boosts Cardiovascular Health Alternating between faster and slower paces challenges your heart and lungs in the best way. It’s been shown to improve something called VO2 peak—which is just a fancy term for how efficiently your body uses oxygen during exercise. And guess what? A better VO2 peak = better overall endurance and longevity. 3. Burns More Calories (Yes, Even After You’re Done!) Here’s the bonus of interval-based exercise: the afterburn effect, or what science calls Excess Post-Exercise Oxygen Consumption (EPOC). Your body continues to burn more calories even after the workout ends as it works to restore itself. That’s efficient training! 4. Improves Strength and Mobility That burst of brisk walking isn’t just cardio—it’s functional movement. It recruits your leg muscles, glutes, core, and stabilizers to support balance and power. This kind of movement helps you move through life with confidence, whether you’re chasing grandkids, walking up hills, or hauling groceries. Add my favorite flexibility exercises and my top mobility exercises to boost your wellness even more! 5. Easy to Modify and Progress Whether you’re just starting out or already logging steps every day, IWT meets you where you are. You can increase intensity by making your fast intervals a little longer, walking hills, or even adding a weighted vest (when you’re ready!). Explore how I use a weighted vest during walks, and my top tips for burning more fat while walking to boost your workouts! How To Start Interval Walking Training Getting started is simple. You don’t need to wait until Monday or buy a thing—just lace up your shoes and go. Here’s how to make IWT work for you: Start slow: Try 30 seconds of brisk walking followed by 1–2 minutes of slower recovery. Warm-up and cool-down: Spend 5–10 minutes at an easy pace before and after to prep your body and avoid stiffness. Find your “fast”: It’s not a run—it’s just a walking speed that makes conversation feel slightly difficult. Think “power walk,” not “Olympic sprint.” Use a watch or app: A simple timer, fitness tracker, or walking app can help you stay on track. I use the stop watch on my iPhone. Stick with it: Aim for 2–3 IWT sessions per week, each lasting approx.15–30 minutes. Consistency is where the magic happens. Wear proper footwear: A good pair of walking shoes makes a difference over time. I personally like good arch support and extra cushioning. These are the guidelines I use to choose the best walking shoes! Adapting Interval Walking Training to Your Fitness Level One of the best things about IWT is that you can adjust it to meet your needs. Here are some general guidelines to get started at your level. Beginner: Stick with shorter fast intervals (30 seconds to 1 minute) and longer recoveries. Focus on effort, not speed. Intermediate: Try a 1:1 ratio of fast to slow (1 min fast, 1 min slow), or walk on an incline for added challenge. Check out these amazing benefits of incline walking for middle aged women! Advanced: Walk longer fast intervals and shorten recovery time. Add a weighted vest or bodyweight moves during recovery walks (think lunges or arm circles). Why Interval Walking Training Works for Women Over 50 As someone who has lived through pregnancy, perimenopause, and post menopause—and worked with thousands of women over the years—I know firsthand that consistency trumps intensity. Walking is something most of us enjoy, and that means we’re more likely to stick with it. IWT lets us take something we already love and simply level it up. It’s fun. It’s efficient. And it meets you where you are. Whether you’re dealing with joint pain, rebuilding fitness, or just want something that feels doable, IWT delivers. Interval walking training is proof that walking doesn’t have to mean

Interval Walking Training: A Smart Way to Burn Fat After 50 Read More »

7 Benefits of Foam Rolling (Complete Beginner’s Guide)

7 Benefits of Foam Rolling (Complete Beginner’s Guide) Discover 7 amazing benefits of foam rolling for muscle recovery, flexibility, and pain relief. This complete beginner’s guide teaches you how to start and maximize results! Foam rolling has so many benefits and is popular amongst physical therapists and athletes to maximize muscle recovery. True to the name, it’s simply a roll of foam that is used for a self-myofascial release technique, that is much more affordable and convenient than deep tissue massages. Foam rolling has gained popularity in recent years as more research reveals the incredible benefits it provides for the body. I personally try to foam roll two to three times a week and I’ve noticed a difference in my daily movement. Let’s take a look at some of the amazing benefits of foam rolling, and how to get started with this simple but powerful tool! Table of contents 1. Loosens Stiff Muscles 2. Can Reduce Stress 3. Helps Prevent Injury 4. Limits Soreness 5. Can Increase Flexibility 6. Boosts Blood Circulation 7. Can Increase Range of Motion How to Get Started Using a Foam Roller Understand the Two Main Types of Foam Rolling Techniques How To Use A Foam Roller Where to Buy Your Foam Roller Foam Rolling Exercises to Get Started With 1. Loosens Stiff Muscles One of the major benefits of foam rolling is that you can use it to loosen stiff muscles so you can get the most out of your workouts, and focus on your recovery too. Ever gone from lounging on the couch to hitting the pavement for a jog without taking the time to properly warm up? You’ve likely felt extremely stiff. Foam rolling is a great way to get blood flowing and loosen up your muscles before a workout so you feel good and your movement feels comfortable. One study conducted by the National Strength & Conditioning Association concluded that athletes who took advantage of foam rolling before exercising felt much less fatigued than those who chose not to foam roll. 2. Can Reduce Stress Foam rolling helps relax tight muscles and release tension, promoting a calming effect that can reduce overall stress levels. High levels of stress can take a toll on your health, especially if you’re trying to lose weight and get in shape. Constant stress is linked to increased hormones such as cortisol that increase appetite, promote weight gain and fat storage, and disrupt your sleep. One university study from South Korea found that foam rolling can lower levels of the stress hormone cortisol. 3. Helps Prevent Injury Another benefit of foam rolling is that it helps to improve muscle elasticity and addresses imbalances, minimizing the risk of strains and injuries during physical activity. Injury prevention isn’t just about being careful, but about being proactive. A consistent routine of stretching and foam rolling can help keep pesky and painful injuries linked with tightness and overuse, as the iliotibial band, at bay by loosening up the muscles. Studies have shown that loosening up your muscles increases the compliance of the muscle-tendon unit. This prevents the body from demanding energy absorption and release that can exceed the capacity of the muscle-tendon unit that leading to injury. 4. Limits Soreness Regular foam rolling aids in breaking up lactic acid buildup, which can reduce post-workout soreness and speed up recovery. By increasing flexibility and blood flow, foam rolling can inhibit soreness. A 2015 study conducted by the National Athletic Trainer’s Association concluded that foam rolling was significantly effective in lessening muscle fatigue and soreness. 5. Can Increase Flexibility Foam rolling releases fascial adhesions, making muscles more pliable and enhancing overall flexibility. Loosening up your muscles through foam rolling can boost their elasticity. The more flexible the muscles, the more power they can produce. In fact, a 2014 study found that foam rolling even increased an athlete’s range of motion. You can also check out my top 10 stretches to improve flexibility after middle age for more tips! 6. Boosts Blood Circulation Another benefit of foam rolling is that it stimulates blood flow, delivering oxygen and nutrients to muscles for better recovery and performance. Proper blood circulation is important on a multitude of levels. Massages work to improve circulation through the arteries, veins, and capillaries in your body, which allows them to receive more oxygen to feel refreshed. One study conducted by the National Athletic Trainer’s Association found that arterial stiffness was decreased while the vascular endothelial function was increased after using a foam roller. 7. Can Increase Range of Motion By loosening tight muscles and connective tissue, foam rolling improves joint mobility and enhances the range of motion during movement. A 2010 study from the Centers for Disease Control and Prevention concluded that the range of motion in every major joint in the body decreases with age. This can cause everyday tasks to feel painful. Decreased range of motion can also lead to injury. Foam rolling has been found to increase range of motion and, compared to static stretching before a workout, can increase muscle force according to a 2014 study published in the International Journal of Sports Physical Therapy. How to Get Started Using a Foam Roller Now that we’ve covered the benefits of roam rolling, let’s dive into how to get started with foam rolling to improve recovery, flexibility, and mobility. These beginner-friendly tips, techniques, and essential steps will help you get started with foam rolling today! Understand the Two Main Types of Foam Rolling Techniques There are two main foam rolling techniques you can use: static pressure and dynamic rolling. Static Pressure This technique involves finding a tender or tight spot in the muscle and holding the foam roller in place on that area for 20–30 seconds. The sustained pressure helps release tension, improve blood flow, and relax the muscle. It’s especially useful for addressing specific trigger points or knots. Dynamic Rolling This method involves slowly rolling the foam roller back and forth over a muscle group, typically in

7 Benefits of Foam Rolling (Complete Beginner’s Guide) Read More »

How I Use Infrared Light Therapy to Manage Pain in Midlife

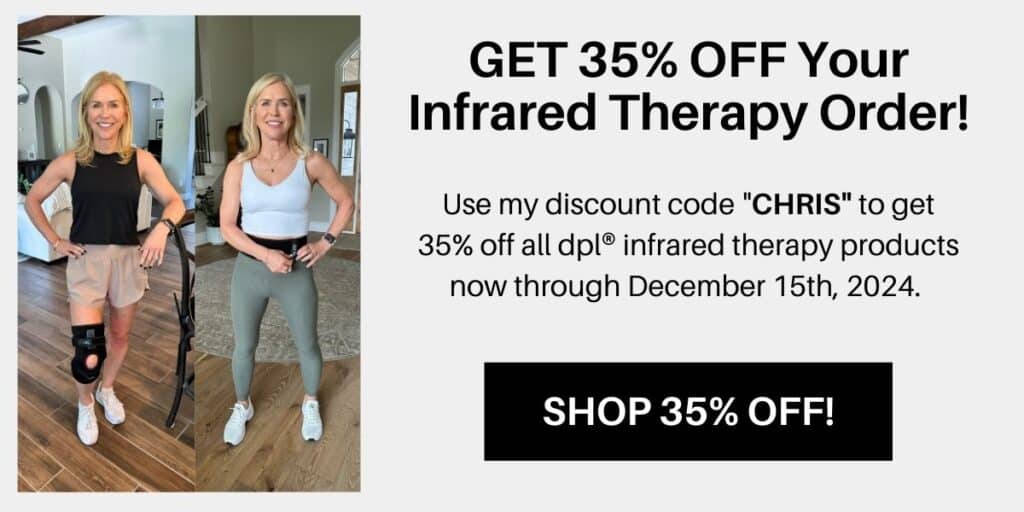
How I Use Infrared Light Therapy to Manage Pain in Midlife Discover how infrared light therapy can be a game-changer for managing pain in middle age. Learn how this natural, non-invasive treatment supports muscle recovery, reduces inflammation, and improves overall well-being as we age. If you’re like me—59, active, and maybe dealing with a few aches and pains—you know the importance of staying proactive with our health. About ten years ago, I struggled with terrible back pain. Years of activity as a fitness professional, mixed with regular wear and tear, had left me in pain that just wouldn’t quit. After trying everything, I found a solution in infrared light therapy and daily stretching. These two became my go-to tools, helping me ease tight muscles and get back to moving without that stubborn pain. Now, it’s become a daily ritual for me—I wear my infrared therapy pad each morning as a kind of “preventative medicine.” And recently, it’s also been a lifesaver for my knee, which has been acting up, likely from years of overuse. I use an infrared light therapy joint wrap that has been an easy and effective way to manage the inflammation and get back to what I love. Let me tell you why I’m such a fan of how this therapy actually works to relieve pain, and what I’ve learned from experience and research. The Benefits of Infrared Light Therapy for Pain Management Infrared therapy isn’t just for back pain—although it’s excellent for that! It can help with a variety of issues, including: Chronic pain: Helps relax muscles and lessen joint pain. Infrared light treatment increases circulation and reduces inflammation to treat pain from long term conditions like arthritis, neuropathy, tendinitis, and more. Acute pain: Helps manage those sudden, sharp pains. Injury recovery: Speeds up the healing process after an injury. Workout recovery: Eases muscle soreness, and improves blood flow so you’re ready for your next session. Muscle spasms: Relaxes muscles, preventing the tightness that leads to spasms. How Does Infrared Light Therapy Therapy Alleviate Back Pain? Back pain, whether from arthritis, daily strain, or injuries, can often feel deeply embedded in our tissues. That’s because this type of pain is often due to cellular damage far within our muscles. Unlike using heat or ice to treat pain that only works on the surface, infrared light therapy can penetrate through layers of skin, reaching deeper into the muscle tissues stimulating cells and increasing circulation to target pain at the source. Yes, heating pads feel good but they can’t do the job alone! And something to note, both red and infrared light therapy are typically combined to deliver maximum results for pain relief. The two light sources can complement each other in treating soreness in the body at different depths of tissue. They are especially effective when combined with back pain exercises to stretch and strengthen your muscles! They are a little different, with the infrared being the hero but here is what they each do. Red Light Therapy: Surface-Level Benefits Red light therapy is a go-to for improving skin health, thanks to its shorter wavelength that interacts mostly with the skin’s surface. This makes it fantastic for treating fine lines, wrinkles, and skin texture. However, red light also encourages blood circulation, making it a good tool for mild pain relief by enhancing circulation and supporting cellular recovery. Infrared Light Therapy: Deep-Tissue Healing Infrared light, on the other hand, has a longer wavelength that penetrates much deeper, reaching beyond the skin to muscle and nerve tissues. This makes it ideal for pain relief and healing below the skin’s surface. By boosting blood flow in targeted areas, infrared light reduces inflammation and supports faster healing. It’s particularly effective for those with arthritis, muscle soreness, or injuries, as it can relieve tightness and discomfort more effectively than red light alone. Additionally, infrared light therapy promotes cellular regeneration, which means it can assist in both wound healing and recovery after physical strain. It’s being hailed for it’s ability to safely alleviate deeper pain and support tissue recovery. Most pain relief devices are created using a combination of red and infrared light. These tools provide powerful results and there’s a ton of research backing this up. For instance, a study from the National Institutes of Health found that infrared light therapy could reduce chronic back pain by 50% over just six weeks. For me, it worked just like that! After 4-6 weeks of consistent use of my dpl® Flex Pad, I was moving freely again. Now, I use it like my “insurance policy” along with my back strengthening exercises to keep back pain at bay. The Infrared Therapy Device I Use Daily I use the dpl® Flex Pad which is a combination of red and infrared light therapy. It’s a large, bendable pad and can be used anywhere on the body. You just charge it up and then it’s hands free. It’s easy to move around and do whatever tasks you have to do around the house. You can feel better in just 20 minutes, right in your own home! And remember what I said earlier, consistency is the key to relieving pain so having something easy to use at home makes that way more achievable. I also use the dpl® Joint Wrap on my knee. Again, hands free and easy to use. You can also use it on your shoulders, elbows, and ankles.  If you were a fly on the wall in my home, you’ll see me wearing infrared light therapy every morning as I get my coffee and get my morning going. Plus, it’s FSA and HSA approved. The Bottom Line Incorporating this type of therapy into my routine has been a game-changer. For me, it’s about actively investing in my long-term health, listening to my body, and using tools that support my recovery and well-being. It’s non-invasive and not a medication! If you’re dealing with pain or simply want a method to support active recovery, consider giving infrared light

How I Use Infrared Light Therapy to Manage Pain in Midlife Read More »

Power Walking For Beginners

Power Walking For Beginners Discover the ultimate guide to power walking for beginners! Learn the benefits, essential tips, and effective techniques to get started on your fitness journey with power walking. Perfect for all fitness levels! Even as a fitness expert that does full intensity workouts many times a week, power walking is my ride or die fitness activity. With countless studies proving the benefits of walking, I love this form of exercise because it will keep you moving at any age. Walking is one of the most maintainable workouts a person can add to their life. If you haven’t started power walking, the time is now! What Are the Benefits of Power Walking? There are so many benefits to power walking. I define power walking as walking at a good pace, with good form for a certain amount of time or mileage. Here are the top reasons why power walking is a wonderful choice of exercise: Power Walking Is Low Impact: Power walking gives you a great heart rate boost without wreaking havoc on your joints and connective tissue. Power Walking Burns Calories: Depending on the speed, a power walk can burn anywhere from 200 to 400 calories per hour or more. If you add a weighted vest for walking, you can burn even more! Check out my list of 7 proven ways to burn more fat while walking to up your intensity even more! Power Walking Is Important For Heart Health: It’s a great cardiovascular exercise working the heart and lungs. You Can Power Walk Anywhere: No equipment or special outfit is needed to walk! That means you can do it nearly anytime and anywhere. Comfortable clothes and choosing the right walking shoes are important, and a treadmill or walking pad can help in the colder months. Power Walking Is Suitable For Everyone: Obvious injuries or illnesses aside, walking is great for all ages, genders, sizes, and fitness levels. Power Waking Can Decrease Disease and Illness: Studies show that power walking can help decrease your risk of multiple maladies. Harvard Medical School says that walking improves cardiac risk factors such as cholesterol, blood pressure, diabetes, obesity, vascular stiffness and inflammation, and mental stress, just to name a few! Tips for Getting Started With Power Walking Power walking is a safe, low-impact form of workout but it’s still important to know to follow the proper power walking technique to avoid injury. These are my expert tips to get started with power walking in a safe way. 1. Stretch Before Power Walking Yes, you do need to stretch, even before a walk. A power walk is an active exercise so you need to warm up those muscles. I recommend a dynamic stretching routine like these 8 Essential Stretches For Walkers. 2. Power Walking Warm-Up A proper warm-up is crucial for all types of exercise including power walking. Begin slowly. Walk for a few minutes and then consider some active stretches such as 10 walking lunges and 10 hip circles. Studies show that a proper warm-up helps prevent injury. 3. Remember Moderation Power walking too many miles can lead to an increased risk of injury and soreness. Don’t be tempted to start aggressively in an attempt to burn more calories. If you are new to power walking, shoot for 15-20 minutes or less on your first endeavor. Do this for the first few times out. After a week of regular movement, increase your time to 20-25 minutes. After a couple more weeks, you will be up to a solid 30-minute walk. The best place to start is with my power walking challenge. 4. Start Slowly Just as walking too far your first time out can lead to injury or soreness, so can walking too fast. Make sure your first walk is moderate in pace. Just a stroll is fine. A good way to judge? Walk with a buddy and carry on a conversation. If you can talk the entire time, you’re probably at a good pace. 5. Stretch At The End Of Your Power Walk If you only have 30 minutes for a brisk walking workout, plan a 25-minute walk and save 5 minutes to stretch at the end. Stretching your calves, glutes, hamstrings, quads, and hips will help prevent soreness and keep you free from common walking injuries. Using Proper Power Walking Technique  Power walking exercise recruits all kinds of muscles in your body. In order to prevent overuse injuries or poor form hazards, here are some good power walking form tips for you to follow. Good Posture: Stand tall. Pull your tummy in like you are zipping up tight jeans. Keep your head up and shoulders pulled back but relaxed. Lift your chest. If this is something you struggle with, give my posture exercises a try! Use Your Arms: Good arm motion will help you burn 5-10% more calories. Bend your elbows 90 degrees and keep elbows pulled in close to your body. Pump your arms straight forward, not diagonally, and be sure they stay low, not going past your breastbone. Make fists, but relaxed not tight. Foot Motion: Your footsteps should be in a heel-to-toe motion. Your heel hits first then your foot rolls through your toe. Keep Your Strides Natural: Don’t try to speed up by taking giant steps or an unnaturally long stride. Instead, lengthen your stride by your back foot by keeping that foot on the ground longer and giving you a more powerful stride forward. Don’t overthink it. Power Walking Workouts To Get Started With Prefer to follow along with a workout? Give one of my power walking workouts a try! 3 Walking Workouts To Boost Your Weight Loss 14-Day Power Walking Challenge The Best Low-Intensity Workouts More Power Walking Expert Tips  Here are some other helpful tips to keep in mind as you learn how to power walk. Choose Comfortable Clothes This one probably seems obvious, but the more appropriate the clothing the more comfortable you will be. And the more comfortable you

Power Walking For Beginners Read More »

Using A Weighted Vest For Walking: Benefits & Expert Tips

Using A Weighted Vest For Walking: Benefits & Expert Tips Incorporating a weighted vest into your walking routine will introduce a new level of exercise intensity while providing health benefits like improving bone density and posture as well! Walking is one of the most accessible and effective ways to maintain fitness, enhance cardiovascular health, and improve mental well-being. I walk almost every day, and I truly love it. If you love walking and are looking for a little extra push, adding a weighted vest to your walks might be the game-changer you need. Especially for women over 40, health-conscious individuals, and fitness enthusiasts This simple addition can offer significant benefits, especially for women over 40, health-conscious individuals, and fitness enthusiasts. Does building bone density and muscle strength while improving balance and heart health sound good to you? Keep reading! I started wearing a weighted vest for my daily walks and noticed a boost in calorie burn right away. I’m going to share the benefits of using a weighted vest, how to choose the right one, and tips for incorporating it safely into your walking routine. What Is A Weighted Vest And Why Should I Use One? A weighted vest is a fitness accessory designed to add resistance to your regular activities, such as walking, running, or bodyweight exercises. The added weight forces your muscles to work harder, leading to increased strength, endurance, and calorie burn. For us ladies in our perimenopausal and menopausal years, a weighted vest provides a simple yet effective way to enhance your walking workouts for weight loss without the need for additional equipment or complicated routines. This is a different concept than rucking which is typically about wearing the weight on your back. A weighted vest distributes the weight across your upper body making it more comfortable. Weighted vests comes in various styles and weights. You’ll want to find one that fits your body and works within your budget. Keep reading for more tips on choosing the right weighted vest for walking! The Benefits Of Wearing A Weighted Vest for Walking Incorporating a weighted vest into your walking routine can elevate your workout to a whole new level. It’s a simple yet powerful tool that adds resistance, making your muscles work harder and providing a bunch of worthwhile benefits. Walking comes with tons of great benefits like boosting your cardiovascular health and enhancing your mental well-being. But, if you’re looking to up the ante and make your walks even more effective, a weighted vest might just be your new best friend. Here’s why you should consider using a weighted vest for your next walk: Improves Bone Density Just as weight training helps strengthen your bones, walking with a weighted vest can contribute to better bone health. This is especially important as we age and naturally start to lose bone density. It’s a great way to help prevent osteoporosis and keep your bones strong, which is a biggie! Builds Muscle Strength and Endurance Carrying extra the extra weight from your vest engages more muscles, particularly in your legs, back, and core. Over time, this can lead to improved muscle tone and endurance. You’ll notice a difference in how strong and stable you feel during your daily activities. Boosts Calorie Burn Adding extra weight means your body has to expend more energy to move, which translates to burning more calories. Whether you’re looking to lose weight or maintain your current fitness level, a weighted vest can help accelerate your progress. Enhances Cardiovascular Health The additional resistance of a weighted vest challenges your cardiovascular system more than regular walking. This can improve your heart health and increase your stamina over time. It’s like turning your leisurely walk into a moderate-intensity workout without changing your pace. Enhances Posture and Balance A weighted vest encourages you to maintain an upright posture and engage your core muscles. This can lead to better balance and reduced risk of falls, which is crucial for overall mobility and health as we age. You can also check out my exercises to improve balance, and my favorite mobility exercises to feel young at any age! How to Choose the Right Weighted Vest Choosing the right weighted vest will help increase the intensity of your walking workout without causing any discomfort or pain. Let’s take a look at fit, weight, and material! Comfort is Key When selecting a weighted vest, it’s crucial to prioritize comfort. Look for a vest that fits snugly but isn’t too tight, allowing you to move freely without discomfort. The one I wear has adjustable straps to customize it to my body. A well-fitted vest will ensure that the weight is evenly distributed across your body, preventing any strain or injury. Choosing The Right Weight When it comes to selecting the right weight for a weighted vest to wear while walking, it’s all about striking a balance between comfort and challenge. Start by considering your current fitness level and experience with weight training. A good rule of thumb is to begin with a vest that is 5-10% of your body weight. For example, if you weigh 150 pounds, a vest weighing between 7.5 to 15 pounds would be a suitable starting point. Make sure the vest fits snugly and distributes the weight evenly across your torso, preventing any undue strain on your shoulders or back. Begin with shorter walks to get accustomed to the additional load, gradually increasing the duration as your body adapts. Always listen to your body and adjust the weight as needed to ensure that the added resistance enhances your workout without causing discomfort or injury. Remember, the goal is to enhance your walk, not to turn it into an arduous task. Material Matters The material of the vest is another important consideration. Look for a vest made from durable, breathable materials that can withstand regular use and provide adequate ventilation. This will help keep you comfortable during your workouts and ensure that the vest lasts for years to come.

Using A Weighted Vest For Walking: Benefits & Expert Tips Read More »

10 Minute Tabata Workout for Beginners

10 Minute Tabata Workout for Beginners This 10 minute Tabata workout for beginners is the perfect way get in a great workout in less time. Think work smarter not longer. Tabata is a form of high-intensity interval training (HIIT) that consists of 20 seconds of intense exercise followed by 10 seconds of rest, repeated for 8 cycles in a row, equaling 4 minutes. This method is designed to maximize your workout efficiency, boosting both cardiovascular fitness and muscle strength in a short period. Often high-intensity interval training (HIIT) is thought of as advanced exercise and it can be, but it’s also possible to use this concept with basic exercises and allow beginners to experience HIIT too. For my beginner’s 10-minute Tabata workout, you’ll cycle through different exercises to keep it engaging and effective, ensuring you get a full-body workout in a brief amount of time. This workout can be done anytime, anywhere—there’s no equipment required. Tabata Workout Instructions Follow these simple instructions to get started with my 10 minute Tabata workout. Warm up for 1 minute by jogging in place Perform each exercise as hard as possible for 20 seconds of work, then take a quick 10-second rest. Do all 4 exercises two times through to make one 4 minute Tabata Eight cycles of 30 seconds = 4 minutes Repeat the whole Tabata again = 8 minutes Cool down for 1 minute, taking deep breaths and lightly stretching. As you become more fit or more accustomed to the format, you can go through the whole thing again or try other Tabata workouts to mix things up! Watch this quick video below to see the exercises demonstrated, or check out the pictures and descriptions of each move below, too! [adthrive-in-post-video-player video-id=”So4Eqpij” upload-date=”2017-10-10T13:03:37.000Z” name=”10 minute tabata workout” description=”This 10-minute tabata workout proves that you CAN get a killer workout in in just 10 minutes. These high powered moves will leave your muscles aching and your body feeling stronger! We LOVE tabatas: a form of HIIT that is proven to burn fat and build muscle SUPER efficiently!”] Remember to warm up and cool down for a minute before and after the exercises, making this a full 10-minute beginner Tabata workout. 1. Plié Squat Plie squats are awesome and effective in my opinion. They target the glutes and legs while placing emphasis on the inner thighs and women love that! How to Perform a Plie Squat: Stand with feet slightly wider than shoulder distance apart and toes turned out. Bend your knees while lowering your torso, keeping your back upright and abs tight. Engage your glutes and come to the standing position squeezing your inner thighs. 2. Jumping Jacks Jumping jacks are a full-body cardiovascular exercise that boosts heart health, burns calories, and improves coordination and endurance. How to Perform Jumping Jacks: Start standing with a slight knee bend and hands resting on your thighs. Keeping the knees bent, open the arms and legs out to the sides. Arms come above the head and legs wider than shoulders, then close, returning to your start. 3. Cross Behind Lunges This cross behind lunge engages the glutes, quads, and inner thighs. I also love that a cross behind brings in some balance. It’s the perfect addition to your Tabata workout! How to Perform a Cross Behind Lunge: Begin standing with your feet hip distance apart. Transfer your body weight onto your left leg and cross your right foot behind your left leg, keeping your hips facing forward as you bend both knees and lower yourself toward the floor in a lunge. Step back to starting position and repeat on the other side. 4. Punching In this Tabata workout, punching provides an intense cardiovascular boost that also uses upper body strength and coordination. How to Perform the Punching Exercise: Stand with feet slightly wider than shoulder distance apart and bend your knees slightly. Tighten the core to keep your center still. Punch out one arm at a time at a fast pace. Try adding this 10 minute Tabata workout to your weekly schedule to switch up your workout routine, and get more benefits in less time! This 10 minute Tabata workout for beginners is the perfect way get in a great workout in less time. Think work smarter not longer. Tabata is a form of high-intensity interval training (HIIT) that consists of 20 seconds of intense exercise followed by 10 seconds of rest, repeated for 8 cycles in a row, equaling […] Chris Freytag, CPT{authorlink}https://gethealthyu.com/simple-full-body-tabata-workout/Get Healthy U | Chris Freytag

10 Minute Tabata Workout for Beginners Read More »

What is Rucking? Benefits, Workouts, Gear and More

What is Rucking? Benefits, Workouts, Gear and More Learn all about rucking, a low-impact exercise that requires you to carry a weighted backpack. Discover the benefits of rucking, sample workouts and recommended gear. Are you looking for a good workout routine that will get you in shape and also help you prepare for any unforeseen circumstances? Then you should consider rucking.  The hashtag #rucking has already gotten close to 20 million views on TikTok making it what we call a “trend” in fitness.  So, what is rucking? Rucking is simply walking with a weighted pack on your back. You can also use a weighted vest. This can be done for recreation, fitness, or as part of military training.  It is a great workout because it exercises your whole body.  You’ll use your legs to walk, of course, but you’ll also engage your core muscles to stabilize the weight of the pack. And since you’re carrying extra weight in the bottom of the pack, you’ll also get a good cardio workout. Keep reading to learn more about rucking, the benefits of this loaded pack workout, the best gear, and and tips to succeed. Table of contents What is Rucking? Benefits of Rucking Increases Cardio Endurance Builds Strength Improves Joint Stability Can Be Done Anywhere Improves Mental Toughness Choose the Right Weight for Rucking Rucking Gear Pre-Workout Warm Up Sample Rucking Workouts Beginner Rucking Workout More Challenging Rucking Workout Tips for Success What is Rucking? Rucking is a form of fitness exercise that involves walking or hiking with a loaded backpack, typically known as a rucksack. The term “rucking” is derived from “ruck march,” a military term used to describe marching or walking with a heavy backpack as part of military training. The concept of rucking has its roots in military training, where soldiers carry heavy loads over various terrains to build strength, endurance, and mental toughness. It’s an effective and practical way to train for the physical demands of carrying equipment and supplies during long marches or missions. In the civilian fitness context, rucking has gained popularity as a functional and accessible form of exercise. People of all fitness levels can participate by simply putting on a backpack with some weight and walking for a set distance or duration. The added weight challenges the cardiovascular system, strengthens muscles, and enhances overall endurance. People are now rucking in their neighborhoods, local parks and trails. Rucking is a great workout for a number of reasons that I’ll cover next! Benefits of Rucking Rucking is basically adding load. By adding weight to your body, you are able to increase the intensity of your workout while also burning more calories. And by the way, this works with a baby too—if you’re carrying your 9-month-old on your back, yes, you’re rucking. Here are some of the many benefits of rucking: Increases Cardio Endurance Rucking is an excellent way to get your heart rate pumping and build up your cardio endurance. Walking with added weight increases heart rate and improves cardiovascular endurance. By carrying around extra weight, your heart and lungs have to work harder to pump blood and oxygen to your muscles.  Builds Strength In addition to improved cardiovascular endurance, rucking will also help you build strength. Carrying around extra weight across long distances will force your muscles to work harder, leading to increased strength and muscle mass over time.  Carrying a loaded backpack engages various muscle groups, including the legs, core, and upper body, providing a functional full-body workout. Rucking will make everyday activities like carrying groceries, heavy boxes or toddlers around seem easier.  Improves Joint Stability Another benefit of rucking is improved joint stability. When you carry extra weight, your joints have to work harder to stabilize the added load.  This can help to prevent injuries in the future by strengthening the muscles and connective tissues around your joints. Can Be Done Anywhere One of the best things about rucking is that it can be done anywhere. All you need is a backpack and some weight, and you’re good to go.  Whether you’re hiking in the woods or walking around your neighborhood, you can get a great workout in by ruck marching. Improves Mental Toughness  Rucking requires mental resilience, especially when carrying a heavy load for an extended period. It can help build mental toughness and discipline.  Carrying extra weight is hard.  Every time I see someone with a baby on their back as they are hiking up the same mountain I am, I think to myself, “That is serious work!!”  Whether you’re looking to lose weight, build strength, or improve your cardiovascular endurance, rucking is a great option.  So what are you waiting for? Grab a backpack and start! Choose the Right Weight for Rucking In order to get the most out of your rucking workout, it’s important to choose the right weight for your body. Here are a few things to keep in mind when selecting the weight of your ruck: The weight of your ruck should be based on your body weight. A general rule of thumb is that your ruck should be 10% of your bodyweight to begin. If you’re new to rucking, start with a lighter ruck and gradually increase the weight as you get more comfortable with the movement. If you’re looking to increase the intensity of your ruck, go for a heavier weight. Just be sure that you can still safely and comfortably move with the added weight. When in doubt, err on the side of caution and go with a lighter ruck. It’s better to make your rucking workout a little easier than to risk injury by carrying too much weight across longer distances. By following these guidelines, you can ensure that you’re choosing the right weight for your body and your rucking goals. Rucking Gear The most important piece of gear for rucking is, of course, is the load. You’ll want to find a backpack that’s comfortable to wear and has enough space to

What is Rucking? Benefits, Workouts, Gear and More Read More »

Best Weighted Hula Hoops & Fun Workouts For Adults (2023)

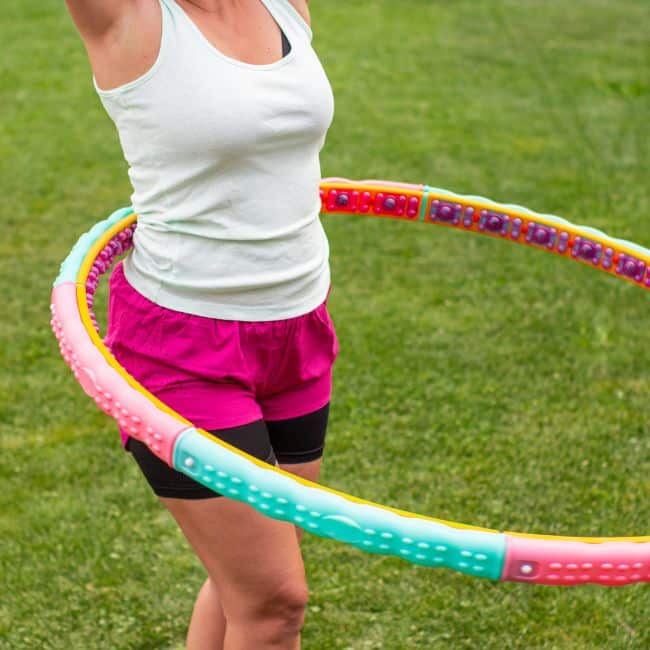
Best Weighted Hula Hoops & Fun Workouts For Adults (2023) Of all the things that TikTok makes you buy, the weighted hula hoops may be worth your money. I’ve been using a weighted hula hoop for 15 years and I am here to tell you they are both fun and effective.  Weighted hula hoops are having a moment on TikTok for a few reasons. Number one, hula hooping is fun to watch! Number two, the heavier hoop is a great way to get effective and enjoyable exercise.  Forget trying to run three miles. Instead, step inside a weighted hoop. Turn on some music, move your body in a circular motion, and enjoy.  I purchased 10 of these hoops at a fitness experts conference to bring home with me years ago. I’ve been using them ever since!  For 15 years my full-body workout bootcamp attendees have begged me to use the exercise hoop as one of our stations.  It’s familiar, play-like and everybody loves them. Plus, your heart rate will soar.  And it’s a multiple muscle group workout. Your core muscles, lower back, hips, and thighs will be working way more than with a traditional hula hoop workout!  You can learn more about this fun form of exercise in my complete hula hooping guide. Are you ready to give the best weighted hula hoops a try? Table of contents What Is A Weighted Hula Hoop? Do Weighted Hula Hoops Work? How Often Should You Hula? Benefits of Exercising With a Weighted Hula Hoop Fitness Benefits Core Strength Fun and Enjoyable Accessibility Stress Relief Social Aspect Weight Loss The Best Weighted Hula Hoops On Amazon My Favorite Weighted Hula Hoop The Best Weighted Hula Hoop For Travel The Newest Type of Weighted Hula Hoop A Heavier Hula Hoop Option The Best Heavy Hula Hoop For Carrying How to Use a Weighted Hula Hoop Correctly Other Exercise To Do With Hula Hooping What Is A Weighted Hula Hoop? I taught at fitness conferences for years. About 15 years ago at one of the conferences, I became interested in the benefits of hula.  Weighted hula hoops were getting some hype back then and I took a 30-minute hula hoopers class. It was so fun the time flew by. It was more intense than a standard hula hoop and great aerobic activity.  The next day, my abs were sore.  Something to note – this is not the $5 normal hula hoop from the drug store. These weighted hula hoops are bigger in circumference and come in different sizes. The weighted hula hoop takes the concept of a regular hula hoop and adds additional weight, shock absorbers, and adjustable sizes. They typically weigh between a half to a full pound each.  Thankfully, the bigger diameter makes it easier to learn.  Even if you couldn’t hula as a kid, remember these are easier to keep up on the hips. They also deliver better results than a cheap kids hoop!   The weight can range, but I’m not as big a fan of the heavy hoops (up to 5 lbs). They’re simply too stressful on my hips. But other people do like them, so you have to find the right choice for you. I tried a whole bunch and settled in on a lighter hoop with a circumference of around 40 “ and weight between 1-1.5 lbs. That’s my sweet spot! Do Weighted Hula Hoops Work? Weighted hula loops are a totally fun way to get moderate intensity cardiovascular fitness. Using these fun hoops can help burn calories and improve endurance. Regular hula hoops are just plain fun, but adding weight to the hoop will engage core muscles. And, it works way more than just your core! Weight hula hoops can also effectively target abdomen, lower back, hips, and thighs. This effective low-impact exercise is also easy on the joints. How Often Should You Hula? If you’re interested in giving a weighted hula hoop a chance, I suggest starting small. In the beginning, try hooping from 5-15 minutes a few times a week.  Ultimately, how often you do waist hooping will depend on personal preference. Just like the weight of the hoop.   You can just hoop in your living room for 10 minutes any time you want. Or you can throw it at the beginning or end of another workout just for fun. Look for an adjustable hoop with easy assembly that you can use in a home gym, or take with you on the go. Benefits of Exercising With a Weighted Hula Hoop Hula hooping is a fun and enjoyable form of physical activity. Many people find it entertaining, which encourages them to stick with their workout routine. It also doesn’t require any skill level to start. The rhythmic movement and the challenge of keeping the hoop spinning can make exercise feel like play.  It has gained popularity for several reasons. The hype around this low-impact workout can be attributed to their potential health and fitness benefits.  Here are a few of the reasons they have become so popular: Fitness Benefits Using a weighted hula hoop provides an effective moderate intensity cardiovascular workout that can help burn calories, improve endurance, and enhance overall cardiovascular health.  The added weight engages core muscles, making it a more intense workout compared to traditional hula hooping.  It also targets muscles in the abdomen, lower back, hips, and thighs, leading to improved muscle tone and strength. Plus, it’s low impact and easy on the joints.  Core Strength Hula hooping, especially with a weighted hoop, engages the core muscles extensively.  This can lead to improved core strength, stability, and balance. A strong core is essential for overall body strength and can help prevent back pain and improve posture. You might also enjoy my favorite core strengthening exercises! Fun and Enjoyable Hula hooping is a fun and enjoyable form of exercise. Many people find it entertaining, which encourages them to stick with their workout routine.  The rhythmic movement and the challenge of keeping the hoop spinning can make exercise feel like play. Accessibility Weighted hula hoops are relatively inexpensive and readily available, making them accessible to a wide range of people.  They can be used at home, in parks, or in fitness classes, making it convenient for individuals to incorporate hula hooping into their fitness regimen. Stress Relief Exercise, including hula hooping, triggers the release of endorphins, which are natural stress relievers.  Engaging in regular hula hooping sessions can help reduce stress and

Best Weighted Hula Hoops & Fun Workouts For Adults (2023) Read More »

15 Best Mobility Exercises for Seniors to Stay Active

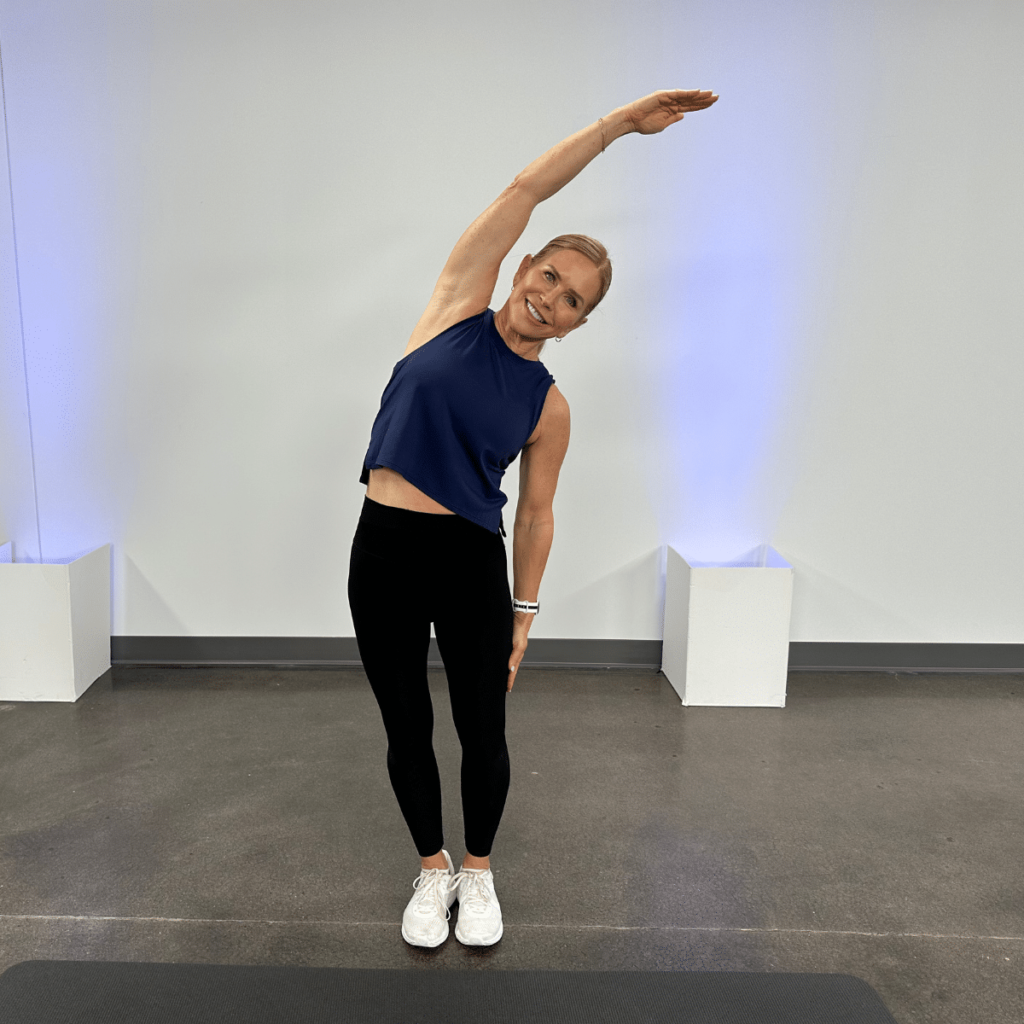
15 Best Mobility Exercises for Seniors to Stay Active One of the best things you can do to stay healthy and active with age is to make mobility exercises a regular part of your routine. Did you know that limited mobility is actually the thing that makes you look the oldest? Don’t worry if you’re already noticing mobility issues crop up, because it’s never too late to see benefits! In fact, a quick mobility routine is often all it takes to start feeling better.  To see the benefits firsthand, try the 15 best mobility exercises for seniors. These are the best exercises that will keep you in action and impact your overall health for years to come. Table of Contents The Benefits of Mobility Exercises for Seniors Tips for Doing These Exercises 15 Mobility Exercises for Seniors FAQs The Benefits of Mobility Exercises for Seniors Before we dive into which mobility exercises to add to your regular exercise routine, let’s talk about why you should do them in the first place. Here are the standout health benefits of mobility exercises for seniors: Keeps joints healthy. Motion is lotion! Moving your joints through a healthy range of motion washes them in fluid, keeps them working smoothly and can help prevent joint pain.  Improves stiffness and pain. It’s pretty common for joints to creak and hurt with age, especially if you have arthritis. Movement is often the number-one solution to stiff, achy joints, largely thanks to that fluid we mentioned earlier.   Makes everyday activities easier. When your joints feel better, everyday activities tend to feel better, too. Plus, teaching your joints to move in a greater range of motion makes more movements possible, because you’re not limited by how far your ankles, knees, hips, spine, shoulders, elbows, and wrists can bend and rotate. An active lifestyle improves your quality of life and can help prevent risk of injury too. Help you stay active. If mobility exercises can make daily life easier, they can also help you stay active. Staying active is key for keeping your muscles strong, your heart and lungs fit, your mind sharp, and your balance on point. Aside from fending off chronic conditions, staying active can also help you live independently, maintain great mental health, and muscle strength.    Makes you look (and feel!) younger. Few things make you look and feel older than the inability to move. Mobility exercises are simple to add to your routine, and can shave years off if done consistently. Related: 9 Hip-Strengthening Exercises for Seniors Tips for Doing These Exercises These mobility exercises and stretching exercises are for older adults with mobility issues and those looking to stay active. They’re not for people with injuries. These folks should work with a physical therapist or other healthcare provider who can supervise their recovery. You only need floor space and a yoga mat for most of these exercises. There are also chair exercises that use a seated position.  Do these exercises two to three times per week. Keep your movements controlled and work at a comfortable pace. If you can build them into your daily routine, even better! At first, these exercises might feel awkward and stiff. But the more you do them, the warmer your muscles and the looser your joints will get. Over time, the following exercises will feel easier, and so will daily physical activity. Can’t do an exercise as written? Good news! We’ve included tips to modify a move if needed.  Amazon Basics Extra Thick Yoga Mat with Carrying Strap Check Price We earn a commission if you make a purchase, at no additional cost to you. COSCO Vinyl Folding Chair, 4 Pack, Black Check Price We earn a commission if you make a purchase, at no additional cost to you. 15 Mobility Exercises for Seniors 1. Shoulder rolls Basic shoulder rolls are simple exercises that loosen up the shoulder muscles and joints. Shoulder mobility is critical for basic tasks like reaching overhead and sports like tennis and swimming.  How to perform a shoulder roll: Stand with your feet hip-width apart. Shrug your shoulders up toward your ears. Then, slowly roll them in a forward motion. After about 30 seconds, roll your shoulders in a backward motion.  Muscle Groups Targeted: Shoulders 2. Arm circles This move loosens the shoulder joints and engages the shoulders, biceps, and triceps. It’s an easy way way to improve posture and get your arms and shoulders ready for sports like swimming and pickleball. How to perform an arm circle: Stand tall with your feet shoulder-width apart.  Raise and extend your arms to your sides.  Without bending the elbows, rotate your arms forward in small circles for 30 seconds. Then, rotate your arms backward in small circles for 30 seconds.  Muscle Groups Targeted: Shoulders, Biceps, Triceps, Upper Back 3. Hip circles This simple exercise helps loosen up the muscles and joints in your hips. As the hips play a role in practically every activity you do, it’s important for them to have a healthy range of motion. How to perform a hip circle: Stand tall with your feet shoulder-width apart and place your hands on your hips. Keeping a slight bend in your knees, slowly circle your hips in a clockwise direction for 30 seconds. Then switch directions and circle your hips counterclockwise for 30 seconds..  Muscle Groups Targeted: Lower Back, Hips 4. Standing side bends The standing side bend stretches the spine and obliques (side-abs). This helps improve posture for sports, new exercise, and daily activities. How to perform a standing side bend: Stand tall with feet and legs together. On an inhale, reach both arms straight up overhead.  Lower your right arm to the right side of your body. On an exhale, lengthen the left arm over your head, bending your body gently to the right.  Inhale to return both arms overhead and repeat on the left side. Do six to 10 reps per side. Do this exercise in a sturdy chair if you get tired from standing or can’t keep your balance while bending. If chair exercises fit your comfort zone, try these 10 best chair exercises for seniors too! Muscle Groups Targeted: Spine, Obliques 5. Wall push-ups Wall push-ups are a great mobility exercise for seniors that target the shoulders, chest and triceps. It helps with daily activities such as pushing open doors and getting up from a chair. How to perform a wall

15 Best Mobility Exercises for Seniors to Stay Active Read More »