weight lifting

Auto Added by WPeMatico

Bodybuilding on a Keto Diet: Does It Work?

Bodybuilding on a Keto Diet: Does It Work? Every so often, a diet trend emerges (or re-emerges) and dominates in the media, on store shelves, and at nutritionists’ offices. One of them is the ketogenic diet, which has been credited with meteoric weight loss among other benefits. But controversy rages over the efficacy of the diet, which promotes slashing carbohydrates in order to burn more fat. The regimen can be hard to maintain even without physical activity — so what happens when you combine a keto diet and bodybuilding? What Is a Ketogenic Diet? A ketogenic diet prescribes cutting carbohydrates and increasing fat intake with the intention of placing your body into ketosis. In this metabolic state, the body uses stored fat instead of carbs as its primary fuel source. Most cells in the body prefer the blood sugar, or glucose, that derives from carbs. However, when that isn’t available, stored fat is broken down into ketones as fuel. You reach ketosis when ketones number more than normal. Once ketosis is achieved, many cells will run on ketones for energy until you consume carbohydrates again. A medical standard for time to reach ketosis remains elusive, but it’s been studied to take as few as two days of limiting daily carbohydrate intake to 20 to 50 grams for your body to shift from circulating glucose to ketones for energy. Typical meal options within a keto diet include eggs, meats, cheese, fibrous vegetables, oils, butters, and nuts. Can I Do Keto and Bodybuilding Together? Given the energy demands required for intense weightlifting, a ketogenic lifestyle isn’t really compatible with a bodybuilding regimen. According to Andrea N. Giancoli, MPH, RD, while it’s possible to train on a ketogenic diet, your body will need carbs — something obviously lacking during ketosis — for serious bodybuilding activity. “You need five to seven grams of carbohydrates per kilogram of body weight for weightlifting,” she says. Based on the above carbohydrate intake imposed by a ketogenic diet, this works out fine if you weigh 13 pounds. Carbohydrates provide fuel for muscles, which store the vital macronutrient as glycogen to power through strength-training sessions. A lack of glucose in the diet means a decrease in glycogen stores in the muscles, resulting in compromised athletic performance. Men and women who lift weights two or more times a week need at least half of their calories to come from carbohydrate sources. Of course, that doesn’t mean you should get your fill on pasta, pizza, and white bread. Quality carbohydrates containing fiber, like beans, quinoa, and whole-grain bread, are what you should lean toward. Can You Build Muscle On a Low-Carb Diet? It’s possible to build muscle on a low-carb diet, but it’s not recommended — and it can take far longer. University of South Florida researcher Dr. Dominic D’Agostino, Ph.D., who is also a national qualified bodybuilder, says it’s common for people to jump into the keto diet expecting it to work from day one. But the body can take weeks or even months to fully adapt to ketosis. “A keto diet can lead to poor performance, as it decreases muscle fullness since the muscles won’t be as hydrated,” D’Agostino says. That’s because, to every gram of carbohydrate, the body assigns three grams of water. Also, a standard ketogenic diet generally prescribes getting 55 to 60 percent of your calories from fat. D’Agostino notes that such a breakdown doesn’t leave a lot of room for protein, the body’s basic building block for muscle. A consistent supply of protein throughout the day is critical for optimal muscle growth since it isn’t stored. Without an adequate amount of protein, your body won’t sufficiently build, maintain, or repair muscle tissue. What Happens If You Try Bodybuilding on a Keto Diet? When you consume carbohydrates, your body transports them into muscles as glucose for energy. Weightlifting on a keto diet means missing out on that fuel source. As a result, you’ll likely experience declines in performance on a ketogenic diet. “Creatine is your primary fuel source for the first 10 seconds of each set,” says Trevor Thieme, CSCS. “But after that your muscles run primarily on glucose, which comes from carbohydrates.” And if you’re a bodybuilder, you know how important form is. Without the energy necessary to perform at your fullest, form may also become a casualty of a keto diet. That can not only cost you gains, but also heighten your risk of injury. Furthermore, there’s a transition period while switching to a keto diet, and until your body gets used to it, you may also notice side effects like fatigue, dizziness, headache, and nausea. What Is the Best Diet for Weightlifting? There is no one-size-fits-all diet for bodybuilders, but there are dietary principles to keep in mind when trying to build muscle and strength. 1. Eat more protein When lifting weights regularly, it’s important to get sufficient protein in your diet so you can benefit from muscle growth, repair, and recovery. For high-protein meals — especially after a workout — 20 grams is generally considered optimal for muscle growth. Research suggests that the body doesn’t use much more than 20 grams for muscle growth at a time. 2. Get enough calories Running a calorie deficit is a pathway to weight loss, not muscle gain. To determine how many calories you should consume in order to gain weight, identify how many calories you would need if you didn’t move at all in a given day — your base metabolic rate (BMR) — then calculate calories burned by daily activity and exercise. Any calories consumed above that represent a surplus. 3. Balance your macros Depending on whether you want to bulk up and then lean out, or gradually build lean mass, your mix of macros matters. To increase weight gained from fat, those macros should emphasize carbs as well as fat, since the latter is the densest calorically. The bulk of that fat should come from unsaturated sources such as avocado, olive oil, and salmon. The post Bodybuilding on a Keto Diet: Does It Work? appeared first on BODi. Every so often, a diet trend emerges (or re-emerges)

Bodybuilding on a Keto Diet: Does It Work? Read More »
How to Train Type 2 Muscle Fibers for Better Strength and Explosiveness

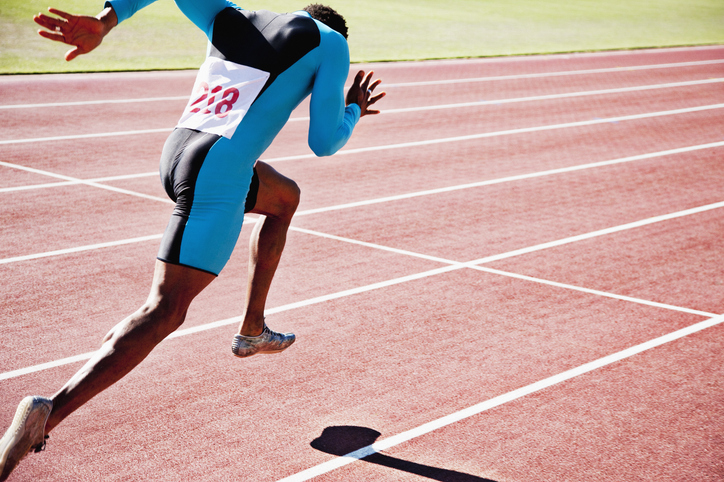
How to Train Type 2 Muscle Fibers for Better Strength and Explosiveness What do a mixed martial artist, a sprinter, and an Olympic weightlifter have in common? Besides a drawer full of spandex, they all rely heavily on type 2 muscle fibers, also known as fast-twitch muscle fibers. Type 2 muscle fibers give a roundhouse kick more oomph and a barbell snatch its signature snap. But even if you don’t have plans to step into the ring or slip on a singlet, understanding how to train your skeletal muscle fibers can help you become a better athlete. What Are Type 2 Muscle Fibers? You use type 2 muscle fibers during short, explosive periods of physical activity, which is why they’re well-known as your fast-twitch muscle fibers. “Type 2 muscle fibers are quicker to fatigue but can produce stronger and faster bursts of power,” says Joe Tatta, PT, DPT, founder of the Integrative Pain Science Institute. Tatta explains that type 2 muscle fibers fit into two main categories (note that there are other types of “hybrid” fibers): Type 2a Type 2b (also referred to as type 2x, and are very rare!) “Type 2a is used more during sustained power activities, such as sprinting 400 meters or doing repeated lifts with a weight below maximum,” he explains. “Type 2b is used for very short-duration, high-intensity bursts of power, such as maximal and near-maximal lifts and short sprints.” Your body uses type 1 muscle fibers — a.k.a. fatigue-resistant “slow-twitch” muscle fibers — during prolonged, steady-state exercises that require endurance (e.g., a 10k run or a long, leisurely bike ride). How Do You Increase Type 2 Muscle Fibers? “To develop type 2 fibers, you should focus on training with heavier weights, explosive exercises, and power movements regularly,” advises Breanne Celiberti, MS, former adjunct instructor in the Human Performance department at the University of Tampa. So if your goal is to increase type 2 muscle fibers in your legs, we recommend alternating between heavy lifts like barbell squats and deadlifts and explosive exercises like box jumps during your workout on a rotation. Generally speaking, muscle fibers grow when small tears caused by physical activity heal, creating larger and stronger tissues. (If you’ve ever pushed yourself during a workout, you’ve likely experienced some of the achiness and swelling associated with this process). Research indicates that, with specifically tailored training, it is also possible to change type 1 muscle fibers to type 2 muscle fibers. Take note that your muscle fibers revert to an “intermediate” or ‘unassigned’ state — part type 1, part type 2 — with inactivity. What Do Type 2 Muscle Fibers Look Like? Compared to type 1 muscle fibers, which are smaller and red (contain more oxygen), type 2 muscle fibers are larger and, according to Tatta, “pale.” Type II muscle fibers are “white” fibers because they’re used during anaerobic exercise, requiring less oxygen. Because type 2 muscle fibers are larger, they help determine the size and definition of a muscle. So, next time you’re running sprints on the treadmill, dashing from one side of the court to the other, or snatching a barbell over your head, think about how you’re increasing your type 2 muscle fibers! The post How to Train Type 2 Muscle Fibers for Better Strength and Explosiveness appeared first on BODi. What do a mixed martial artist, a sprinter, and an Olympic weightlifter have in common? Besides a drawer full of spandex, they all rely heavily on type 2 muscle fibers, also known as fast-twitch muscle fibers. Type 2 muscle fibers give a roundhouse kick more oomph and a barbell snatch its signature snap. But even […] The post How to Train Type 2 Muscle Fibers for Better Strength and Explosiveness appeared first on BODi. Kayne Toyosato{authorlink}https://www.beachbodyondemand.com/blog/type-2-muscle-fibersBODi BODi is a Health Esteem platform to help you embrace the person you are today so you can take action to achieve all your health and fitness goals. https://bodiblog.wpenginepowered.com/wp-content/plugins/bod-blog/assets/vendor/beachbodydigital/wordpress-core-plugins/beachbody.png

How to Train Type 2 Muscle Fibers for Better Strength and Explosiveness Read More »

Take a Moment to Appreciate the Art of Bodybuilding Poses

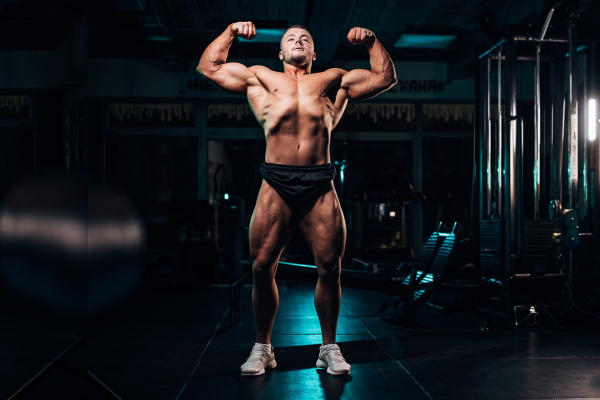
Take a Moment to Appreciate the Art of Bodybuilding Poses Thinking about attending — or entering — a bodybuilding show? There’s a lot more to it than random sweating, straining, and standing around looking crazy-fit. You need to know your bodybuilding poses. To the average viewer, everyone on a bodybuilding stage looks like a living statue — lean, muscular, poised — and separating winners from losers in a contest seems like a guessing game. But aficionados of bodybuilding — deemed an “art and sport” by author Charles Gaines in his seminal 1977 book Pumping Iron — know that judges are looking for very specific attributes in each athlete: Broad shoulders Diamond-shaped calves A defined midsection A thick chest A lean, defined look only achievable through stringent dieting They’re also looking for a balance, flow, and proportion among muscle groups, with each part contributing to the appearance of a unified whole. One athlete may have big, defined arms but less impressive legs; another may have big thighs but narrow calves; another may have a big chest and shoulders but also appear thick in the waist. Not, perhaps, the most body-positive pursuit. But at its best, physique contests can be exciting and motivating — a celebration of hard work and the beauty of the human form. One essential component of a typical show is the compulsory bodybuilding poses: five to eight poses that, together, allow the judges to see all attributes of each athlete’s physique. The compulsories enable the judges to evaluate each athlete as thoroughly and fairly as possible. These bodybuilding poses come up repeatedly throughout a show. So if you’re perusing the web for some #fitspiration, attending your first show as a spectator or competitor, or even looking for a way to track your own progress over time, you’ll want to be familiar with the compulsories. Here’s a rundown — along with our completely biased opinion on which bodybuilders through history did each pose the best. 1. Front Double Biceps Pose When you pose for a “fitness” pic, this is the pose you strike: arms outstretched, flexed at the elbows, contracting your biceps for all they’re worth. That’s a front double bi. Some athletes crunch down on their abs when they do this pose, emphasizing the six-pack. Others vacuum their stomachs in to create a more tapered appearance. Either way, the pose emphasizes the contrast between the width of the shoulders and the narrowness of the waist, as well as the size and shape of the upper arms and the definition and size of the quads and calves. Inspiration: Brian Buchanan, Cory Everson 2. Front Lat Spread If you’ve never seen this pose, prepare for a shock: The legs are together, feet turned out to showcase the quads, hands pinching either side of the waist — so far, so good. To perform the pose, the athlete lifts their chest up and out, then spreads the lats — the thick muscles beneath the armpits — to give the torso the appearance of a cobra with its hood flared, preparing to strike. In addition to the lats, this pose highlights the shoulders (they should look wide, developed, and defined) and the size and definition of the quads. This pose isn’t required in most women’s shows. Inspiration: Lee Haney 3. Side Chest Next up, you’ll turn to one side (usually up to the athlete), point your downstage foot to show the calf and grab the wrist of the arm facing the judges. To complete the pose, you push your chest up and out flex the biceps of the downstage arm for all you’re worth. This pose demonstrates an athlete’s thickness — the amount of muscle they carry, particularly in the chest, shoulders, arms, and thighs. It was a favorite of Arnold Schwarzenegger, whose chest was so developed he could reputedly balance a champagne glass on his upper pecs. While many athletes look big from the front, this pose lets the judges see which athlete has the greatest mass. Well-defined athletes also showcase lots of detail in the sides of their waist in this pose. Inspiration: Arnold Schwarzenegger 4. Side Triceps Still turned sideways to the audience, you set up with your legs in the same position as the previous pose, then straighten your downstage arm. Reach your opposite arm behind your back and take hold of your downstage wrist. Finish the pose by flexing your triceps, squeezing your arm against your flank to make it appear bigger, and contracting the muscles on the side of your torso to showcase the definition in your waist and obliques. While the side tri is a good pose for bigger athletes — like the previous pose, it’s a good one for bodybuilders with thick legs — it’s also a good chance for more aesthetic bodybuilders to show their lines, symmetry, and definition. Inspiration: Bob Paris, Alina Popa 5. Back Double Biceps This is the same pose as the front double biceps, only this time with your back to the audience. From the ground up, you contract your hamstrings and calves — pushing through the ball of one foot to show the definition in one calf. Then you raise your arms into the double bi position. The key is to contract all the muscles in the back — from the traps and lats in the upper back to the erector spinae, the two snakelike muscles flanking the spine. This pose takes some finesse: Do it right, and you’ll look wide and defined, with detail popping out all around the upper back like a road map. Do it wrong — by squeezing the shoulder blades together instead of spreading them wide — and you look narrower and less defined. This pose shows off the back — naturally — and also highlights the development of all three heads of the deltoids or shoulder muscles. Since a thick, defined back is difficult to build, the back double biceps pose often separates the show’s top placers from the rest of the competition. Inspiration: Ronnie Coleman, Lenda Murray 6. Rear Lat Spread Like the previous pose, this one is the

Take a Moment to Appreciate the Art of Bodybuilding Poses Read More »

Build Your Upper Body More Efficiently With a Pull Day Workout

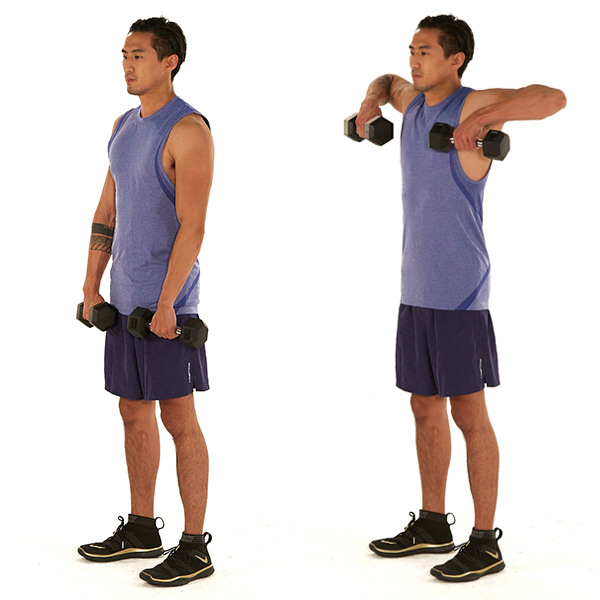
Build Your Upper Body More Efficiently With a Pull Day Workout Looking for a better, more systematic approach to strength training? Consider the pull day workout and its counterpart, the push day workout. Dividing your workouts between push and pull days is one of the most straightforward ways to create a fitness plan that will allow you to vary your movements, optimize your training time, and avoid injury. What Is a Pull Day? The typical pull day workout consists of upper-body exercises that utilize a pulling motion. They primarily engage the biceps, forearms, and back muscles. “Because a majority of the ‘pull’ muscle groups make up the back of the body (or posterior chain), these are extremely important for posture and mobility,” says BODi Fitness Programming Manager Amanda Herrera. Plus, pulling is key to everyday functional movement, whether you’re paddling a kayak or lifting grocery bags. How Is It Different From Push Day? A push day workout focuses on pushing exercises that target the opposing muscles, including the chest, shoulders, and triceps. Alternating between pushing and pulling exercises allows you to work one group of muscles while the other group recovers. This is why it’s possible to do a push day workout after a pull day workout without taking a rest day. Ultimately, this training method allows you to accomplish more strength training in a shorter period. Weightlifting programs on BODi — such as LIIFT4 and Body Beast — follow this principle by targeting different muscle groups on different days to make sure you hit every workout hard and maximize muscle building. What Are the Best Pull Exercises? Try incorporating these exercises into your training plan to get the most out of your pull day workout. 1. Dumbbell bent-over row Stand with your feet hip- to shoulder-width apart, holding a dumbbell in each hand. Brace your core, hinge at your waist to push your hips back, bend your knees slightly, and lower your torso until it’s nearly parallel to the floor. Keep your glutes engaged to protect your lower back. Let the dumbbells hang at arm’s length with your palms facing each other. Engage your shoulder blades to keep your shoulders pulled back. This is the starting position. Without moving your torso, and while keeping your elbows tucked and back flat, row the weights to your sides as you squeeze your shoulder blades together. Make sure there’s a 90-degree bend in the elbow, so you’re rowing to your ribs and not armpits. Pause, and then lower the weights back to the starting position. 2. Pull-up  Grab a pull-up bar with an overhand grip that’s slightly wider than shoulder-width. Hang at arm’s length with your arms straight (a position known as a dead hang) and your ankles crossed behind you. Without swinging or kipping (using momentum to propel you upward), engage your lats and squeeze your shoulder blades together as you pull your chin to the bar. Pause, and then lower yourself back to a dead hang. 3. Renegade row  Assume a push-up position with your hands gripping two hex dumbbells. Your hands should be in line with and slightly wider than your shoulders. This is the starting position. Keeping your core engaged, elbows tucked, and body straight from head to heels, lift the dumbbell in your right hand to the side of your torso. Make sure there’s a 90-degree bend in the elbow, so you’re rowing to your ribs and not armpits. Pause, and then return to the starting position. Repeat, this time rowing the dumbbell in your left hand. Continue alternating sides. 4. Dumbbell biceps curl Stand with your feet hip-width apart, holding a pair of dumbbells at arm’s length by your sides, palms facing forward. Keeping your core engaged and elbows at your sides, curl the weights toward your shoulders. Avoid swaying your body. Pause, and then slowly lower the weights to return to the starting position. 5. Upright dumbbell row Stand tall, holding a pair of dumbbells at arm’s length in front of your thighs, palms facing towards you. Keeping your core engaged, back straight, and weights close to your body, lift the dumbbells until your elbows reach shoulder height. Pause, and then reverse the movement to return to the starting position. 6. Zottman curl  Stand tall, holding a dumbbell in each hand at arm’s length by your sides, palms facing forward (underhand grip). Keeping your elbows tucked and locked by your sides, curl the weights toward your shoulders. Rotate the dumbbells 180-degrees, so your palms are now facing down. Lower the weights back down to your sides and then flip your grip again (to underhand) to return to the starting position. What’s a Good Push/Pull Day Schedule? One way to structure a push/pull training plan that targets the whole body is to combine leg and core exercises and alternate between the three types of workouts. So, for example, your weekly training schedule may look like this: Monday: Push day workout Tuesday: Pull day workout Wednesday: Legs and core workout Thursday: Push day workout Friday: Pull day workout Saturday: Legs and core workout Sunday: Rest However, If you’d prefer to have a mid-week rest day or combine core or leg work with your push and pull days, that’s fine too. Just be sure to keep your push and pull workouts on separate days. If you want to leave the workout programming to the experts, all the weightlifting programs on BODi utilize some sort of split training for better efficiency, optimized rest, and faster growth. The post Build Your Upper Body More Efficiently With a Pull Day Workout appeared first on BODi. Looking for a better, more systematic approach to strength training? Consider the pull day workout and its counterpart, the push day workout. Dividing your workouts between push and pull days is one of the most straightforward ways to create a fitness plan that will allow you to vary your movements, optimize your training time, and avoid injury. What […] The post Build Your Upper Body More Efficiently With a Pull Day Workout appeared first on BODi. Kayne

Build Your Upper Body More Efficiently With a Pull Day Workout Read More »

Kettlebells vs. Dumbbells: Which Is Better for Your Workouts?

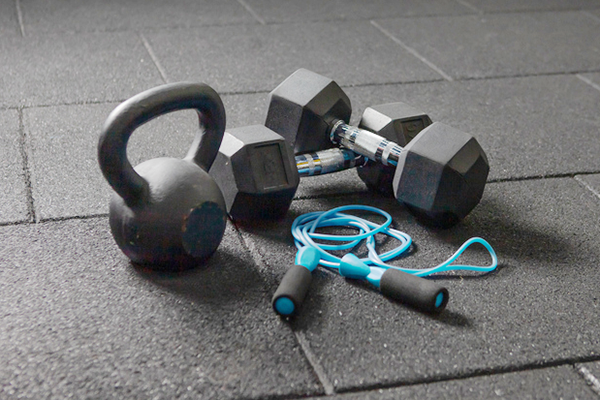
Kettlebells vs. Dumbbells: Which Is Better for Your Workouts? You might think that in the battle of kettlebell vs dumbbell, the latter holds the edge. After all, you’ll see rows and rows of dumbbells in most commercial gyms, while a smaller selection of kettlebells is often tucked away in a corner. However, you’re better off utilizing one over the other depending on your workout and goals. Each one has its advantages, so we’ll help pinpoint the right tool for you. What’s the Difference Between a Kettlebell and Dumbbell? “The main difference between dumbbells and kettlebells is the shape of the implement,” says Jake Harcoff, MS, CSCS, head coach and owner of AIM Athletic. Dumbbells consist of a short bar with weight at both ends, whereas kettlebells resemble a cannonball with a handle. This difference changes the weight distribution of each tool, which affects how you use them. “When you hold a dumbbell in your hand, the center of mass is in the middle of your palm, between the two ends of the weight,” says Marvin Nixon, MS, an ACE-certified personal trainer. But when you hold a kettlebell by the handle, the center of mass is in the large part of the bell, which is usually below your palm. “When you lift the kettlebell, this center of mass moves based on the speed of the movement and how the bell moves around your hands. This small change alters how our muscles, fascia, and even nervous system adapt to the movement being performed,” Nixon says. Can You Use Kettlebells Instead of Dumbbells? There are ideal uses for each tool, but generally, kettlebells and dumbbells are interchangeable. Chances are exercises will simply feel different with a kettlebell vs. a dumbbell. Some exercises may even feel more challenging. Take the dumbbell shoulder press exercise as an example. When you press the dumbbell overhead, the weight is centered in your palm. But swap that dumbbell for a kettlebell and the weight is concentrated below your palm, on the outside of your wrist and forearm. Because of this shift, your body may find the kettlebell tougher to move, Nixon says. That said, some people find kettlebells more comfortable than dumbbells for certain exercises. “I have worked with people who find holding a dumbbell for goblet squats hard on their wrists, but experience no pain when holding a kettlebell by the horns in the same position,” Harcoff says. Best Workouts for Dumbbells Dumbbells are typically a better choice for hypertrophy (muscle-building) workouts, as well as certain strength exercises. For starters, many people find dumbbells easier to grip. “My clients tend to find dumbbells more comfortable for pressing exercises because it’s easier to maintain a neutral wrist position, where your wrist stays straight,” says Katie Prendergast, a NASM-certified personal trainer in Denver, Colorado. Kettlebells, on the other hand, tend to pull the wrist backward because of their weight distribution. In addition, dumbbells are often easier to maneuver for traditional bodybuilding moves, or exercises that zero in on specific muscle groups, such as triceps extensions, biceps curls, lateral raises, and chest flys, Prendergast notes. Best Workouts for Kettlebells With their center of gravity located below the handle, kettlebells are perfect for quick, explosive movements like swings, cleans, and snatches. These types of exercises will help you work up a sweat in no time at all. So if you’re looking for non-traditional cardio options, or you have a high-intensity interval training (HIIT) workout on your schedule, kettlebells are the way to go, according to Harcoff. If you’re new to kettlebell workouts, Kettlebell Academy with Amoila Cesar will teach you the fundamentals of kettlebell training, focusing on drills for swings, cleans, and snatches. With three workout videos dedicated to each exercise, you’ll progress your skills and master each move. As you’ll see in the program, you can then use these movements to easily transition from one exercise to the next. This way, you can keep your motions fast and fluid, which keeps the intensity high. For example, if you’re doing unilateral (single-side) exercises, you could use the one-arm clean to get the kettlebell into position before launching into the offset squat. To increase the intensity, do a one-arm clean in between each squat rep. Then, when you’re ready to tackle the other side, use the one-arm swing to transfer the kettlebell from one hand to the other. Which One Should I Use? Those looking to build muscle and/or strength will likely do better with dumbbells, as these make it easier to perform traditional strength-training exercises, Prendergast says. Meanwhile, people who prefer to focus on conditioning and calorie burning will appreciate kettlebell workouts. “They’re a great option for someone who doesn’t like running or other forms of cardio,” Prendergast says. However, there’s no reason you can’t use kettlebells and dumbbells. “I often suggest that clients include a mix of kettlebells and dumbbells in their strength program,” Nixon says. Each training tool challenges your body in unique ways, which can ultimately make you a stronger, more well-rounded athlete. Plus, trying out a new piece of equipment can give your routine a much-needed refresh, Harcoff says. Where to Buy Kettlebells and Dumbbells You can get your hands on dumbbells or kettlebells via many different vendors. Note that dumbbells are sold as a pair, whereas kettlebells typically come in singles. That said, there are many adjustable weights and kettlebells on the market, which save you space and money. 1. Bowflex SelectTech 552 Dumbbells Weight: 5 to 52.5 pounds (2.5-pound increments up to 25 pounds; 5-pound increments from 25 to 52.5 pounds) This set of Bowflex dumbbells allows you to easily adjust the weight with a simple turn of the dial. It replaces 15 sets of weights so you save space but still have the ability to keep making strength gains. Get them on Amazon. 2. CAP Barbell Rubber Coated Hex Dumbbell Set Weight: 5, 10, 15, 20, 25 pounds If you’re looking to do more accessory work at home, or if you just need some lighter dumbbells for specific types of training,

Kettlebells vs. Dumbbells: Which Is Better for Your Workouts? Read More »

Maximize Your Upper-Body Gains With a Push Day Workout

Maximize Your Upper-Body Gains With a Push Day Workout Adding structure to your fitness routine can make your workouts more purposeful and efficient, minimize the risk of injury, and yield even better results. One simple way to do this is a rotating daily schedule of push, pull, and leg workouts. What Is a Push Day? As the name suggests, a push day workout consists of upper body exercises that utilize a pushing motion. These exercises primarily target the chest, shoulders, and triceps. (Pull exercises, which engage the back, biceps, and forearms, are reserved for another day.) You can find push days in many weightlifting programs on BODi, such as LIIFT4 and Body Beast. They’re designed to work different muscle groups on different days so you can hit your workouts hard and optimize rest. While some people may choose to incorporate leg exercises on a push day, others dedicate a separate day to lower-body work. What Are the Benefits of Push Day Workouts? Pushing is a cornerstone of functional fitness. To simply get off the ground, you must be able to push up your body weight. “Performing a broad range of push exercises helps maintain a strong and healthy body,” says BODi Fitness Programming Manager Amanda Herrera. “Not just for your muscles, but your bones and joints as well.” Dedicating specific days to push day workouts allows you to work harder and maximize rest. “The idea behind separating push and pull days is to work specific related muscle groups together and to exhaust those muscles,” Lopez says. “Therefore, you won’t be training the same muscle groups two days in a row, which can help optimize recovery time.” 6 Push Day Exercises Chances are, you’re already doing push day exercises as part of your regular fitness routine. In case you need some ideas, here are a few push day workout staples. 1. Push-up Assume a high-plank position with your feet together, your body straight from head to heels, and your hands in line with (but slightly wider than) your shoulders. Engage both your glutes and your core to lock your body into position. Keeping your elbows tucked toward your body and your head neutral, lower your torso until your chest is within a few inches of the floor. Pause, and then push yourself back up to the starting position. 2. Shoulder press Stand tall with your feet hip-width apart and hold a pair of dumbbells in front of your shoulders with your elbows tucked in and palms facing each other. Keeping your core engaged and back flat, press the weights directly above your shoulders until your arms are straight and your biceps are next to your ears. Pause, then lower the weights back to the starting position. 3. Dumbbell bench press Lie on a sturdy, padded bench, feet flat on the floor, holding two heavy dumbbells at arm’s length over your chest, palms facing forward. Keeping your core engaged, lower back pressed into the bench, and upper arms at a 45 degree angle to your body, slowly lower the dumbbells until your upper arms are parallel to the floor. Pause, and then push the weights back to the starting position. 4. Dumbbell chest fly Lie on a flat bench or on a mat on the ground holding a pair of dumbbells at arm’s length above your chest, palms facing each other. Keeping your core engaged, lower back pressed into the bench or mat, and elbows slightly bent, slowly lower the dumbbells directly out to your sides until you feel a deep stretch in your chest. Pause, and then slowly reverse the move, returning to the starting position. 5. Dumbbell overhead triceps extension Sit on a bench or chair, cupping one end of a dumbbell in both hands directly overhead. This is the starting position. Keeping your chest up, core engaged, and back flat, lower the weight behind your head without moving your upper arms. Pause, and then press the weight back up to the starting position. 6. Dumbbell lateral raise Stand tall with your feet hip-width apart and your arms at your sides, holding a dumbbell in each hand. Raise your arms to your sides until they’re level with your shoulders. Keep your palms facing downward. Pause, and then lower the weights back to the starting position. How Should I Structure My Push Day? It’s generally a good idea to perform your heaviest lifts at the beginning of a workout, but the key is to stick to pushing exercises. As for the rest of your weekly workout schedule, some people find it helpful to have designated push and pull days and combine lower body and core work in one workout. So, for example, you could structure your routine as follows: Monday: Push day workout Tuesday: Pull day workout Wednesday: Legs and core workout Thursday: Push day workout Friday: Pull day workout Saturday: Legs and core workout Sunday: Rest “You don’t have to have a rest day in between push and pull days because they work different muscles, so you won’t be working the same muscles back to back,” explains Lopez. If you’re interested in a traditional push, pull, legs split routine, check out Body Beast on BODi. If you’re looking to balance cardio with heavy lifting, LIIFT4 combines HIIT and weight training to get you strong, lean, and fit. The post Maximize Your Upper-Body Gains With a Push Day Workout appeared first on BODi. Adding structure to your fitness routine can make your workouts more purposeful and efficient, minimize the risk of injury, and yield even better results. One simple way to do this is a rotating daily schedule of push, pull, and leg workouts. What Is a Push Day? As the name suggests, a push day workout consists of […] The post Maximize Your Upper-Body Gains With a Push Day Workout appeared first on BODi. William Kang{authorlink}https://www.beachbodyondemand.com/blog/push-day-workoutBODi BODi is a Health Esteem platform to help you embrace the person you are today so you can take action to achieve all your health and fitness goals. https://bodiblog.wpenginepowered.com/wp-content/plugins/bod-blog/assets/vendor/beachbodydigital/wordpress-core-plugins/beachbody.png

Maximize Your Upper-Body Gains With a Push Day Workout Read More »

Biohacking Your Manhood: The Proven Habits, Foods, Exercises, Workouts, Nutrients & Tools That Boost Testosterone & Drive.

Biohacking Your Manhood: The Proven Habits, Foods, Exercises, Workouts, Nutrients & Tools That Boost Testosterone & Drive. Platelet-rich plasma injections into my crotch? Done. Stem cell injections directly into my schlong? Yep. Acoustic sound wave therapy? Multiple The post Biohacking Your Manhood: The Proven Habits, Foods, Exercises, Workouts, Nutrients & Tools That Boost Testosterone & Drive. appeared first on Ben Greenfield Life – Health, Diet, Fitness, Family & Faith. Platelet-rich plasma injections into my crotch? Done. Stem cell injections directly into my schlong? Yep. Acoustic sound wave therapy? Multiple The post Biohacking Your Manhood: The Proven Habits, Foods, Exercises, Workouts, Nutrients & Tools That Boost Testosterone & Drive. appeared first on Ben Greenfield Life – Health, Diet, Fitness, Family & Faith. Ben Greenfield{authorlink}https://bengreenfieldlife.com/article/hormones-articles/the-best-ways-to-increase-testosterone/Articles by Ben Greenfield – Ben Greenfield Fitness Discover the best life-hacking secrets for body, mind and spirit optimization, personal productivity, work-life balance, family, relationships, survival, spirituality & more! https://bengreenfieldlife.com/wp-content/uploads/2022/02/cropped-BGL-Favicon-negative-5@512-32×32.png

Biohacking Your Manhood: The Proven Habits, Foods, Exercises, Workouts, Nutrients & Tools That Boost Testosterone & Drive. Read More »