LOWER BODY

Auto Added by WPeMatico

“Ass to Grass” or 90 Degrees? Here’s How Low You Should Be Squatting

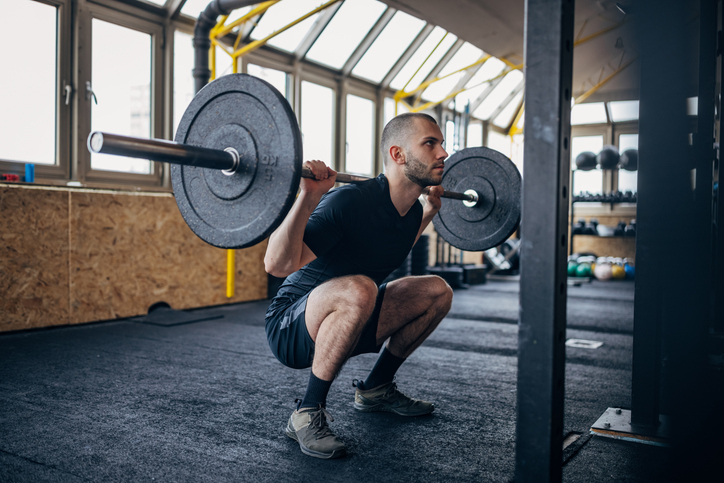
“Ass to Grass” or 90 Degrees? Here’s How Low You Should Be Squatting Whether you’re loading a barbell on your back, racking a kettlebell over your shoulder, or just warming up with bodyweight squats, one question remains a constant: What is the proper squat depth? How low you go is as important to your performance, safety, and results as how much weight you press, so squat depth should be high on your form checklist, according to Carol Mack, D.P.T., C.S.C.S., doctor of physical therapy and strength and conditioning coach. Read on to learn why. How Low Should You Squat? Unless you’re a competitive powerlifter whose goal is to squat as much weight as possible, Mack recommends squatting as deep as you can comfortably without sacrificing form. A deeper squat helps to fire up the muscles more efficiently and builds strength in a greater range of motion, which is important if you’re training for anything beyond aesthetics, like athleticism or everyday function. But your squat depth will vary based on a few personal factors, like “whether you have knee, hip, or ankle pain, and if you have enough mobility to go deeper,” says Mack. What If Your Knees Drift Past Your Toes? One unrelenting myth about squat depth is that you should never let your knees go past your toes. While this cue may indicate other form mistakes you may be making — such as not hinging at the hips — Mack says that your knees will likely drift past your toes if you’re going into a deeper squat, particularly with an activity like powerlifting. “Don’t worry about your knees coming forward when going past 90 degrees,” she says. “Of course, don’t force yourself deeper if you feel pain or a tight spot. But if you’re comfortable going deeper and you’re listening to your body, then it’s OK to go lower.” One alignment tip that helps, she adds, is to look down and make sure your knees are in line with your middle two toes, rather than splaying outward. (Just be sure to apply this tip during your warm-up and not, say, during a PR attempt.) How Can You Improve Squat Depth? If squat depth is something you struggle with, here are some strategies to help you get lower. 1. Focus on your hips Because squat depth is not just about your quads and glutes, focusing on the hips can be a game-changer, Mack says. Instead of dropping your butt straight down, try sending your hips back slightly — known as hinging — as you lower into your squat. This will help you bend with more hip flexion (a.k.a. bringing your knees closer to your chest), which can improve depth. It’s also important to keep your knees from caving inward as you approach the bottom of your squat and drive up to stand. “That might require adding hip mobility or strengthening to your routine to improve your squats,” Mack notes. Hip mobility exercises can do more than help squat depth, too. They can reduce the strain on the body from sitting too much, improve overall flexibility, and give you greater range of motion. 2. Increase ankle mobility Mack adds that it’s also important to have greater ankle mobility. This aspect of the squat can sometimes get ignored, but it plays a huge part in helping you get deeper. If you ever feel your ankles lifting off the ground during a squat, that’s a sign that you need to improve your mobility. Ankle-strengthening exercises can give you greater mobility and stability to support your squats, no matter how deep you go. 3. Strengthen your core Finally, remember that squats involve your spine as well, Mack says. “Some people have trouble keeping their trunk upright as they move deeper into their squat,” she says. “This can throw off alignment throughout the squat movement. It can happen for a lot of reasons, including mobility, but core strength is a big culprit.” If you tend to round your back as you come into a squat, or feel your upper body collapse as you’re pushing back up to standing, that usually means you need to integrate more core work into your routine, she suggests. Fortunately, there are tons of options for that, and much like the other mobility and strengthening choices here, you’ll be reducing your risk of injury and improving your form for a breadth of moves, including squats. The post “Ass to Grass” or 90 Degrees? Here’s How Low You Should Be Squatting appeared first on BODi. Whether you’re loading a barbell on your back, racking a kettlebell over your shoulder, or just warming up with bodyweight squats, one question remains a constant: What is the proper squat depth? How low you go is as important to your performance, safety, and results as how much weight you press, so squat depth should be high […] The post “Ass to Grass” or 90 Degrees? Here’s How Low You Should Be Squatting appeared first on BODi. William Kang{authorlink}https://www.beachbodyondemand.com/blog/squat-depthBODi BODi is a Health Esteem platform to help you embrace the person you are today so you can take action to achieve all your health and fitness goals. https://bodiblog.wpenginepowered.com/wp-content/plugins/bod-blog/assets/vendor/beachbodydigital/wordpress-core-plugins/beachbody.png

“Ass to Grass” or 90 Degrees? Here’s How Low You Should Be Squatting Read More »

4 Sprinting Tips to Help You Build Power, Strength, and Speed

4 Sprinting Tips to Help You Build Power, Strength, and Speed When was the last time you really had to sprint? Heart pumping, legs burning, and going as fast as you possibly could? If you can’t remember, then you’re missing out on one of the best tools to challenge your body and improve body composition. Sprinting is arguably one of the most essential training tools for athletic performance. If you’re going to work sprints into your routine, you need to consider the best ways to approach them to maximize their use and to protect yourself. When you do, you’ll see improvements in your body’s ability to perform. What Are the Benefits of Sprinting? Boosts athletic performance Sprinting carries over to every sport because of the power, strength, and speed benefits. “Because it’s super explosive, it’s activating practically every muscle in the human body,” says Mike Young, Ph.D., director of Athletic Lab, which focuses on speed development and athletic performance. “Not too much in the fitness world involves every muscle group acting as aggressively as you see in sprinting,” Young says. Improves body composition Beyond sports performance, the benefits of sprinting carry over to the body’s physical qualities, Young says. “You get the benefit from the high intensity through body composition and lean mass — more athletic glutes, hamstrings, and quads,” he says. “This is why you see elite sprinters look the way they do — really lean and muscular. Some of that simply comes from the act of sprinting.” How to Acclimate Your Body to Sprinting Sprinting is an intense, high-impact exercise. To protect your body and get the most out of your sprints, follow these tips. Warm up When you do start sprinting, start with a quick warm-up like high knees and lunges to get your body loose and primed to sprint. Then start with the basic movement, acclimating your tissues, muscles, and even bones to the intensity, Rooney says. Even sprinting in place can be a good starting point as your body gets used to the movement. “You have to wake up the nervous system that accesses the big muscle fibers — the big motor. When you do that, you can work that musculature,” Rooney says. Start slow If the last time you sprinted was in high school gym class, don’t go right out and do 100-yarders. You just want to start with moving fast again, says Martin Rooney, CSCS, founder of Training for Warriors. That could be taking quick steps through a speed ladder or doing paces slightly faster than would feel comfortable. While there’s no “perfect” distance to sprint, aim for 30 yards or so when you’re first starting out. Maintain your body You should work on mobility — through stretching and dynamic movements like lunges that improve your range of motion — so you lower your risk of injury. And if you’re at a higher body weight than you should be, dialing in your nutrition and losing weight will improve your ability to sprint, Rooney says. 4 Sprinting Tips to Get You Faster If you want to make sure you’re experiencing all of the benefits sprinting, here are four tips to help you do it the right way. 1. Keep your mechanics tight The fastest body is the most efficient body, meaning you’re not wasting energy with body parts in the wrong place. While it may seem that running fast is just, well, running fast, then you’re not making the most of your effort. Your anatomical checklist for great sprinting technique: Lean your whole body forward. Instead of just hunching your back, Young advises to think of leaning from your ankles up so that your head, neck, spine, and pelvis are all aligned. Stabilize your head. “A common error is for the head to flop around from normal postural alignment,” Young says. That means the force transfer from the ground is not transferred efficiently throughout the body. Because the human body isn’t designed ideally for sprinting (we’re too vertical compared to the horizontal position of, say, a cheetah), a wobbling head makes an inefficient system even more so. 2. Accelerate with long strides Good sprinting form is about how you accelerate through the run. “The physics of running has not changed: If you run in a world governed by physics, you don’t get to top speed without acceleration,” Young says. That means your first steps are big, long strides — not the short, choppy ones you see some people doing — with big, swinging arms. When you take short steps, you can’t generate a lot of force, because there’s less contact time with the ground. Having great stride length means longer contact time with the ground — and more force to propel the body forward, Young says. 3. Experiment with intensity When most people hear the word “sprint,” they think “all-out.” That doesn’t have to be the case, Rooney says. You can aim for 70 or 80 percent of max effort in your workouts — and play with combinations of different distances and intensities. “When we say sprint, it doesn’t mean it has to be like a tiger is chasing you,” Rooney says. 4. Strengthen your sprint muscles The glutes and hamstrings — and all the muscles in your posterior chain — serve as your engine for speed, Young says. Deadlifts, Romanian deadlifts, glute-ham raises, and steps-ups are great for strengthening those muscles to help with sprinting performance. Any single-leg exercises will also be helpful, Young says. And there are few better movements that train power and speed than plyometrics, which help build explosiveness. The post 4 Sprinting Tips to Help You Build Power, Strength, and Speed appeared first on BODi. When was the last time you really had to sprint? Heart pumping, legs burning, and going as fast as you possibly could? If you can’t remember, then you’re missing out on one of the best tools to challenge your body and improve body composition. Sprinting is arguably one of the most essential training tools for […] The post

4 Sprinting Tips to Help You Build Power, Strength, and Speed Read More »

Front Squat vs Back Squat: Which Barbell Squat Is Right for You?

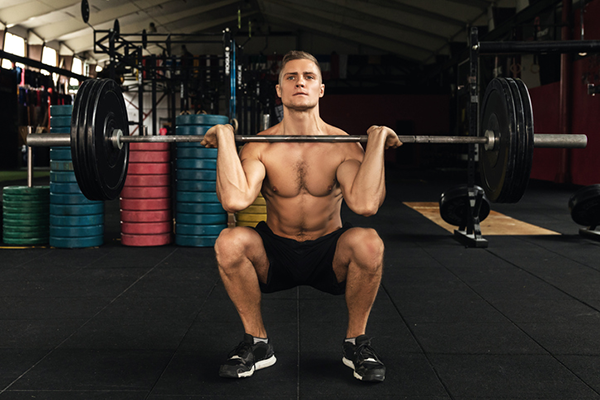
Front Squat vs Back Squat: Which Barbell Squat Is Right for You? We don’t question all the available squat variations. We understand that each one — from the curtsy squat to the split squat — builds lower-body strength while bringing something a little different to a workout. But there’s something about squatting with a barbell that invites a comparison between the front squat vs back squat. Which is harder? Is one more effective at building muscle? Do you need to do both? Before investigating the merits of the front squat vs. the back squat, it’s important to understand the differences between the two movements. Both use a barbell, but the placement differs: When back squatting, you hold the barbell behind your shoulders so that it rests across the trapezius (upper-back muscles) and rear deltoids (posterior shoulder muscles). During a front squat, you hold the barbell (with a full grip or your fingertips, depending on your mobility) in front of your shoulders with your elbows pointing forward so that the bar is resting on your front deltoids. Is a Front Squat Harder Than a Back Squat? Because of the front-loaded positioning of the barbell, most people find the front squat to be more difficult than the back squat. “This is because in a front squat there is much more demand put on maintaining posture, and the bar has to stay within a smaller path to be able to hold onto it,” says Kate Meier, CPT, Certified USA Weightlifting Level 1 Coach. While both squats engage the upper body, the front squat poses a greater challenge to the core and back muscles. Some lifters also struggle to hold the barbell in a front squat, says Robert Herbst, 19-time World Champion powerlifter and member of the AAU Strength Sports Hall of Fame. “The front squat is more difficult to perform because most people lack the flexibility to hold the bar,” he explains. “Some can do it Olympic clean style [with their elbows up and fingers under the bar], while others cross their arms, but many find it uncomfortable. A back squat is easier to hold because the bar is up on your traps or farther down on your back and held in place by the mechanical force of your arms.” Do Front Squats and Back Squats Work the Same Muscles? When comparing the muscles used in front squats vs. back squats, there are some differences. Meier explains: The front squat will work your upper back muscles and mainly the quads in the lower body. The back squat will work more of the glutes and hamstrings in addition to the quads. It also engages the lower back muscles more than the front squat does. And while both the front squat and back squat will test your core strength, the challenge is typically greater in a front squat. Can Front Squats Replaces Back Squats? Meier says that a well-rounded strength routine typically includes both front squats and back squats. But it’s not necessary to do both, especially if you’re training for general fitness and not a specific sport. “Depending on your body type, one may feel better on your joints than the other,” Meier says. “The important thing is to include a squatting movement in your program in general.” If you prefer front squats, it’s fine to make them your default squat option. Should You Add Front Squats to Your Routine? As previously noted, front squats don’t need to be part of your training plan, especially if you find them uncomfortable. But if you’re at all interested in sports like CrossFit or Olympic weightlifting, front squats are unavoidable. Alternatively, you can try a goblet squat with a dumbbell or kettlebell positioned in front of your chest. Like the front squat, this movement demands core and back strength, but it’s easier to scale down the weight, and the grip requires less mobility. How to Perform a Front Squat Before attempting a front squat, it’s a good idea to work with a personal trainer to ensure you’ve mastered the proper form for a bodyweight squat. “Many times people hurt themselves because their squat movement isn’t correct, and then they throw weight on top of it,” Meier says. As with any lift, start with a light load and progress gradually over time. With the barbell resting on a squat rack, grip the bar with your hands shoulder-width apart. Bring your shoulders underneath the barbell so that your elbows are bent and facing forward, and the bar is resting on the underside of your palms or fingers. Step back, lifting the bar out of the rack, and stand tall with your feet slightly wider than shoulder-width apart. Keeping your back flat, chest up, and core braced, push your hips back, bend your knees, and lower your body until your thighs are at least parallel to the floor. Pause, and then push through your feet to return to a standing position. The post Front Squat vs Back Squat: Which Barbell Squat Is Right for You? appeared first on BODi. We don’t question all the available squat variations. We understand that each one — from the curtsy squat to the split squat — builds lower-body strength while bringing something a little different to a workout. But there’s something about squatting with a barbell that invites a comparison between the front squat vs back squat. Which […] The post Front Squat vs Back Squat: Which Barbell Squat Is Right for You? appeared first on BODi. Kayne Toyosato{authorlink}https://www.beachbodyondemand.com/blog/front-squat-vs-back-squatBODi BODi is a Health Esteem platform to help you embrace the person you are today so you can take action to achieve all your health and fitness goals. https://bodiblog.wpenginepowered.com/wp-content/plugins/bod-blog/assets/vendor/beachbodydigital/wordpress-core-plugins/beachbody.png

Front Squat vs Back Squat: Which Barbell Squat Is Right for You? Read More »

6 Exercises for an Effective Leg Day Warm-Up

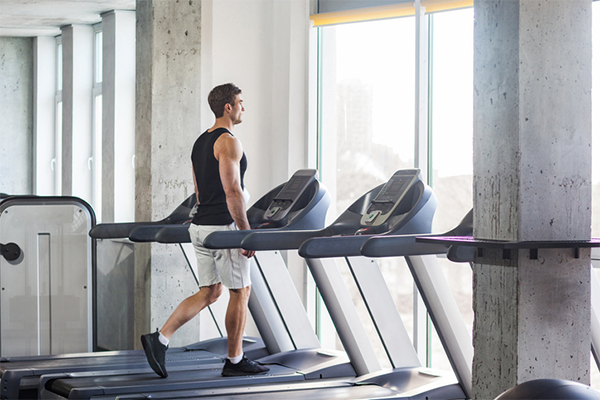
6 Exercises for an Effective Leg Day Warm-Up If you’ve been skipping your leg day warm-up, it may feel like you’re saving time that you can spend on a few extra reps. But by forgoing a lower body warm-up, you may actually be shortchanging your gains and increasing your risk for injury. A quick warm-up not only increases blood flow to the muscles — a boon for soft tissue extensibility and muscle-building contractions — but also sends a signal to the brain that the body is about to work, explains Michael Julom, CPT, founder of ThisIsWhyImFit. This can help make muscles and joints less prone to injury, he adds. Setting aside 10 to 15 minutes to warm up at the beginning of a leg day workout is a worthy investment — just make sure your warm-up is specific to your programming. Not sure what that should look like? The list of exercises below will help you get the most out of your leg day warm-up. “It involves each of the muscles you’ll be working in pretty much any leg day workout imaginable,” Julom says. “The joints, muscles, and brain get prepared for work.” 1. Quick Walk or Jog Think of this as a sort of warm-up for the warm-up. A brief walk or jog — even just 10 minutes — gets the blood pumping, warms up the body’s tissues, and can help you get in the right headspace to lift. This is especially helpful if you’ve been sitting in front of a computer all day or just woke up for an early-morning workout. Julom’s hack? “I park my car in the farthest space from the gym and walk in,” he says. 2. Forward Leg Swing Both forward and lateral leg swings activate the hips and glutes. “Start with a small range of motion and move the leg intentionally rather than letting momentum swing the leg like a pendulum,” Julom advises. Stand tall with your feet together and your arms out to your sides or gripping a stable surface next to you for balance. Shift your weight to your left leg and raise your right leg off the floor. Swing your right leg forward until your thigh is parallel with the floor, then swing it behind you as far as you comfortably can. Continue swinging back and forth for 30 seconds. Switch legs and repeat, completing three sets per side. 3. Lateral Leg Swing Stand tall with your feet together and your arms extended out to your sides or gripping a stable surface in front of you for balance. Shift your weight to your left leg and raise your right leg out to your right side. Keeping your chest lifted, core braced, and back flat, swing your right leg back and forth in front of your left leg. Continue for 30 seconds. Switch legs and repeat, completing three sets per side. 4. Supported Squat “The supported squat loosens the knees and hips, warms up all the constituent muscles, and places no load on the lumbar spine,” Julom says. “It’s perfect because it begins with supporting all the bodyweight with the arms, allowing your knees and hips to flex and extend unloaded. Gradually transfer the support from the arms to the legs by reducing the tension on whatever you’re holding onto.” Secure a suspension trainer or strong resistance tubing to an overhead anchor point. If you don’t have access to a suspension trainer or tubing, you can hold onto a squat rack or a heavy piece of equipment for support. Gripping a handle with each hand, stand facing the anchor point with your feet about hip-width apart. Make sure you’re far enough away from the anchor point to create tension on the straps. Using the straps to support your weight, bend your knees, push your hips back, and lower your body until your thighs are parallel to the floor. Keep your back flat and your core braced. Push through your feet to return to a standing position. Perform three sets of 10 reps. After the first set, gradually begin to transfer the resistance from your arms to your legs. 5. Good Morning If you plan to deadlift, bodyweight good mornings are a must. They help reinforce a proper hip hinge movement while activating the hamstrings and glutes. “Pay special attention to squeezing the glutes,” Julom says. Stand with your feet hip-width apart and place your fingertips gently behind your ears. Keeping your back flat and core braced, maintain a slight bend in your knees as you push your hips back and hinge at your hips, lowering your torso until it is nearly parallel to the floor or you feel a deep stretch in your hamstrings. Pause, and then return to the starting position, squeezing your glutes as you bring your hips forward. Perform three sets of 10 reps. 6. Walking Lunge Walking lunges fire up the quads, glutes, hamstrings, and calves while actively stretching the hip extensors. “Start with a limited range of motion,” Julom says. “Once your hips and knees are loose, increase your stride length and depth as desired.” Stand tall with your feet hip-width apart and your arms at your sides. Option to hold a light pair of dumbbells. Keeping your chest lifted, shoulders back, core braced, and back flat, take a large step forward with your right foot, lowering your body until your right thigh is parallel to the floor and both knees bend to 90 degrees. Your front knee should be tracking in line with your ankle, and your knee should not track past your toes. Push into your front foot, driving down through your right heel as you bring your left foot forward to return to a standing position. Lunge forward again, this time with your left foot. Continue alternating legs, performing 8 to 10 lunges on each side. Complete three sets. The post 6 Exercises for an Effective Leg Day Warm-Up appeared first on BODi. If you’ve been skipping your leg day warm-up, it may feel

6 Exercises for an Effective Leg Day Warm-Up Read More »

The Complete Guide in Upper Lower Split Workout for Beginners

The Complete Guide in Upper Lower Split Workout for Beginners The upper lower split workout is an effective way to organize your training, as it requires you to work in already well-established routines regularly. With this way of organizing your workouts, you can use a variety of movement variations to build the necessary muscle mass, strength, and power for the next workout. You should make a schedule for your splits: Monday – Lower Tuesday – Upper Wednesday – Take an off Thursday – Lower Friday – Upper Saturday and Sunday – Take off On the upper lower split workout days, you should work on the muscle groups like the back, chest, biceps, and abs. And on the lower split workout days, you should work on glutes, hamstrings, calves, and quads. The 4-day Upper and Lower Workout Let’s look at the exercise standard of upper lower split workout. It is fanatical because you can have a consistent schedule from week to week, and you get to train your muscle group twice a week. The 4 upper lower workout you can do alternatively in a week. Day 1 of Lower Body Split Workout: 3 sets of 6 reps Back Squats 3 sets of 12 reps Glute Ham Raises 3 sets of 10 reps Alternating Forward Curls 2 sets of 15 reps Lying Hamstring Curls 3 sets of 8 reps Standing Smith Machine Calf Raises Day 2 of Upper Body Split Workout: 3 sets of 10 reps Barbell Bench Press 3 sets of 10 reps Barbell Bent Over Rows 3 sets of 12 reps Seated Dumbbell Shoulder Press 3 sets of 8 reps Lat Pulldowns 2 sets of 12 reps Low Cable Chest Flyes 2 sets of 15 reps Dumbbell Curl 2 sets of 15 reps Overhead Dumbbell Tricep Extensions 2 sets 25 reps Rope Cable Face Pulls Day 3 of Lower Body Split Workout: 3 sets of 12 reps Leg Press 3 sets of 10 reps Romanian Deadlift 3 sets of 15 reps Unilateral Dumbbell Shrug 3 sets of 15 reps Leg Extensions 4 sets of 12 reps Seated Machine Calf Raises Hanging Leg Raises, four sets of ten repetitions  Day 4 of Upper Body Split Workout: 3 sets of 10 reps Pull Ups 3 sets of 8 reps Incline Dumbbell Bench Press 3 sets of 12 reps Standing Barbell Push Press 3 sets of 10 reps Cable Lat Pullovers 3 sets of 10 reps EZ-bar Bicep Curl 3 sets of 15 reps Dumbbell The upper lower split workout is a great way to get in the best shape of your life. It’s a highly structured routine that uses compound sets to build muscle and burn fat at the same time while still leaving you with enough time to recover between each training day. Generally speaking, warming up before Upper/ Lower Split workouts will reduce the risk of muscle soreness and injury. Your muscles are more likely to stiffen during a workout if you do not warm them up beforehand. Also Read: Beginner Workout Routine for Men Pros and cons of the upper lower split workout  Pros of Upper and Lower split workout. The 4-day upper lower split is a famous workout routine for many lifters. This type of split allows you to train each muscle group twice per week, a frequency supported by many studies. It makes the 4-day upper lower split an excellent option for those who want to improve their long-term results. The benefits of training a lift multiple times per week. The benefits of training a lift multiple times per week are clear for many people. Training a lift more often allows us to improve better and maintain movement proficiency. It is because we perform different exercises more often throughout the week. The frequency of your weightlifting workouts should be based on your experience level. If you’re a beginner, start with twice-weekly workouts. It’s great for avoiding volume overlap because you have two separate workouts – an upper and a lower one. It means the risk of training fatigued muscles too soon is much smaller than in other training splits.  Cons of Upper and Lower split workout. If you want to work all the muscle groups in your upper body, you’re looking at doing a lot of sets. For example, if you do just three sets for your back, chest, shoulders, triceps, and biceps, you’ll still have to do 15 working sets. That can be a lot to keep track of during your workout. Lower body workouts, on the other hand, may be completed faster because there are fewer muscle groups to train. In other words, if you insist on performing direct exercises for your traps, abs, obliques, and forearms, you might want to add them to your lower body days. When establishing your exercise split, you must make inevitable priority trade-offs. For example, the “bro split” allows us to prioritize each muscle during training. On an upper/lower split, you must start with one muscle group and put the others on the back burner. For example, you can start with the bench press but won’t be able to complete your rows until you’ve fully recovered. Frequently Asked Questions (FAQs): Can I build muscle with the upper lower split? It is a common question among those new to weightlifting, and the answer is yes – you can certainly build muscle using an upper-lower split routine. This routine involves splitting your body into upper and lower halves and working each half on alternate days. For example, you might train your upper body on Monday and Thursday and your lower body on Tuesday and Friday. There are a few reasons why an upper lower split can be effective for building muscle. First, by training each muscle group twice per week, you can give them a little more attention than you would if you were training your whole body three or four times per week. Second, this type of split allows you to use slightly heavier weights than you might otherwise

The Complete Guide in Upper Lower Split Workout for Beginners Read More »