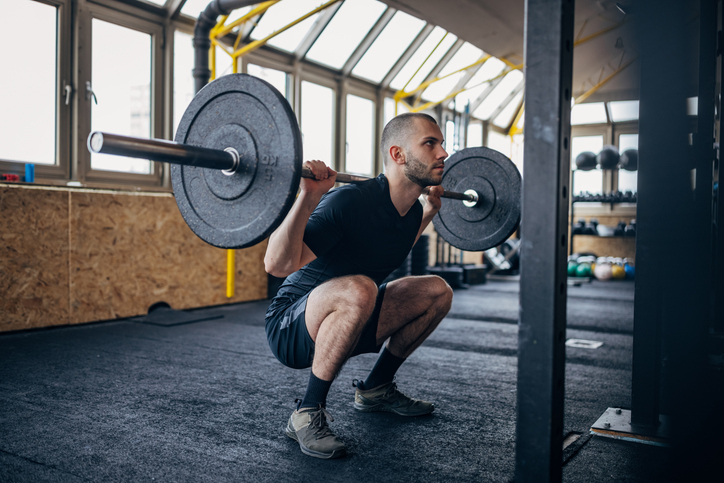
Legs

WED EXERCISE:

1 SQUATS

2 STRAIGHT-LEG DEADLIFTS

3 GOOD MORNINGS (DO ONCE A WEEK)

4 LUNGES

5 SUPERSET: LEG EXTENSION W/LEG CURLS


SAT EXERCISE:

1 FRONT SQUATS

2 DEADLIFTS

3 GOOD MORNINGS (DO ONCE A WEEK)

4 LUNGES

5 SUPERSET: LEG EXTENSION W/LEG CURLS

REP RANGES
5 SETS OF 8-12 REPS with each of these major exercises, so we will stay in these rep ranges. Judge how you’re feeling and if things are going well, push to a max effort and max 1-Rep squat.
DEADLIFTS: CHOOSE : 10, 6, 4; 5, 5, 5 or 12, 10, 8
GOOD MORNINGS: Only do once a week, choose a day
During week 4, choose one day to try a 1-Rep Max

“Ass to Grass” or 90 Degrees? Here’s How Low You Should Be Squatting

“Ass to Grass” or 90 Degrees? Here’s How Low You Should Be Squatting Whether you’re loading a barbell on your back, racking a kettlebell over your shoulder, or just warming up with bodyweight squats, one question remains a constant: What is the proper squat depth? How low you go is as important to your performance, safety, and results as how much weight you press, so squat depth should be high on your form checklist, according to Carol Mack, D.P.T., C.S.C.S., doctor of physical therapy and strength and conditioning coach. Read on to learn why. How Low Should You Squat? Unless you’re a competitive powerlifter whose goal is to squat as much weight as possible, Mack recommends squatting as deep as you can comfortably without sacrificing form. A deeper squat helps to fire up the muscles more efficiently and builds strength in a greater range of motion, which is important if you’re training for anything beyond aesthetics, like athleticism or everyday function. But your squat depth will vary based on a few personal factors, like “whether you have knee, hip, or ankle pain, and if you have enough mobility to go deeper,” says Mack. What If Your Knees Drift Past Your Toes? One unrelenting myth about squat depth is that you should never let your knees go past your toes. While this cue may indicate other form mistakes you may be making — such as not hinging at the hips — Mack says that your knees will likely drift past your toes if you’re going into a deeper squat, particularly with an activity like powerlifting. “Don’t worry about your knees coming forward when going past 90 degrees,” she says. “Of course, don’t force yourself deeper if you feel pain or a tight spot. But if you’re comfortable going deeper and you’re listening to your body, then it’s OK to go lower.” One alignment tip that helps, she adds, is to look down and make sure your knees are in line with your middle two toes, rather than splaying outward. (Just be sure to apply this tip during your warm-up and not, say, during a PR attempt.) How Can You Improve Squat Depth? If squat depth is something you struggle with, here are some strategies to help you get lower. 1. Focus on your hips Because squat depth is not just about your quads and glutes, focusing on the hips can be a game-changer, Mack says. Instead of dropping your butt straight down, try sending your hips back slightly — known as hinging — as you lower into your squat. This will help you bend with more hip flexion (a.k.a. bringing your knees closer to your chest), which can improve depth. It’s also important to keep your knees from caving inward as you approach the bottom of your squat and drive up to stand. “That might require adding hip mobility or strengthening to your routine to improve your squats,” Mack notes. Hip mobility exercises can do more than help squat depth, too. They can reduce the strain on the body from sitting too much, improve overall flexibility, and give you greater range of motion. 2. Increase ankle mobility Mack adds that it’s also important to have greater ankle mobility. This aspect of the squat can sometimes get ignored, but it plays a huge part in helping you get deeper. If you ever feel your ankles lifting off the ground during a squat, that’s a sign that you need to improve your mobility. Ankle-strengthening exercises can give you greater mobility and stability to support your squats, no matter how deep you go. 3. Strengthen your core Finally, remember that squats involve your spine as well, Mack says. “Some people have trouble keeping their trunk upright as they move deeper into their squat,” she says. “This can throw off alignment throughout the squat movement. It can happen for a lot of reasons, including mobility, but core strength is a big culprit.” If you tend to round your back as you come into a squat, or feel your upper body collapse as you’re pushing back up to standing, that usually means you need to integrate more core work into your routine, she suggests. Fortunately, there are tons of options for that, and much like the other mobility and strengthening choices here, you’ll be reducing your risk of injury and improving your form for a breadth of moves, including squats. The post “Ass to Grass” or 90 Degrees? Here’s How Low You Should Be Squatting appeared first on BODi. Whether you’re loading a barbell on your back, racking a kettlebell over your shoulder, or just warming up with bodyweight squats, one question remains a constant: What is the proper squat depth? How low you go is as important to your performance, safety, and results as how much weight you press, so squat depth should be high […] The post “Ass to Grass” or 90 Degrees? Here’s How Low You Should Be Squatting appeared first on BODi. William Kang{authorlink}https://www.beachbodyondemand.com/blog/squat-depthBODi BODi is a Health Esteem platform to help you embrace the person you are today so you can take action to achieve all your health and fitness goals. https://bodiblog.wpenginepowered.com/wp-content/plugins/bod-blog/assets/vendor/beachbodydigital/wordpress-core-plugins/beachbody.png

“Ass to Grass” or 90 Degrees? Here’s How Low You Should Be Squatting Read More »
6 Exercises for an Effective Leg Day Warm-Up

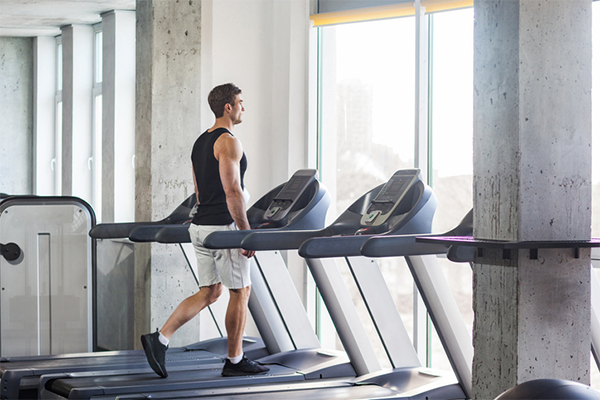
6 Exercises for an Effective Leg Day Warm-Up If you’ve been skipping your leg day warm-up, it may feel like you’re saving time that you can spend on a few extra reps. But by forgoing a lower body warm-up, you may actually be shortchanging your gains and increasing your risk for injury. A quick warm-up not only increases blood flow to the muscles — a boon for soft tissue extensibility and muscle-building contractions — but also sends a signal to the brain that the body is about to work, explains Michael Julom, CPT, founder of ThisIsWhyImFit. This can help make muscles and joints less prone to injury, he adds. Setting aside 10 to 15 minutes to warm up at the beginning of a leg day workout is a worthy investment — just make sure your warm-up is specific to your programming. Not sure what that should look like? The list of exercises below will help you get the most out of your leg day warm-up. “It involves each of the muscles you’ll be working in pretty much any leg day workout imaginable,” Julom says. “The joints, muscles, and brain get prepared for work.” 1. Quick Walk or Jog Think of this as a sort of warm-up for the warm-up. A brief walk or jog — even just 10 minutes — gets the blood pumping, warms up the body’s tissues, and can help you get in the right headspace to lift. This is especially helpful if you’ve been sitting in front of a computer all day or just woke up for an early-morning workout. Julom’s hack? “I park my car in the farthest space from the gym and walk in,” he says. 2. Forward Leg Swing Both forward and lateral leg swings activate the hips and glutes. “Start with a small range of motion and move the leg intentionally rather than letting momentum swing the leg like a pendulum,” Julom advises. Stand tall with your feet together and your arms out to your sides or gripping a stable surface next to you for balance. Shift your weight to your left leg and raise your right leg off the floor. Swing your right leg forward until your thigh is parallel with the floor, then swing it behind you as far as you comfortably can. Continue swinging back and forth for 30 seconds. Switch legs and repeat, completing three sets per side. 3. Lateral Leg Swing Stand tall with your feet together and your arms extended out to your sides or gripping a stable surface in front of you for balance. Shift your weight to your left leg and raise your right leg out to your right side. Keeping your chest lifted, core braced, and back flat, swing your right leg back and forth in front of your left leg. Continue for 30 seconds. Switch legs and repeat, completing three sets per side. 4. Supported Squat “The supported squat loosens the knees and hips, warms up all the constituent muscles, and places no load on the lumbar spine,” Julom says. “It’s perfect because it begins with supporting all the bodyweight with the arms, allowing your knees and hips to flex and extend unloaded. Gradually transfer the support from the arms to the legs by reducing the tension on whatever you’re holding onto.” Secure a suspension trainer or strong resistance tubing to an overhead anchor point. If you don’t have access to a suspension trainer or tubing, you can hold onto a squat rack or a heavy piece of equipment for support. Gripping a handle with each hand, stand facing the anchor point with your feet about hip-width apart. Make sure you’re far enough away from the anchor point to create tension on the straps. Using the straps to support your weight, bend your knees, push your hips back, and lower your body until your thighs are parallel to the floor. Keep your back flat and your core braced. Push through your feet to return to a standing position. Perform three sets of 10 reps. After the first set, gradually begin to transfer the resistance from your arms to your legs. 5. Good Morning If you plan to deadlift, bodyweight good mornings are a must. They help reinforce a proper hip hinge movement while activating the hamstrings and glutes. “Pay special attention to squeezing the glutes,” Julom says. Stand with your feet hip-width apart and place your fingertips gently behind your ears. Keeping your back flat and core braced, maintain a slight bend in your knees as you push your hips back and hinge at your hips, lowering your torso until it is nearly parallel to the floor or you feel a deep stretch in your hamstrings. Pause, and then return to the starting position, squeezing your glutes as you bring your hips forward. Perform three sets of 10 reps. 6. Walking Lunge Walking lunges fire up the quads, glutes, hamstrings, and calves while actively stretching the hip extensors. “Start with a limited range of motion,” Julom says. “Once your hips and knees are loose, increase your stride length and depth as desired.” Stand tall with your feet hip-width apart and your arms at your sides. Option to hold a light pair of dumbbells. Keeping your chest lifted, shoulders back, core braced, and back flat, take a large step forward with your right foot, lowering your body until your right thigh is parallel to the floor and both knees bend to 90 degrees. Your front knee should be tracking in line with your ankle, and your knee should not track past your toes. Push into your front foot, driving down through your right heel as you bring your left foot forward to return to a standing position. Lunge forward again, this time with your left foot. Continue alternating legs, performing 8 to 10 lunges on each side. Complete three sets. The post 6 Exercises for an Effective Leg Day Warm-Up appeared first on BODi. If you’ve been skipping your leg day warm-up, it may feel

6 Exercises for an Effective Leg Day Warm-Up Read More »

Why Everyone Can & Should Squat the Same: 101 Truths

Why Everyone Can & Should Squat the Same: 101 Truths Dr. Joel Seedman, Ph.D.     If you are a die-hard ATG (ass-to-grass) squatter who believes the ATG squat is the one true squat, STOP now. You need not read any further. There is nothing here for you. If you view strength training primarily as a means to enhance athletic performance and muscle function, have injured yourself squatting ATG, or are willing to consider the possibility that there is an optimal way to squat other than ATG, then read on. My goal in writing this is not to attract more followers, or clients, or to drum up business. I’m simply stating the facts as I’ve observed and experienced them over the past 16 years while pursuing bachelors, masters and doctorate degrees in exercise science and kinesiology, researching the neurophysiological basis of muscle function, and training hundreds of clients of all ages, sizes and shapes, backgrounds, ethnicities, skill, ability and fitness level, from sedentary individuals to weekend warriors, high school, college or pro-athletes, bodybuilders and more, who came to me with or without injuries, and whom I’ve trained for as little as one or two sessions, a few months, a year, or more than 5 years. After all my years of study and training what I found is this: with appropriate instruction (and minimal cueing), every single individual will naturally gravitate to a 90-degree joint angle squat and everyone’s squat will essentially look the same. Read more about proper squat form here. This video features a very small fraction of the many athletes and clients I train performing a wide variety of squats, from barbell back squats to unique front-loaded variations, and reflects the wide variety of populations mentioned above in terms of gender, age (12 – 71 years), ethnicity, training background, presenting injury, and time spent training with me. To that last point, a handful of the clients in the video are clients with whom I literally spent less than 1 minute before filming the clip. And no, that’s not an exaggeration as we have new athletes periodically come through our facility in large group settings and some of these were shot on their first day with very little time under my tutelage. So no, the reason everyone’s squat looks the same is not because I have spent years with each person molding them to my system and forcing them to squat a particular way. Instead, it represents what the human body will naturally gravitate to when given the opportunity. My coaching simply provides that opportunity, nothing more, nothing less. Here’s a bit more about my personal squat journey for those interested. With that said here are 100 + truths about the squat as well as 8 myths and facts that should change your perception of what optimal squat mechanics entail and reasons why everyone’s squat should look the same. (Note: For more information on this topic check out my previous squat article as well as my book MOVEMENT REDEFINED which goes into great detail with hundreds of references). It should also be noted that the aforementioned squat article was written over 3 years ago. While everything in that article still holds true, over those last 3 years I’ve come to realize that the parameters and guidelines for what constitutes proper movement is even more stringent and precise than I had originally understood. With that said I know hold to the 90 degree principle rather than “somewhere between 90 degrees and parallel) as it represents a more precise and accurate parameter for defining optimal squat mechanics.     MYTH There is no such thing as an optimal or correct way to squat as each person will squat differently based on their individual differences and anthropometrics. FACT When we examine and integrate principles of neuromuscular physiology, biomechanics, muscle physiology, osteokinematics, and functional anatomy we find strong support for the notion that there is, in fact, an optimal method of squatting for the human body, particularly under conditions of intense loading and force, that should look almost identical from person to person. TRUTH #1 An optimal squat involves approximately 90-degree joint angles. This is typically 10-30 degrees above parallel. A parallel squat involves approximately 100 to 120-degree joint angles as a thigh position that is parallel to the floor cannot form a 90-degree joint angle with the tibia unless the latter is perfectly vertical and perpendicular to the ground, which is only possible during wall sits or smith machine squats. TRUTH #2 The type of squat and loading position will tend to dictate how close a 90-degree joint angle and parallel squat are to each other. Typically, a 90-degree barbell back squat will be moderately above parallel, whereas a 90-degree front loaded squat will be closer to parallel. Likewise, 90-degree wide stance squats tend to appear closer to parallel than close stance squats simply because the wider position involves a more vertical tibia than the close stance squat where there is greater tibial inclination. With that said, There’s no such thing as a right or wrong stance width, just like there’s no such thing as a right or wrong grip width for the bench press. Some individuals may be find a particular stance width more comfortable based on hip structure while others may intentionally select different widths for various goals. What does stay constant regardless of stance width is joint angles and ROM. TRUTH #3 The optimal squat involves a neutral spine, straight foot alignment, hips set back, weight back on the heels while gripping down with the toes (particularly big toe). There should also be proper alignment, i.e. a fairly straight line, between the feet, ankles, knees, and hips. The hips and knees should bend at approximately the same rate so that by the time they reach the bottom position there is an approximately 90-degree joint angle at both the hips and knees. TRUTH #4 Occasionally, some individuals, particularly those with prior injuries, orthopedic issues, or extreme mobility restrictions, may find their

Read More »