Workouts + Exercises

Auto Added by WPeMatico

Benefits of Deep Squat Variations to Improve Hip Mobility

Benefits of Deep Squat Variations to Improve Hip Mobility Let’s talk about something that doesn’t always get the attention it deserves—hip mobility. Our hips are essential for almost every movement we make, from walking and bending to standing up with good posture. But as we age, they can tighten up, leading to stiffness, discomfort, and even a greater risk of falls. The good news? You don’t have to accept stiff, achy hips as an inevitable part of getting older. One of the most effective ways to maintain hip flexibility and strength is by incorporating deep squat variations into your routine. Now, I know what you might be thinking: “Deep squats? That sounds tough!” But don’t worry—I’m here to guide you through simple, approachable variations that can work for any fitness level. Whether you’re aiming to improve balance, strengthen your pelvic floor, or just move more freely in daily life, adding deep squat variations—like the primal squat (also called the yogi squat)—to your workouts can be a game-changer. From the view of a personal trainer and a woman who is turning 60 (yes – that is me!), this is why these movements matter and how you can start incorporating them today to keep your hips healthy. Why Deep Squat Variations Matter for Women Over 50 Staying mobile and active is more important than ever as we age. If you’ve noticed that simple movements—like squatting down to pick something up—feel harder than they used to, you’re not alone. What’s interesting is that deep squats have been a natural part of daily life in many cultures for centuries. In parts of Asia, Africa, and among indigenous communities, people rest in deep squats for everything from cooking to socializing. It’s a posture that helps maintain mobility in the hips, knees, and ankles—joints that are crucial for maintaining independence as we get older. Unfortunately, in modern Western cultures, we’ve traded squatting for sitting—and our bodies have adapted by becoming less mobile. Over time, that stiffness adds up, making basic movements harder and riskier. Here’s a sobering truth: According to the CDC, falls are the leading cause of injury and death in older adults, and women are especially at risk. Around 75% of all hip fractures happen to women, and tragically, about 1 in 5 older adults who suffer a hip fracture die within a year due to complications like infections or loss of mobility​. But here’s the empowering part: deep squat variations can help prevent that kind of decline by building strength, improving balance, and keeping your joints functioning well. It’s never too late to get started—and it’s one of the best gifts you can give your future self. The Role of Hip Mobility in Aging Your hips are involved in almost everything—getting out of a chair, walking up the stairs, playing with your grandkids, or just standing tall with good posture. When hip mobility declines, daily movements become harder and can even lead to balance issues or falls. But here’s where deep squat variations come in. By practicing these movements regularly, you can keep your hips mobile, your muscles strong, your joints happy, and your body moving with ease. How Deep Squats Help Deep squats aren’t just about improving flexibility—they also: Strengthen the muscles around your hips Improve range of motion Engage your core, legs, and pelvic floor Promote better posture When done correctly, deep squat variations—like the yogi squat—can help you move with more confidence. Whether you’re getting up from the floor, picking something up, or simply trying to feel less stiff throughout the day, these exercises are a must. Common Concerns About Deep Squats I hear a lot of hesitation from women when I mention deep squats so let’s address some common concerns: “I have knee pain—can I still squat?” Yes! Squatting itself isn’t the problem—poor form is. Modifications like a chair-assisted squat or wall-supported squat hold can help ease into deeper movements without pain. I always say in all my workouts, “no shame in the modify game.” “I’m not flexible enough for deep squats.” That’s exactly why you should start! Flexibility improves with practice. Small progressions lead to big gains. “Aren’t deep squats bad for my joints?” Actually, research shows that primal squats and yogi squats, when done with proper form, can strengthen your joints and improve function. 8 Deep Squat Variations for Improved Hip Mobility All of these variations are bodyweight squats that you can do anywhere, anytime. Do a few of these daily to help improve mobility. Work up to doing all of them in a row.  1. Basic Yogi Squat (a.k.a. Primal Squat) This is the foundational deep squat variation that promotes ankle, knee, and hip mobility. It’s also a natural resting position in many cultures. (It’s even more challenging barefoot.) Exercise Instructions: Start with your feet slightly wider than hip-width apart, toes turned out just a bit. Lower your hips down toward the floor, keeping your heels grounded and your chest lifted. Bring your hands to heart center and press your elbows gently into your inner thighs to open your hips. Hold here, focusing on your breath and posture. Stay for 20–30 seconds or as long as feels good. 2. Yogi Squat with Hip Rocks This variation adds gentle movement to help open the hips and loosen up tension through the pelvis and lower back. Exercise Instructions: Set up in your basic yogi squat position. With your hands in prayer at your chest or resting lightly on your thighs, gently shift your weight from side to side. Rock slowly, pressing one knee out at a time and allowing the hips to sway side to side. Continue for 30–45 seconds, breathing deeply and keeping your chest upright. 3. Deep Squat with Single Knee Taps This movement builds strength and stability through your core and hips, while challenging balance and control. Exercise Instructions: Lower into your deep yogi squat. Keeping your chest lifted and hips low, gently tap one knee to the ground (or just toward the ground if you can’t touch). Place your hands on the floor for balance if needed. Return to the center and switch sides. Alternate for 6–8 reps per side. Keep the movement slow and controlled—this one

Benefits of Deep Squat Variations to Improve Hip Mobility Read More »
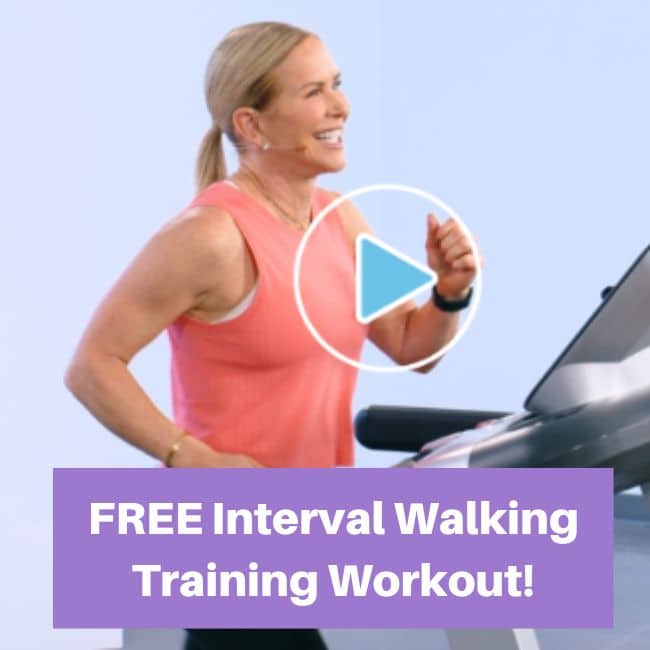
Interval Walking Training: A Smart Way to Burn Fat After 50

Interval Walking Training: A Smart Way to Burn Fat After 50 Let’s be real—there are a lot of women in midlife who are not looking to jump, sprint, or crush burpees anymore. And guess what? You don’t have to. If traditional HIIT feels a little too intense or your joints are saying “no thanks,” you’re not alone. That’s exactly why I fell in love with Interval Walking Training (IWT). It’s walking—with purpose. You alternate between brisk and moderate paces, and suddenly, your daily walk becomes a fat-burning, heart-boosting workout that actually feels doable. No fancy equipment. No pounding. Just results. Don’t get me wrong… HIIT training is great for all ages depending on your fitness level. But if jumping and sprinting isn’t your thing, you might just find that IWT becomes your new BFF. As a personal trainer and a middle age woman, IWT has become something I do weekly! What Is Interval Walking Training (IWT) Think of IWT as the best of both worlds: the ease and accessibility of regular walking with the fat-burning, heart-pumping benefits of interval training. It’s simple—you alternate between periods of faster-paced walking and slower, more moderate recovery walks. You’re still walking (yay for joint-friendly movement!), but you’re strategically pushing your pace to boost your fitness and results. Here’s a beginner-friendly example of what IWT could look like: Warm-up: 3–5 minutes at an easy pace Intervals: 1 minute of brisk walking (a pace where talking becomes challenging), followed by 2 minutes of moderate walking (where chatting feels effortless) Repeat the cycle for 20–30 minutes Cool-down: 3–5 minutes of relaxed walking That’s it! Just walking with an extra push. Keep reading to get a FREE WORKOUT with me below! Benefits of Interval Walking Training Interval walking offers a powerful yet joint-friendly way to boost metabolism, improve cardiovascular health, and enhance endurance—making it an ideal fat-burning workout for women over 50. Let’s explore some of the top benefits! 1. Low-Impact, High-Reward Walking is already one of the most accessible and sustainable forms of movement out there. Add in intervals, and you’ve got a recipe for better heart health, calorie burn, and endurance—without straining your knees, hips, or back. If you’ve got cranky joints (hello, menopause-related joint stiffness), IWT is a game-changer. It keeps you moving without beating up your body. 2. Boosts Cardiovascular Health Alternating between faster and slower paces challenges your heart and lungs in the best way. It’s been shown to improve something called VO2 peak—which is just a fancy term for how efficiently your body uses oxygen during exercise. And guess what? A better VO2 peak = better overall endurance and longevity. 3. Burns More Calories (Yes, Even After You’re Done!) Here’s the bonus of interval-based exercise: the afterburn effect, or what science calls Excess Post-Exercise Oxygen Consumption (EPOC). Your body continues to burn more calories even after the workout ends as it works to restore itself. That’s efficient training! 4. Improves Strength and Mobility That burst of brisk walking isn’t just cardio—it’s functional movement. It recruits your leg muscles, glutes, core, and stabilizers to support balance and power. This kind of movement helps you move through life with confidence, whether you’re chasing grandkids, walking up hills, or hauling groceries. Add my favorite flexibility exercises and my top mobility exercises to boost your wellness even more! 5. Easy to Modify and Progress Whether you’re just starting out or already logging steps every day, IWT meets you where you are. You can increase intensity by making your fast intervals a little longer, walking hills, or even adding a weighted vest (when you’re ready!). Explore how I use a weighted vest during walks, and my top tips for burning more fat while walking to boost your workouts! How To Start Interval Walking Training Getting started is simple. You don’t need to wait until Monday or buy a thing—just lace up your shoes and go. Here’s how to make IWT work for you: Start slow: Try 30 seconds of brisk walking followed by 1–2 minutes of slower recovery. Warm-up and cool-down: Spend 5–10 minutes at an easy pace before and after to prep your body and avoid stiffness. Find your “fast”: It’s not a run—it’s just a walking speed that makes conversation feel slightly difficult. Think “power walk,” not “Olympic sprint.” Use a watch or app: A simple timer, fitness tracker, or walking app can help you stay on track. I use the stop watch on my iPhone. Stick with it: Aim for 2–3 IWT sessions per week, each lasting approx.15–30 minutes. Consistency is where the magic happens. Wear proper footwear: A good pair of walking shoes makes a difference over time. I personally like good arch support and extra cushioning. These are the guidelines I use to choose the best walking shoes! Adapting Interval Walking Training to Your Fitness Level One of the best things about IWT is that you can adjust it to meet your needs. Here are some general guidelines to get started at your level. Beginner: Stick with shorter fast intervals (30 seconds to 1 minute) and longer recoveries. Focus on effort, not speed. Intermediate: Try a 1:1 ratio of fast to slow (1 min fast, 1 min slow), or walk on an incline for added challenge. Check out these amazing benefits of incline walking for middle aged women! Advanced: Walk longer fast intervals and shorten recovery time. Add a weighted vest or bodyweight moves during recovery walks (think lunges or arm circles). Why Interval Walking Training Works for Women Over 50 As someone who has lived through pregnancy, perimenopause, and post menopause—and worked with thousands of women over the years—I know firsthand that consistency trumps intensity. Walking is something most of us enjoy, and that means we’re more likely to stick with it. IWT lets us take something we already love and simply level it up. It’s fun. It’s efficient. And it meets you where you are. Whether you’re dealing with joint pain, rebuilding fitness, or just want something that feels doable, IWT delivers. Interval walking training is proof that walking doesn’t have to mean

Interval Walking Training: A Smart Way to Burn Fat After 50 Read More »

How Pilates Changed My Body (& Why I Got Certified)

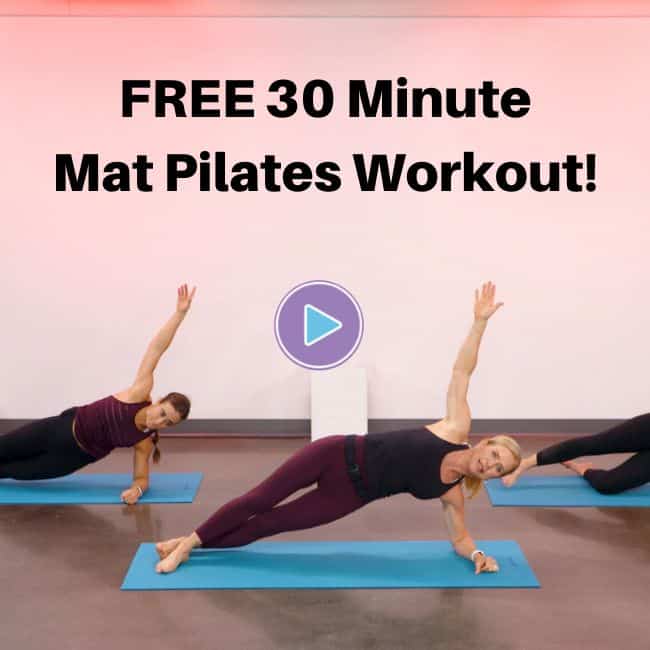
How Pilates Changed My Body (& Why I Got Certified) Pilates changed my body in ways I never expected—stronger core, better posture, and a whole new appreciation for movement. I’m a journalist by degree, but my career took a different path—straight into the world of fitness. Sharing knowledge, helping people understand their bodies, and making sense of health and wellness has always been in my DNA. After my third child, I noticed a significant separation in my abdominal wall. As a fitness professional, I understood what had happened—diastasis recti. What I didn’t expect was how it would affect me. My core muscles felt weaker, my lower back ached more, and I realized I needed a new approach to regain control of my body. Enter: Pilates. I’m going to walk you through my journey with Pilates, so you can see how powerful it might be for you too! My Pilates Misconception To be honest, I never saw myself as the “Pilates type.” I pictured ballerinas with long lean muscles and effortless flexibility, and that was not me. But, what I did know was that Pilates was all about core strength, and that was exactly what I needed. Over time, I’ve come to see how unfortunate it is that Pilates is often marketed as a way to achieve a “long, lean” look. Yes, it will help sculpt your muscles. But that couldn’t be further from the real magic of Pilates. Pilates isn’t about looking a certain way—it’s about moving well for life. It’s for every body—every gender, race, age, and ability. You see, Pilates is about body awareness, core engagement, and coordinating movement with breath. It’s about learning how your muscles work together and activating those deep stabilizing abdominal muscles that support you in everything you do. That’s not something you can rush—it takes time, practice, and patience. My Journey to Pilates Certification As is typical for me, once I experienced the power of Pilates firsthand, I wanted to share it with others. I decided to get Pilates certified—first in Mat Pilates and then in Reformer Pilates. The process of becoming a Pilates instructor took a full year. Learning all the precise movements, breath patterns and small little tweaks. It’s graceful yet powerful. It’s like a form of physical therapy in my mind. It transformed not only how I moved in Pilates class but also how I approached all of my strength training, cardio workouts, and everyday movement. I started paying attention to my core engagement in every form of exercise I would do from weightlifting to kickboxing. It became about whole body wellness. And, even though my ab separation would always be there to some degree, I was able to strengthen my abs and back muscles, improve my posture, and eliminate my back pain. Fast-Forward 25 Years… Now, decades later, I appreciate Pilates even more. At this stage in life, joint mobility and flexibility are everything. As I always say, “motion is lotion”—when you move your joints through a full range of motion, you stimulate synovial fluid production, keeping them lubricated and pain-free. Osteoarthritis? It’s a common reality after 45, but Pilates can help ease the discomfort by keeping joints mobile and strong. And let’s talk about core strength—it’s the foundation of everything as we age. Pilates strengthens the entire core, not just the abs, but the deep muscles that support your spine and help you move efficiently. The Contrology Concept Joseph Pilates, the creator of this method, originally called it Contrology—the art of controlling your body with precision, coordination, and breath. His famous quote says it all: “In 10 sessions, you will feel the difference. In 20, you will see the difference. And in 30, you’ll have a whole new body.” I will tell you he is right. After about 30 sessions, you’ve mastered the principals and something magical happens. I personally try to do one Pilates class a week. I am not perfect but having that goal makes me accountable to take the time to practice. Sometimes on the mat and sometimes on the reformer! 11 Benefits of Pilates & Why It’s Worth Your Time Mastering the practice of Pilates comes with so many great benefits! Not only will you see gains in core strength, but other areas of your body as well. If I were trying to convince you to start Pilates, here’s what I would tell you: Strengthens Your Core. A strong core supports your spine, improves posture, and reduces back pain. Check out even more core exercises to build strength. Improves Your Posture. Proper alignment prevents aches and pains as you move through life. Better posture makes you look younger too. These posture exercises can also help! Enhances Flexibility and Mobility. Keeping your joints moving smoothly can prevent stiffness and pain. Strengthens Your Pelvic Floor. Using controlled movements and breath patterns, you can improve bladder control, reduce pelvic pain, and support overall pelvic floor health.  Builds Muscle. When using the refomer, the springs provide resistance and will help improve muscle tone and even muscle mass. Reduces Injury Risk. Pilates exercises teach you to move with intention, protecting your body from strains and misalignments. Improves Balance and Coordination. These are key as we age, reducing the risk of falls and injuries. Boosts Body Awareness. You’ll start to notice how you move—and how to move better. Can Decrease Stress. The mind-body connection is powerful. And the rhythmic breathing and focus help calm the nervous system and reduce stress. Complements Other Workouts. Strength training, running, yoga—Pilates makes everything else better. Strengthens Your Bones. The low-impact resistance helps maintain bone density. These osteoporosis exercises will help too! Getting Started: Mat vs. Reformer If you’re new to Pilates, I highly recommend starting with Mat Pilates. I strongly believe before jumping onto a reformer machine, you should build a strong foundation with Mat Pilates. The reformer is a fantastic tool, but without an understanding of Pilates principles, it can become just another piece of equipment. Pilates is about body awareness, core engagement, and coordinating movement with breath. It’s about learning how your muscles work together and activating those deep stabilizing abdominal muscles that support you in everything you do. That’s not something you can rush—it

Read More »

Benefits of Incline Walking for Middle Aged Women

Benefits of Incline Walking for Middle Aged Women Incline walking offers middle-aged women a simple yet powerful way to improve their health by boosting heart health, strengthening bones, burning calories, enhancing mood, and reducing stress, all while fitting easily into a busy lifestyle. As an avid walker, I can’t tell you enough how much I love my daily walks! I was a runner but over the years, I started to trade the high-impact pounding of running (and the hip and back pain that came with it) for something kinder to my joints. But let’s be honest: I still miss that “runner’s high”—that feeling of pushing my heart rate and challenging my body. That’s when I discovered the magic of incline walking! Women ask me all the time: “How can I ramp up my low-impact walks?” Adding incline—whether on a treadmill or by finding outdoor hills—is one of the best ways to challenge your body while keeping it gentle on your joints. It’s like turning your walk into a power-packed workout! Plus, incline walking isn’t just about burning calories; it’s a multitasking activity that builds strength, improves your heart health, and even lifts your mood. Physical Benefits of Incline Walking for Women Over 50 When you introduce incline walking into your routine, you’re not just walking—you’re leveling up your workout in a big way! Here’s how adding some elevation can transform your fitness and health. Check out these health benefits of incline walking: 1. Low-Impact Exercise for Joint Health Incline walking is a joint-friendly workout that delivers big benefits without the pounding. As we age, protecting our joints becomes a priority. Walking uphill helps strengthen the muscles around your knees and hips, which adds stability and support—key for avoiding injuries. 2. Strengthens Bones and Prevents Osteoporosis One of the lesser-known perks of incline walking is how it supports bone health. The uphill motion creates resistance and puts more force through the bones than walking on a flat surface. This helps build and maintain bone density, reducing the risk of osteoporosis. It’s like weightlifting for your legs! If bone health is a concern for you, check out these 6 early warning signs of osteoporosis to watch for. You can also use my 10 osteoporosis exercises to start strengthening your bones! 3. Improves Cardiovascular Health Walking at an incline gets your heart pumping without the need for running or intense cardio workout. By challenging your cardiovascular system, you can improve heart health and stamina—both vital for women in midlife and beyond. And if you add little spurts of incline (aka hills) to your walks, it mimics high intensity interval training (HIIT) pushing your heart way up and then allowing it to come down a bit before doing it again. All great for us midlife women! Some sources claim that middle aged women should avoid HIIT, but I actually disagree. Here are 5 benefits of HIIT workouts during menopause! 4. Boosts Mood and Reduces Stress If you’ve ever felt a sense of accomplishment after tackling a hill, you know the mental health benefits are just as powerful as the physical ones. Incline walking releases endorphins, those feel-good hormones that can help reduce stress and lift your mood. 5. Calorie-Burning Powerhouse Walking on an incline isn’t just a calorie-torching workout—it’s a heart-pumping powerhouse! Studies show that walking briskly at a 5–10% incline can elevate your heart rate to levels comparable to jogging on flat terrain. This means you can get the cardiovascular benefits of running without the high-impact pounding on your joints. For example, a 150-pound person walking at 3.5 mph on a 5-10% incline can burn around 350 calories in an hour compared to just 250 calories on flat ground. And as your incline increases, so does your calorie burn—making it an efficient way to maximize your time and effort. 6. Builds Muscle Strength and Tone Uphill walking is essentially strength training in disguise! Unlike flat walking, incline walking targets your glutes, hamstrings, calves, and even your core. These muscles engage more intensely to help you push yourself upward, leading to increasing muscle and definition. In other words – it’s more of a lower body strength workout that flat land. Over time, this added resistance can help build lean muscle mass, which also gives your metabolism a boost since muscle burns more calories at rest than fat does. 7. Improves Balance and Coordination When you’re walking uphill, your body has to stabilize itself more than it would on flat ground. This requires your core and smaller stabilizing muscles to engage, helping to improve balance and coordination. This benefit is especially important as we age because maintaining good balance reduces the risk of falls—a major concern for women over 50. Incorporating incline walking into your routine helps you stay steady on your feet, whether you’re hiking a trail (check out rucking!), walking down a flight of stairs, or simply navigating everyday life. 8. Increases Endurance and Stamina If you’re looking to build your cardiovascular endurance and overall stamina, incline walking is your go-to workout. Walking uphill forces your heart and lungs to work harder to deliver oxygen to your muscles, which strengthens your cardiovascular system over time. It’s always humbling to me when I add in hills. My heart rate goes way up when I walk on an incline more than I expect and like I said above, it gets my heart rate into my aerobic zone I like to call working: comfortably hard. I am able to still talk a little but I am definitely breathing heavy through my mouth. Learn your ideal zone using my Target Heart Rate Zone Calculator! This endurance boost translates to other areas of your life, making activities like climbing stairs, carrying groceries, or keeping up with your grandkids feel easier. And the best part? Unlike running or high-impact cardio, incline walking delivers these stamina-building benefits without putting unnecessary stress on your joints. How to Incorporate Incline Walking into Your Routine Ready to experience all the amazing benefits

Benefits of Incline Walking for Middle Aged Women Read More »

7 Bubble Butt Exercises For A Complete Booty Workout

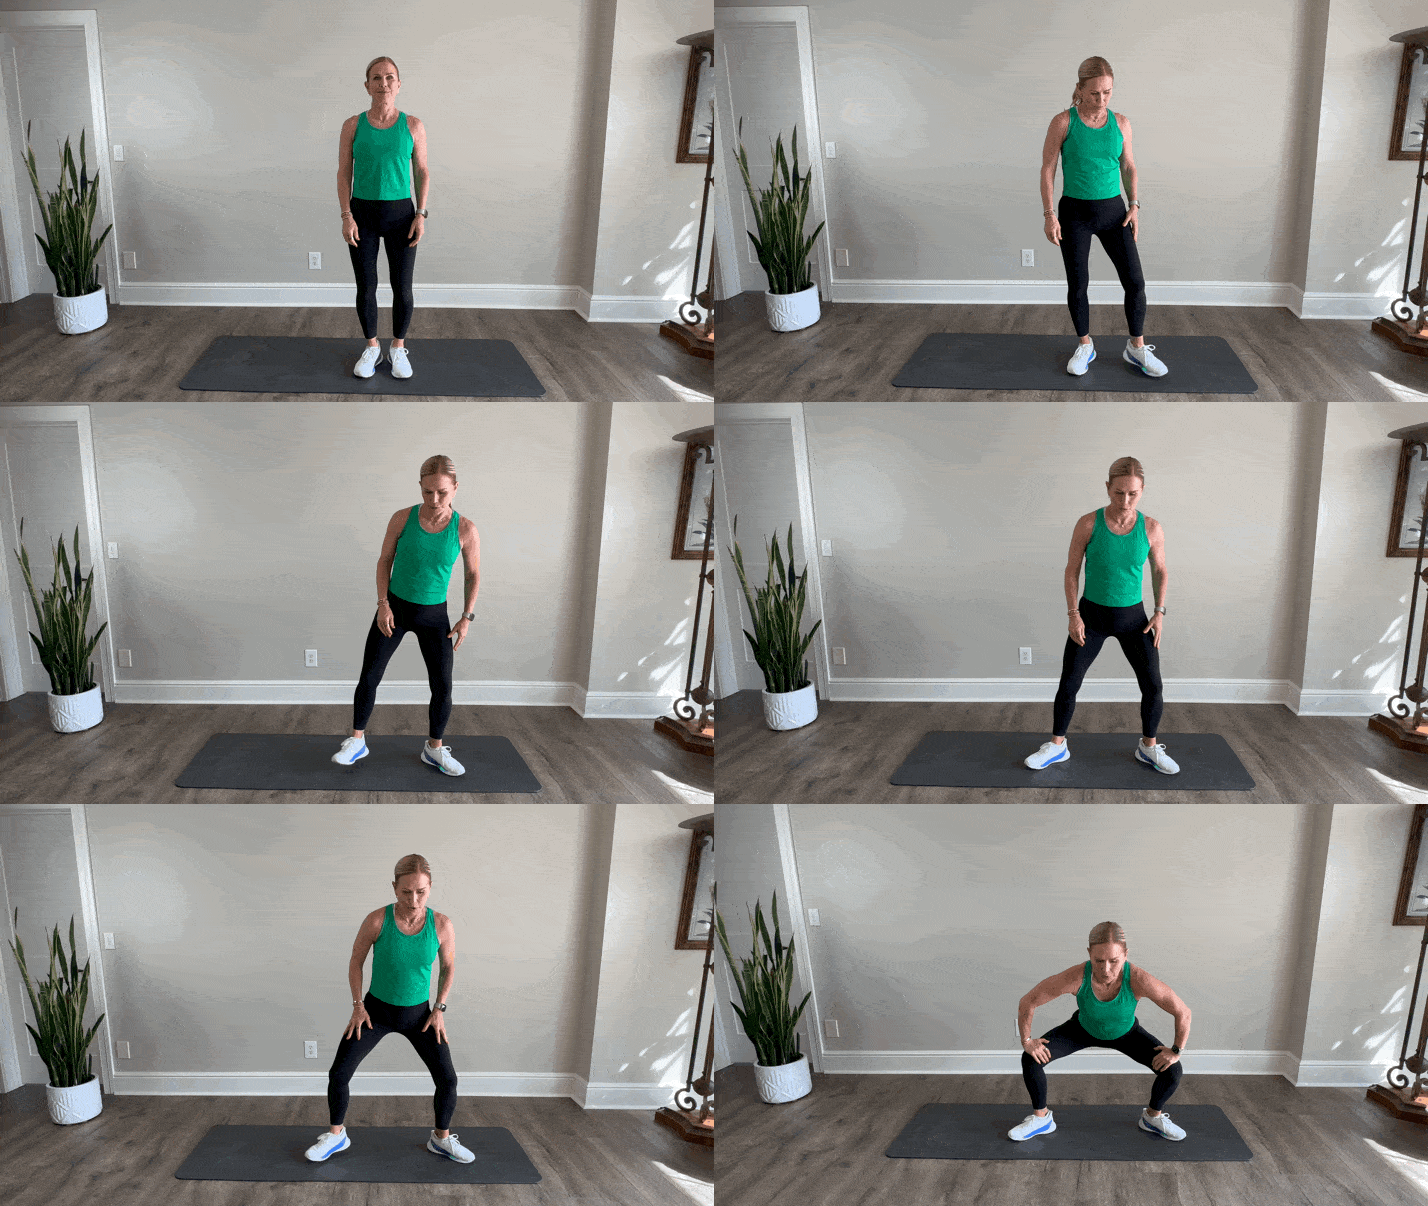
7 Bubble Butt Exercises For A Complete Booty Workout Boost your glutes with these 7 bubble butt exercises. Discover a complete booty workout to sculpt, tone, and strengthen your glutes for a firmer backside. Perfect for all fitness levels! Bubble butts may come and go as a trend, but a strong, lifted rear end is timeless—and essential for your health. As a 59-year-old personal trainer, I can tell you that your glutes aren’t just about looks. These powerhouse muscles are crucial for posture, mobility, and overall strength. In this guide, I’ll walk you through 7 highly effective butt exercises that target your glutes and help you achieve a firm, toned booty—all from the comfort of your home. These are simple yet powerful bodyweight moves, with options to incorporate a resistance band for an extra burn. You can use these booty exercises into your existing workouts, or do them all together for one killer, butt-kicking workout! Bubble Butt Workout Directions If you do them all together as a “bubble butt” exercises program, perform 10-12 repetitions of each movement and do 2-3 sets of each. These moves are all bodyweight except for the resistance band butt blaster—but this move can be modified without the resistance band, too. Basic Squat The basic squat is an effective lower body move that strengthens all leg muscles including glutes, quads, hamstrings, and calves. You can stick to bodyweight at first, and add additional resistance as you build muscle strength. How To Do A Basic Squat Stand tall with your feet hip-distance apart. Your hips, knees, and toes should all be facing forward. Bend your knees and extend your buttocks backward as if you are going to sit back into a chair. Make sure that you keep your knees behind your toes and your weight in your heels. Rise back up and repeat. Skaters Skaters are a cardiovascular exercise where you perform a lateral jump to get your heart rate up, strengthen your legs and improve stability and balance. These start as a single leg squat and then you laterally hop over to the other side. The strengthening part of this exercise is mostly focused on quads and glutes and is a great butt exercise. An added benefit to this move is the lateral movement that strengthens of your medial glute and outer thigh.  How To Do Skaters Start with your legs slightly wider than shoulder-distance apart and arms at the sides. Bring one leg behind at a slight angle into a reverse lunge. The front knee will come to a 90-degree angle. Swing the arms in front of that bent knee and leap the back leg forward to switch sides in a skating motion—arms alternate as you switch sides like a speed skater. Squat Jumps Squat jumps are a powerful, plyometric exercise that strengthens your entire lower body and increases your heart rate for a significant calorie burn. This exercise targets your quads, hamstrings, glutes and calves while also toning the ab and back muscles. How To Do Squat Jumps Start standing with feet hip-distance apart and lower into a squat position by bending the knees. Keep the spine straight, chest lifted, and knees behind toes. Arms are in front of the chest for balance. Jump straight up and swing arms overhead. Return to squat. Resistance Band Butt Blaster The resistance band butt blaster is a unique way to strengthen your glutes without having to do any squats or lunges or even put body weight on your knees. This exercise has 1990 vibes. We used to do fire hydrants and kick backs in aerobic class all the time! The resistance band comes with so many benefits, and provides a unique opportunity to find new ways to complete exercises that might otherwise be impossible. It’s a great bubble butt exercise! How To Do Resistance Band Butt Blasters Kneel on the floor and wrap band under the right foot, and place hands down under shoulders holding handles against the floor. Lift right knee off the floor slightly and push the right foot back to extend leg straight against the band, squeezing your glute. Release slowly, bringing the knee back into a bent position. Continue for desired reps and switch feet. Note: You don’t have to use a resistance band if you don’t have one; it can easily be modified as bodyweight-only. Glute Bridges The glute bridge is a simple exercise with powerful results. It helps you build strength, improve posture, and sculpt a toned, firm posterior without stress to the knees. How To Do Glute Bridges Lie on back with bent knees hip-distance apart, and feet flat on mat stacked under the knees. Engage the core and squeeze your glutes as you lift your hips to a bridge. Hold, squeezing tight, and return to the mat with control. Repeat for the desired number of reps. Plié Squats A plié squat is one of the best butt exercises that strengthens the legs, glutes, and calves and increases the range of motion in your hips. You can channel your inner ballerina when doing this move. This lower body move targets the thighs (toning the inner thighs,) hamstrings, and glutes (the strongest and most powerful muscles in your butt.) How To Do Plié Squats Stand with feet slightly wider than shoulder distance apart and toes turned out into a 45-degree angle. Bend knees and lower your torso, keeping your back straight and abs tight. Squeeze your glutes and come to a standing position. Cross Behind Lunges The cross behind lunge is a great version of a lunge that focuses on strengthening your glutes, quads, hamstrings and calves. It lets you sink into a deep range of motion to really shape your booty and sculpt your thighs, and can be done with bodyweight alone, or added weight. Bonus! They’re low impact and a great way to get an awesome rear end. How To Do Cross Behind Lunges Begin standing with your feet hip-distance apart. Transfer your body weight onto your left leg and cross your right foot behind your left leg keeping your

7 Bubble Butt Exercises For A Complete Booty Workout Read More »

10 Stretches to Improve Flexibility At Any Age

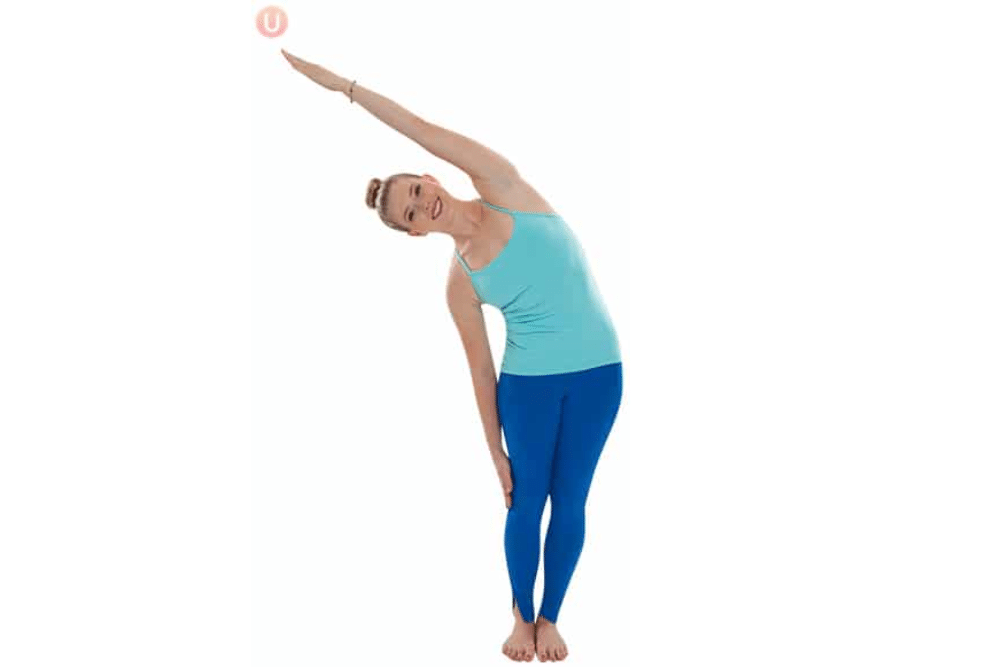
10 Stretches to Improve Flexibility At Any Age Flexibility is key to feeling strong, mobile, and energized at any age. As we get older, maintaining a regular stretching routine becomes even more essential to improve flexibility, support joint health, prevent stiffness, and reduce the risk of injury. Whether you’re in your 40s, 60s, or beyond, incorporating stretches into your daily routine can make a world of difference in how you move and feel. You’ll enjoy health benefits far beyond better flexibility, like: Improves your performance in physical activities and everyday tasks Decreases your risk of injury Helps relieve and prevent upper and lower back pain Improves posture Gives a more youthful appearance (think shuffling or hunching over!) Below I’m giving you 10 effective flexibility stretches that anyone can do to improve flexibility, regardless of experience or age. Each stretch is designed to improve flexibility in a gentle yet effective way, so you can ease into them at your own pace and reap the benefits over time. Ready to loosen up? Flexibility Stretch Routine Instructions Try each of the below stretches, holding for about 30 at a time and then take a deep breath and repeat. (Perform on each side if unilateral). Make sure to breathe slowly and relax as much as possible. Do not stretch to the point of pain. 1. Standing Side Bend The standing side bend stretches the obliques, lats, and intercostal muscles along the sides of your torso, and improves flexibility through your entire side body. This stretch also encourages better posture by opening up the spine and helps release tension from your lower back. For even more help standing taller, try these posture exercises! How to Perform a Standing Side Bend Stand tall with feet and legs together and reach both arms straight up overhead as you inhale. Lower your right arm down the right side of your body and exhale as you lengthen the left arm over the head, bending body gently to the right. Inhale to return arms overhead to center and exhale as you repeat on the left side. 2. Pyramid Pose This deep hamstring and calf stretch lengthens the muscles at the back of your legs, promoting greater flexibility and mobility in your hips and hamstrings. Pyramid pose also stretches the lower back and helps enhance balance and stability. I also recommend adding these balance exercises for seniors to your weekly routine! How to Perform Pyramid Pose From a standing position, step the inside of your left foot directly behind your right foot about 6-8 inches, as if you are standing on a balance beam. Back foot is angled. As you inhale reach both arms high overhead, lengthening your spine. As you exhale slowly reach hands down to shin or, if you are able, the floor. You can slightly bend the front knee if needed. Let your chest rest over your front leg and relax the back of your neck.  Breath slowly as you stretch your hamstring. Hold 30 seconds and switch sides. 3. Yogi Squat The yogi squat opens up the hips, inner thighs, and groin, helping to increase hip flexibility, which is essential for a full range of motion in everyday movements. This stretch also improves strength and stability in the lower body. How to Perform a Yogi Squat Start with your feet slightly wider than shoulder distance apart and your toes turned out. Bend your knees and use your leg muscles to slowly lower your hips to the floor. Go as deep as you can while keeping your heels on the floor. Elbows pressing into knees and knees hugging into elbows the upper and lower body stay active. Straighten legs to return to standing. 4. Downward Dog A staple yoga pose, downward dog stretches the hamstrings, calves, and shoulders, while lengthening and decompressing the spine. This pose supports overall flexibility, particularly in the back and legs, and can help ease tension throughout the body. For even more leg relief, check out my favorite leg stretches for tight muscles! How to Perform Downward Dog Begin in a kneeling position on your mat with hands directly under shoulders, fingers spread wide. Tuck your toes under and engage your abdominals as you push your body up off the mat so only your hands and feet are on the mat. Press through your hands moving your chest gently toward your thighs and your heels gently toward the floor. Relax your head and neck and breathe fully. 5. Cat Pose This gentle spine stretch increases flexibility in the back, releasing tension from the spine and helping to mobilize each vertebra. It’s an excellent warm-up pose for improving overall spinal flexibility. How to Perform Cat Pose Begin on your hands and knees with hands directly under shoulders and knees directly under hips. Start with your spine in a “neutral” or long position, then slowly tuck your tailbone and lower the crown of your head so your back gently rounds. Draw your naval up to your spine and breathe gently as you hold the stretch. 6. Cow Pose Paired with cat pose, cow pose enhances flexibility in the back and neck. It also stretches the chest and helps improve posture by counteracting forward rounding in the shoulders. How to Perform Cow Pose Begin on your hands and knees with hands directly under shoulders and knees directly under hips. Start with your spine in a “neutral” or long position, then gently lift your heart and tailbone so your back gently curves downward. Be sure to focus on the lifting – do not press your back downward. Let the curve happen naturally. Look slightly upward with a relaxed neck and breathe gently. 7. Runner’s Lunge This deep lunge stretches the hip flexors, quads, and hamstrings, promoting hip flexibility and range of motion. It’s particularly beneficial for those who sit for extended periods, helping to open up tight hips. If hips are your problem area, you might also benefit from these resources! 9 Hip Bursitis Exercises Hip Strengthening

10 Stretches to Improve Flexibility At Any Age Read More »

7 Plantar Fasciitis Stretches to Soothe Heel Pain

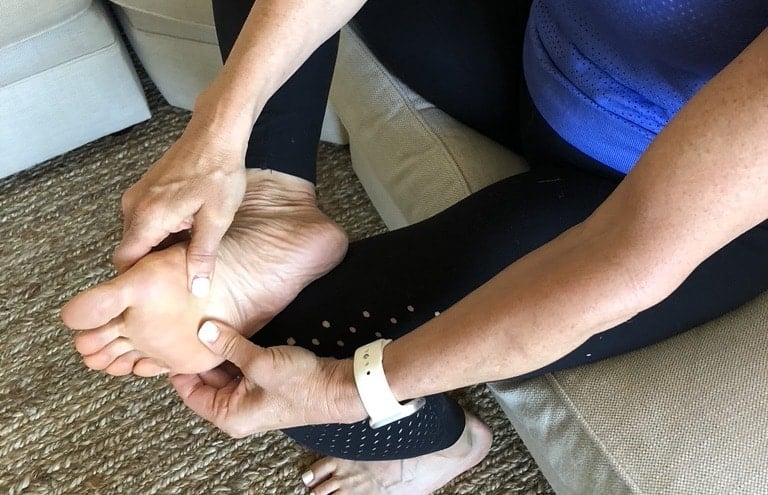
7 Plantar Fasciitis Stretches to Soothe Heel Pain Discover effective stretching exercises for plantar fasciitis relief! Learn gentle, targeted stretches to reduce heel pain, improve flexibility, and support recovery, helping you stay active and pain-free. Plantar fasciitis can be a painful roadblock in daily life, especially for those who love staying active. But the good news is, stretching can be a powerful tool for relief! The stretches below will help loosen tight muscles, increase flexibility, and support your recovery journey. Whether you’re dealing with occasional flare-ups or chronic discomfort, adding these exercises to your routine can make a big difference! Regular and consistent stretching is going to be key for any plantar fasciitis treatment plan. It is best to do each exercise not only daily but in some cases several times a day. The good news is they can be spread out throughout the day. Here’s a sample of how to easily work them into your daily routine. Make sure you do these for BOTH of your feet, even if you only have pain on one side. Plantar Fasciitis Stretches for Before You Get Out Of Bed These plantar fasciitis focused stretches are best to do before you even get out of bed! Add these into your morning wake up routine for better relief! Hand Stretch & Massage Before you get out of bed, use your hands to gently pull the top of your foot back stretching it very lightly. Then take your thumbs and, starting in the middle of your foot pull each thumb toward the outer edges of the foot almost like you are trying to get rid of a wrinkle. Do this in 3 or 4 different places at the bottom of your foot. Alphabet Game Next, sit up in bed and hang your legs over the side to play the alphabet game with your foot. Point your big toe and draw the alphabet from A to Z with each foot to strengthen and stretch the foot and calf. Roll It Out After the alphabet game, slowly stand up and place one foot on a massage ball, tennis ball, or frozen water bottle and slowly roll it across the bottom of the foot starting at the heel. Once you reach your toes go back slowly in the other direction. Repeat 3 times for each foot. Choosing a frozen water bottle gives you the bonus of reducing inflammation while the rolling massage helps you get prepared to step and move. Plantar Fasciitis Stretches for Before or After Lunch Incorporate these stretches for plantar fasciitis either before or after your lunch. They are perfect for the midday break. Step Stretch Find the nearest set of stairs and stand on the bottom step. Put the ball of the foot you want to stretch on the step and let the heel drop down for 30 seconds. Switch to the other foot and do the same. Stretch each foot 3 times. Heel Press Stand facing a wall and place both hands against the wall. Step one foot back and press the heel of that foot firmly into the ground keeping your leg straight. Move your hips forward until you feel a stretch in your calf. Hold 30 seconds. Switch legs and repeat. Try 3 times per foot. Don’t bounce! Remember that tight calves are often the origin of heel pain. Plantar Fasciitis Stretches for Just Before Bed Add these plantar fasciitis stretches to your bedtime to routine to finish of you day of exercises! Washcloth Exercise Sit on a chair or the edge of your bed with a washcloth on the floor. Keep your heel on the ground and lift the washcloth with your toes. Release and repeat 10 times. Repeat on the other foot. Seated Straight Leg Stretch Grab a long band and or towel and sit down on the floor with your legs straight out in front of you. Place the band or towel around one foot, keeping that leg straight. Gently pull back on the band or towel holding for 30 seconds and breathing gently. Switch to the other floor. Stretch each side 3 times. Additional Plantar Fasciitis Treatments In addition to performing the above stretches for plantar fasciitis, you may want to add on some additional treatments. When plantar fasciitis is treated early, most people resolve their pain with conservative treatments within six weeks. However, sometimes it takes a few treatments stacked on top of one another. Here are some tried and true treatment options that can be utilized to relieve plantar fasciitis pain: Ice Just like with other injuries, the inflammation of plantar fasciitis can be helped with ice. The best way to do this is to use a frozen water bottle and roll it back and forth under your foot for about 10 minutes, several times a day. Do it at meals, under your desk while you work, or even at night when you watch TV. Be consistent. Massage No, you don’t have to pay for it. While you are sitting, roll a tennis ball around under your foot to massage the area. It works like a foam roller for your foot. Of course, the frozen water bottle also serves this purpose. Medication Over-the-counter anti-inflammatories can help. Ibuprofen or Naproxin are good bets to reduce inflammation and provide pain relief. Rest Your feet need time off from whatever is causing the issue. Stop or cut way back on high-impact exercises. New Shoes What a great prescription, huh? Most people wear their workout shoes for far too long before replacing them. Remember that the plantar fascia muscle, which runs along the bottom of your foot, helps support the arch of your foot. So it makes sense that if you do not wear shoes with proper support you are putting extra wear and tear on that fascia. This leads to the muscle being strained and small tears can be created. Also, many find relief by wearing supportive shoes or shoe inserts (more on that below) very regularly.

7 Plantar Fasciitis Stretches to Soothe Heel Pain Read More »

12 Best Yoga Poses for Back Pain

12 Best Yoga Poses for Back Pain If you are experiencing back pain, adding a yoga practice into your day is essential to feel better! By incorporating these 12 best yoga poses for back pain will help reduce pain as well as stress. Back pain affects all ages and sadly, 85 percent of the U.S. population suffers from back pain. It’s the second most common reason for seeing a doctor in the United States, and exactly why I have a whole guide dedicated to back pain exercises. What you may not know, is that a consistent yoga practice may reduce your back pain and prevent additional future injuries as well. Incorporate the following 12 yoga poses for back pain into your weekly exercise routine, and enjoy the benefits! Yoga for Back Pain Routine Instructions: Start with some deep breathing exercises in and out of the nose called pranayama. Think of a slight lengthening as you inhale and a releasing as you exhale. Complete each of the 12 moves for 3-5 rounds (depending on your individual needs) while continuing this practice of breath awareness throughout each. Do the following pain-relieving yoga sequence two to three times a week to start feeling back pain relief. Grab your yoga mat and let’s go! Product Image Product Name Primary Button Gaiam Yoga Block – Soft Non-Slip Surface with Beveled Edges for Yoga, Pilates, Meditation Check Price Gaiam Yoga Mat Premium Solid Color Non Slip Exercise & Fitness Mat for All Types of Yoga, Pilates & Floor Workouts, New Lilac, 5mm Check Price Yoga Mat Non Slip, Hot Yoga Mat(72″X 26″/5mm), Rubber Exercise Mat Check Price Amazon Basics Extra Thick Yoga Mat with Carrying Strap Check Price Amazon Basics Neoprene Coated Hexagon Workout Dumbbell Hand Weight, 3 Pound – Set of 2 Check Price Gaiam Yoga Block – Soft Non-Slip Surface with Beveled Edges for Yoga, Pilates, Meditation Check Price Gaiam Yoga Mat Premium Solid Color Non Slip Exercise & Fitness Mat for All Types of Yoga, Pilates & Floor Workouts, New Lilac, 5mm Check Price Yoga Mat Non Slip, Hot Yoga Mat(72″X 26″/5mm), Rubber Exercise Mat Check Price Amazon Basics Extra Thick Yoga Mat with Carrying Strap Check Price Amazon Basics Neoprene Coated Hexagon Workout Dumbbell Hand Weight, 3 Pound – Set of 2 Check Price 1. Child’s Pose The child’s pose lengthens and stretches the spine while relieving tension in the neck and shoulders. Start on the hands and knees and sit hips back towards the heels. Bring the big toes together and keep the knees together to create support to round the back over the legs and get into the thoracic spine. You can also try using a block under the forehead for more relief. You can come back here as often as needed. 2. Cat and Cow Pose From child’s pose, rise up to hands and knees. For Cow: Lift the chin up and drop the belly to the mat as you look up arching the tail bone upward, then round the spine upward dropping the tailbone down as you look back to the thighs, like a cat-back. Try this a couple of times slowly, wallowing in each pose to feel the stretch, then move with the breath for a few times: inhaling as you move into Cow Pose with the chin and tail bone up, exhale into Cat Pose. Movement with the breath is called vinyasa and this will create some synovial fluid along the spine which will lubricate the back, making it feel more supple. 3. Downward Dog The Downward dog pose lengthens and strengthens at the same time. It’s also a big stretch for the hamstrings which can be the root of back pain. Come on to the balls of the feet and lift the hips up, then release the heels down toward the mat. This is another option to come back to in between poses. Take some time here to pedal the feet, twist the hips, and rock side to side. Down Dog 4. Crescent Lunge On One Knee Crescent lunge helps open up the hips which can significantly impact the back. It’s a great pose for sciatica pain relief. Step right foot forward between the hands. Aim to place the foot right below the knee so the shin is vertical. You can keep your hands on the mat for balance or reach the arms up over your head to lengthen the spine and open the chest. Add a twist: lift your right hand up, with the left hand by the right foot, and rotate the chest into the thigh or upwards. Twists are great for improving spinal range of motion. Repeat on the left side and come back child pose or down dog. 5. Warrior 1 The Warrior 1 pose is an energizing move that creates stability and improves balance. Having better posture can significantly impact and alleviate back pain. Bring the right foot between the hands and bend the right knee, release the back foot down to the mat and lift the body and arms up. Think of bringing the back hip forward so that the hips are aligned. This creates some twists in the low back. Warrior One 6. Triangle This Triangle pose gets into the spinal nerves and strengthens the lower back. Straighten the right leg and reach the right hand forward and down to the right leg. You can make contact above the knee, on the shin, foot, floor, or use a block and place the hand on the block near the front foot. Left-arm is up and the chest is open to the side. 7. Revolved Triangle Revolved triangle is another pose that improves balance with the help of the internal and external obliques. This pose activates the spine! Legs stay the same, switch the arms so the left hand is down toward the right leg and the right arm is reaching up. Repeat on left side. 8. Locust Pose Locust pose will strengthen and elongate all the muscles along the spine. Lie face down on your belly and lift the chest and

12 Best Yoga Poses for Back Pain Read More »