main dish

Auto Added by WPeMatico

9 Healthy Fall Recipes I’m Kind of Obsessed With Right Now

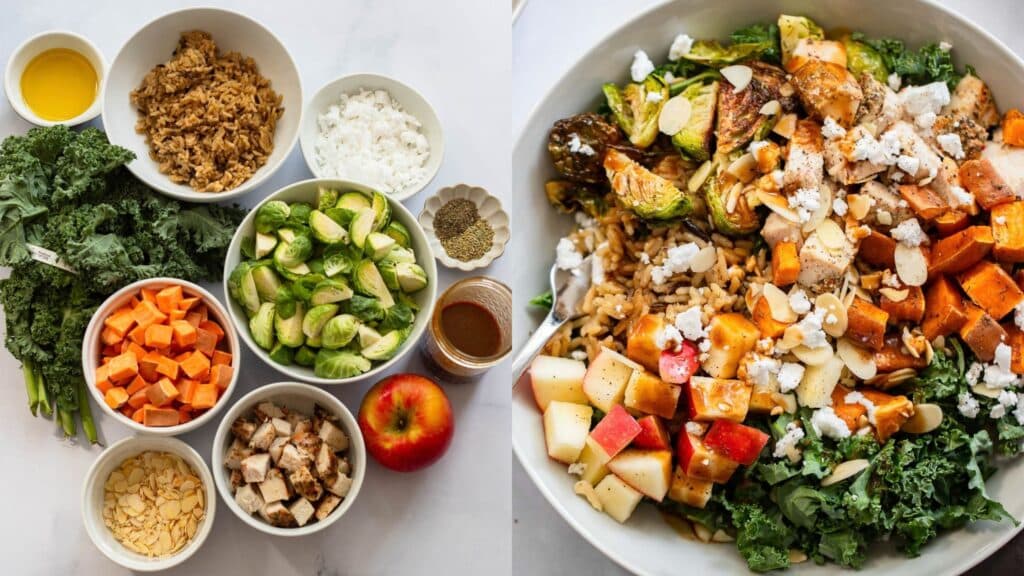
9 Healthy Fall Recipes I’m Kind of Obsessed With Right Now If you walked into my kitchen right now, you’d smell cinnamon, and you’d probably find a pot of something simmering on the stove. Fall does that to me. As a trainer in my 60s who still teaches group fitness every week, I need food that fuels me, not food that feels like a punishment, and fall is the season where “healthy” and “actually delicious” finally stop fighting each other. These are the nine recipes I’m cooking this month. Some are dinners I make on repeat because they’re easy and they freeze well. A few are the pumpkin everything you’ve been waiting for since August. And one is a dessert I will defend until the day I die. No deprivation here, ladies. Just real food, real flavor, and a little protein woven in wherever I can get it. Want every new recipe like these delivered straight to your inbox? Join My Free Weekly Email List! Best Harvest Bowl This is the bowl I reach for when I want dinner on the table fast and I still want it to taste like fall. It’s got that roasted, cozy flavor going on, but it’s built to actually keep you full, not the kind of “salad” that has you raiding the pantry an hour later. I make this one on repeat through October and November. Get the REcipe Healthy White Chicken Chili Is there anything better than a pot of chili going on a Sunday while you get everything else done? I don’t think so. This one is creamy, warming, and loaded with protein, and it’s the kind of dinner that makes the whole house smell like fall the second you walk in the door. Get the recipe Turkey Chili Recipe I make a double batch of this one every single time, because half goes straight in the freezer and half disappears by Tuesday. It’s veggie loaded, it’s lean, and it’s the kind of dinner you can hand to your husband, your kids, or your pickiest guest and everyone finishes their bowl. Get the recipe Low Calorie Southwestern Chicken Soup This is the soup I reach for on the weeks I know I won’t feel like cooking every night. It’s got that smoky, southwestern flavor that makes it feel like a treat, but it’s light enough that a bowl actually feels good, not heavy. Make it once and portion it out for lunches all week. GET THE RECIPE My Favorite Pumpkin Smoothie Pumpkin spice season officially starts the day I make this smoothie, and I’m not apologizing for it. It’s thick, it’s cozy, and it comes together faster than a coffee order. I add a scoop of protein powder to mine most mornings so it doubles as breakfast, not just a treat. GET THE RECIPE Healthy Pumpkin Protein Balls I keep a container of these in my fridge from September through November. Non-negotiable. They’re the thing I grab on my way out the door to teach class, and they taste like a cookie even though they’re built to actually hold you over. GET THE RECIPE Healthy Pumpkin Muffins Two ingredients. That’s genuinely all it takes for these, and I still can’t quite believe how good they are. If you’ve been wanting a pumpkin baking project without an hour of prep and a sink full of dishes, read this twice: two ingredients. GET THE RECIPE Healthy Pumpkin Blondies This is the treat I make when I want something that feels like dessert but doesn’t derail my whole week. Soft, spiced, and just sweet enough. I bring these to every fall gathering and there’s never a single one left on the plate. GET THE RECIPE Healthy Apple Crisp And then there’s apple crisp, the recipe I will defend until I’m 90. Warm apples, a crumbly topping, a scoop of something cold on top if you’re feeling it. This is the dessert that proves healthy doesn’t mean boring, and it’s the one I make when I want the whole house to feel like fall. GET THE RECIPE How I Meal Prep This Whole List for the Week I don’t cook all nine of these in one weekend, that would be a lot even for me. But I usually pick two or three on a Sunday and set myself up for the week. The chilis and the soup are the ones I double, one bowl for dinner, the rest in containers for lunch. The protein balls and the muffins go straight into the freezer in a ziplock, and I pull out what I need the night before. It’s not complicated. It’s just a little planning so that on a Tuesday when I’ve taught two classes and I’m not in the mood to cook, dinner is already done. Fall Pantry Staples I Always Keep Stocked A few things live in my pantry and fridge on repeat once the weather turns, and having them on hand is half the reason these recipes come together so fast. Canned pumpkin (not pumpkin pie filling, check the label) Canned beans, white and black Rotisserie chicken or a batch of shredded chicken I cook ahead Old fashioned oats Protein powder, I always have vanilla on hand for smoothies and baking Cinnamon and pumpkin pie spice Low sodium chicken broth Greek yogurt Keep this list stocked and half of these recipes are a “what’s for dinner” problem solved in twenty minutes. NAKED Vanilla Whey Protein 1Lb, Only 3 Ingredients, All Natural Grass Fed Whey Protein Powder Check Price We earn a commission if you make a purchase, at no additional cost to you. 09/22/2026 03:40 am GMT Fall Recipe Questions I Get All the Time Can I freeze these? Most of them, yes. The chilis, the soup, the protein balls, and the muffins all freeze well. I’d eat the harvest bowl and the smoothie fresh since those don’t hold up the same way. Can I swap the protein in the chili recipes? Go

9 Healthy Fall Recipes I’m Kind of Obsessed With Right Now Read More »
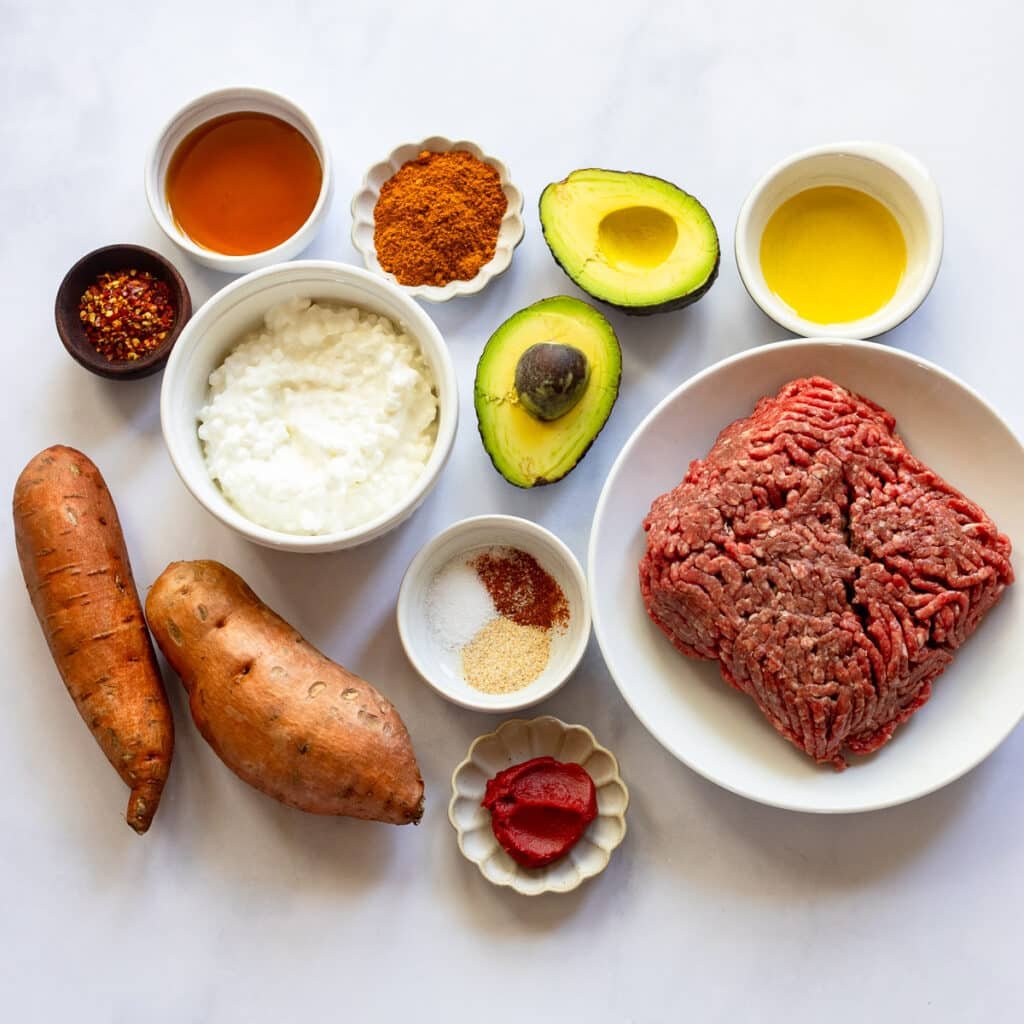
TikTok’s Viral Beef Bowl with Cottage Cheese and Hot Honey

TikTok’s Viral Beef Bowl with Cottage Cheese and Hot Honey This beef bowl with cottage cheese and hot honey is viral for good reason! These delicious bowls with spiced beef, cottage cheese, sweet potato, and avocado are packed with protein and fiber for a satisfying weeknight friendly dinner recipe.  One of the latest recipes to gain viral status on Tiktok is the beef bowl with cottage cheese and hot honey. Honestly, I think part of the hype behind this one is that most (like me) were curious if this unlikely combo of ingredients actually tasted good together and they actually do! These viral bowls feature spiced ground beef, roasted sweet potatoes, creamy cottage cheese, and avocado topped with a drizzle of hot honey. The great thing about these high protein ground beef bowls with hot honey is that they are easy to customize with other ingredients, they’re meal prep friendly and naturally gluten free. If you roast the sweet potatoes in advance, these are a super quick weeknight dinner or work from home lunch option. Want to give them a try for yourself? Read on to find out how to make them. Love cottage cheese? Check out my other high-protein cottage cheese recipes for women! Ingredients for these Viral Hot Honey Beef Bowls  Use these simple and fresh ingredients packed with nutritional value to make this delicious hot honey beef bowls recipe. Be sure to check out the recipe card for the exact amounts of each ingredient you’ll need.  Sweet potato: for four bowls, roast up 2 large sweet potatoes that have been cubed. I don’t normally peel my sweet potatoes before roasting, but you can if you prefer them peeled. If you don’t want to turn on the oven, you can also air fry the potatoes for this recipe. Seasoning (garlic powder, chili powder): for extra flavor, I like to toss my sweet potatoes in some simple seasonings before roasting them. I like garlic powder and chili powder, but you could use a favorite seasoning blend instead. You could also skip this step and just add a bit of salt and black pepper.  Olive oil: you’ll need a bit of olive oil for your roasted sweetened potatoes so they crisp and brown in the oven. If you don’t have olive oil, avocado oil is also a great option for roasting potatoes.  Lean ground beef: I prefer to use 93/7 lean ground beef for these bowls since it’s a bit lower in saturated fat, but use what you have. Tomato paste: adds richness to the cooked beef for this viral recipe. Taco seasoning: you’ll use this to season your ground beef in these bowls.  Cottage cheese: I like to use a low fat cottage cheese but any variety of cottage cheese will work for these bowls.  Avocado: adds a pop of color as well as fiber and healthy fats to balance out these bowls. Check out the amazing health benefits of avocado! Hot honey: a surprisingly delicious addition, the hot honey adds a touch of sweetness and heat to compliment the seasoning ground beef. You can buy this at the grocery store or make your own.  Variations Swap the protein: these high protein bowls still work with other types of ground meat. You can swap the ground beef for ground turkey or ground chicken.  Make it vegetarian: instead of ground beef, use a vegetarian ground beef substitute like Beyond Meat or Impossible ground.  Add more veggies: to bump up the color and fiber in these bowls, try adding some veggies like lettuce, tomato, or picked red onions.  How to Make the Viral Beef Bowl These viral beef bowls are simple to put together in a few steps.  Roast the Sweet Potatoes: Preheat the oven to 400 degrees Fahrenheit. Chop the sweet potatoes into ½ inch cubes and add to a large mixing bowl. Toss with the seasoning (garlic powder, chili powder, and salt) and olive oil. Transfer to a rimmed baking sheet and bake for 20 minutes.  Air Fryer Option: you can also roast your sweet potatoes in the air fryer. I usually cook them at 400 degrees for 10-12 minutes or until browned and tender.  Cook the Ground Beef: While the sweet potatoes are baking, add the ground beef to a skillet over medium-high heat and break apart with a spatula. Add the tomato paste and taco seasoning and continue to cook until beef is browned.  Assemble Your Bowls: Divide the sweet potatoes, beef, cottage cheese, avocado, and hot honey between four bowls. For extra spice, garnish with red pepper flakes as well.  Meal Prep and Storage Meal Prep: you can meal prep both the sweet potatoes and ground beef up to 2-3 days in advance. Store them in the fridge and just reheat when you are ready to assemble your bowls.  Storage: store each component (ground beef, sweet potato, cottage cheese) separately in the fridge (if possible). Cooked ground beef and the roasted sweet potatoes can be stored in an airtight container in the fridge for up to 3-4 days.  Are the Viral Beef Bowls Good for You? Yes, the viral beef bowls with cottage cheese and hot honey are a well-balanced and healthy meal option with plenty of protein and fiber. Each bowl is packed with 34 grams of protein. Both sweet potato and avocado are high fiber veggies so adding both to these bowls adds up to 7 grams of fiber. Add some lettuce, tomato, and/or red onion to score even more fiber. Check out even more 25 good sources of fiber! You could also stir ½ cup of canned black beans into the ground beef while it cooks to add more fiber to these. Print Viral Beef Bowl with Cottage Cheese and Hot Honey This beef bowl with cottage cheese and hot honey is viral for good reason! These delicious bowls with spiced beef, cottage cheese, sweet potato, and avocado are packed with protein and fiber for a satisfying weeknight friendly dinner recipe. Prep

TikTok’s Viral Beef Bowl with Cottage Cheese and Hot Honey Read More »

High-Protein Green Goddess Wrap

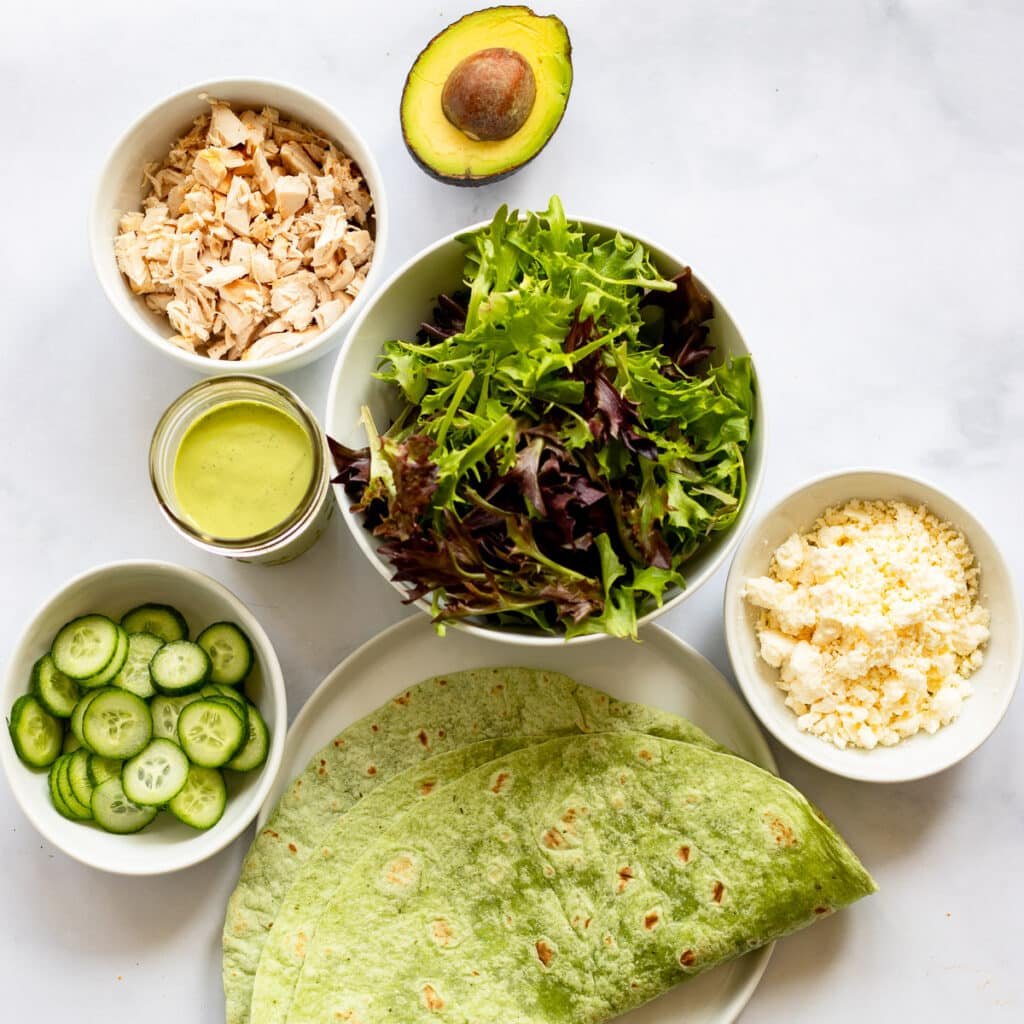
High-Protein Green Goddess Wrap Feeling bored with your go-to turkey and cheese wrap for lunch? Try this flavorful green goddess wrap recipe that is packed with protein and flavor! You’ll want to put the tahini green goddess dressing on everything.  If your current lunch options are starting to feel a little boring and stale, it’s time to try this delicious green goddess wrap recipe! They’re simple to make and packed with lots of fresh herby flavors. Inside each wrap you’ll add cooked chicken, veggies, and a homemade green goddess dressing made with tahini.  You can easily meal prep elements of this wrap recipe so that you can assemble them in just minutes. Perfect for days when you only have a few minutes to throw together a healthy and satisfying lunch! Explore even more low calorie meals that will fill you up and help you stay on track! Ingredients You’ll Need Use these simple and fresh ingredients packed with nutritional value to make this delicious green goddess wrap recipe. Be sure to check out the recipe card for the exact amounts of each ingredient you’ll need.  Whole wheat tortillas: to go with the green theme, I used burrito-size spinach wraps but you can use any large tortilla or wrap for these.  Chicken: shredded chicken adds filling protein to these healthy lunch wraps. Either cook up an extra chicken breast at dinner for these wraps or pick up a rotisserie chicken and use some for these.  Veggies: mixed greens or romaine lettuce, crispy cucumber, and avocado were our picks for this easy wrap but you could use just about any other veggie you like in your wraps and sandwiches for this. They add lots of dietary fiber to make these wraps even more filling. Feta Cheese: adds creaminess and tang to these wraps. You can substitute with goat cheese if you’re not a fan of feta. You could also spread a layer of cream cheese on the wrap before stuffing instead of feta if you prefer.  Green Goddess Dressing: the hero of these wraps is the simple green goddess dressing. Use a small blender to puree the herbs (parsley, dill, green onion), capers, lemon, and tahini together for a creamy green dressing that’s perfect for these simple wraps. Make sure to use fresh herbs for maximum flavor (dried ones just won’t cut it).  Variations Swap the Protein: if you don’t want to make your wraps with chicken, you can also make these high protein wraps with canned tuna or for a vegetarian version, use chickpeas, or edamame.  Add Different Veggies: we kept it simple with lettuce, cucumber, and avocado but the sky is the limit when it comes to adding veggies to these wraps. Try them with shredded carrot, sprouts, grilled or roasted veggies, broccoli, shredded cabbage, peppers, radish, etc. You can even toss some pickled veggies like pepperoncini or spicy pickles in for more flavor.  Make it Gluten Free: the wrap is the only element of this recipe that has gluten, so swap it out for a gluten free wrap if you want to make this recipe celiac friendly. You could also make it low carb by using your favorite brand of low carb wraps.  How to Make High Protein Green Goddess Wraps This high protein wrap recipe is simple to put together in a few steps.  Make the Dressing: Start by making the dressing. To a small blender, add the parsley, dill, green onion, garlic, capers, and tahini, lemon juice, salt, and water. Blend until smooth. Add more water, a tablespoon or two at a time to thin to pouring consistency, if needed.  Assemble the Wraps: Assemble your wraps by adding the chicken, mixed greens, cucumber, avocado, and feta to the middle of your wrap. Top with dressing then wrap tightly and enjoy! What to Serve with this Wrap These green goddess chicken wraps pair well with a variety of your favorite lunch sides. However, if you’re in need of some inspiration, here are a few of our favorites:  Paired with soup: try this tuscan tomato soup or roasted sweet potato soup.  Add a salad: we’d suggest this healthy broccoli salad, healthy pasta salad or this roasted beet and arugula salad.  Other ideas: fresh fruit, tortilla chips & salsa, hummus & cut veggies, Greek yogurt & fruit Something sweet (but healthy): date snickers, chocolate avocado pudding, snickerdoodle protein balls   Meal Prep and Storage Meal Prep: you can shred your chicken in advance and store in an airtight container in the fridge until ready to use. The food processor makes quick work of shredding the chicken! You can also prep the green goddess dressing 2-3 days ahead of time and store in the fridge until you’re ready to assemble your wraps.  Fridge: you can store the ingredients for these wraps separately in the fridge for a couple of days. You can also pre-assemble your wraps and store in the fridge. However, I would leave the dressing off if prepping ahead of time and add it when you’re ready to serve so your wraps don’t get soggy. Print Green Goddess Wrap Feeling bored with your go-to turkey and cheese wrap for lunch? Try this flavorful green goddess wrap recipe that is packed with protein and flavor! You’ll want to put the tahini green goddess dressing on everything. Prep Time 15 minutes minutes Total Time 15 minutes minutes Servings 2 wraps Calories 500kcal Ingredients INGREDIENTS 2 large whole-wheat tortillas 1 cup shredded cooked chicken 2 cups mixed greens 1 mini cucumber thinly sliced ½ medium avocado thinly sliced 4 tablespoons green goddess dressing storebought or homemade 1/4 cup crumbled feta or goat cheese Cracked black pepper to taste DRESSING 1/4 packed cup fresh parsley 1/4 cup fresh dill 2 tablespoons green onion or chives 1 clove garlic 1 teaspoon capers 1/2 cup tahini Juice of 1 lemon 1/2 teaspoon sea salt plus more to taste 1/2 cup filtered water plus more if necessary Instructions Start by making the dressing. To a small

High-Protein Green Goddess Wrap Read More »

The Perfect Grilled Salmon Every Time

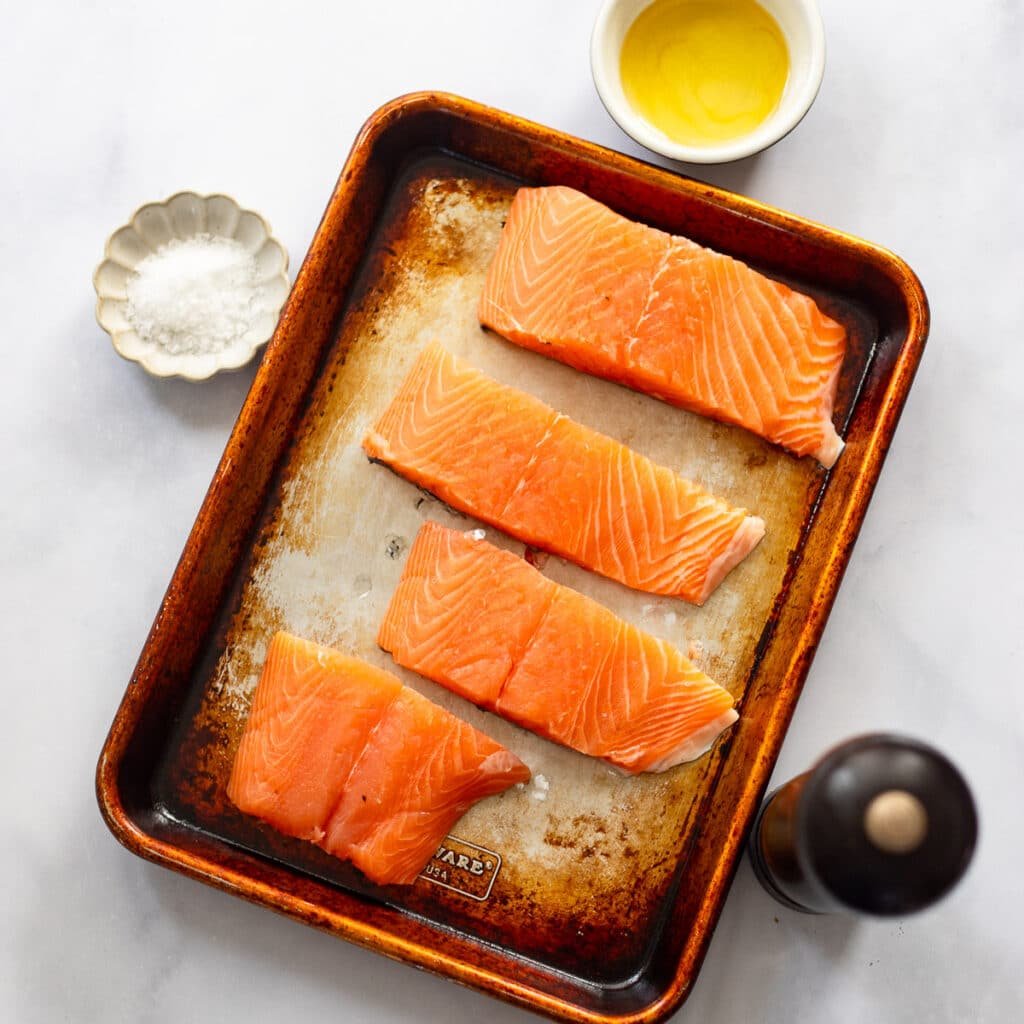
The Perfect Grilled Salmon Every Time If you love grilled salmon but have struggled to cook it well yourself – this post is for you! I’m dishing on my best tips and tricks for the perfect grilled salmon every time.  My grill gets used almost every day in the summertime. Everything from corn to cauliflower steaks to this grilled salmon is on rotation for quick and simple weeknight meals when it’s too hot to turn on the oven. If you’ve ever struggled to cook salmon on the grill, I’m sharing all of my best tips for making the perfect grilled salmon every time.  Like most fish, salmon is super quick to cook on the grill, making it a handy protein option for busy weekdays. Be sure to throw a couple of extra fillets on the grill while you are cooking to save for salads, the perfect harvest bowl, and other meals later in the week.  Ingredients You’ll Need Use these simple and fresh ingredients packed with nutritional value to make this delicious grilled salmon recipe. Be sure to check out the recipe card for the exact amounts of each ingredient you’ll need.  Salmon: choose sockeye salmon if available since this variety has a stronger flavor and stands up well to grilling. This buying guide is helpful for determining which salmon is the best to buy based on fishing and farming practices. In general, I look for wild-caught salmon. Avocado Oil: this oil holds up better to the high heat of the grill than olive oil.  Sea Salt and Black Pepper: enhances the flavor of the salmon. Marinade or Sauce: after grilling, serve up your salmon with your favorite sauce or brush with a go-to salmon marinade. I used teriyaki sauce on the ones from this post.  How to Make Grilled Salmon This grilled salmon recipe is simple to put together in a few steps.  Marinate: If you want to marinate your salmon in a sauce (like bbq, teriyaki, soy sauce, etc) before cooking, you’ll want to get it in the marinade and back in the fridge at least a couple of hours before you’re ready to grill.  Prep the grill: Preheat grill to medium-high (if using a gas grill) or allow your charcoal grill time to warm up for cooking and clean grill grates well with a metal grill brush. Oil grates after cleaning by dipping a paper towel in oil and rubbing onto the outdoor grill grates by holding the oiled paper towel with metal tongs. Prep the salmon: Pat each piece of salmon dry with paper towels. Rub oil all over the salmon filets. Generously sprinkle both sides with pepper and salt.  Grill: Place the salmon on the grill, skin-side up. Grill until the salmon lifts from the grates without sticking, about 3-5 minutes. Flip the salmon and brush with sauce (if using). Cook until the salmon lifts from the grates without sticking and flakes with a fork, 1 to 2 minutes more and the fish has reached an internal temperature of 145 degrees Fahrenheit. Be careful not to overcook – it goes quick! Serve the grilled fish with desired toppings (teriyaki sauce or pesto are two of my favorites).  Tools You’ll Need Gas or charcoal grill Metal grill tongs Chef’s knife Silicone basting brush Tips for Making the Best Grilled Salmon Clean and oil the grates of your grill well before cooking your salmon to prevent sticking. A tip for oiling the grates of your grill while hot is to dip a paper towel in oil and hold it with tongs to rub onto the grates of your grill.  Always pick up salmon with the skin for grilling. Salmon (and other fish) is notoriously difficult to grill because it’s so tender and can fall apart easily. Buying skin on salmon helps it hold together better when grilling. Make sure to oil both sides of the salmon fillets before grilling to prevent sticking.  Do not move the salmon once you add it to the grill. It will stick initially, but let it cook another minute or two – it should be easy to remove and flip.  What to Serve with Grilled Salmon Salmon makes for a delicious protein option that is packed with essential nutrients like omega-3 fats as well as antioxidants (the pink color comes from high levels of the antioxidant astaxanthin). This hearty fish pairs well with grilled veggies like baked zucchini chips, baked vegetables, salad, roasted sweet potatoes, and more.  Try it on my teriyaki salmon salad or try it on one of my best healthy salad recipes. For a heartier meal, serve your grilled salmon fillet on top of a grain bowl like this healthy harvest bowl recipe. Storage Fridge: store any leftover grilled salmon in an airtight container in the fridge for up to 3 days.  Freezer: store leftovers in a ziplock bag in the freezer for up to 3 months. Allow to thaw in the fridge overnight before reheating.  Print The Perfect Grilled Salmon Every Time If you love grilled salmon but have struggled to cook it well yourself – this post is for you! We’re dishing on our best tips and tricks for the perfect grilled salmon every time. Prep Time 10 minutes minutes Cook Time 27 minutes minutes Total Time 37 minutes minutes Servings 4 Calories 354kcal Equipment Gas or charcoal grill Metal grill tongs Chef’s knife Silicone basting brush Ingredients 4 6-8 ounce skin-on salmon fillets 2 tablespoons avocado oil 2 teaspoons sea salt 2 teaspoons freshly ground black pepper Instructions Preheat the grill. Make sure to clean the grill grates and close the lid for more even and fasting heating. Generously coat the flesh side of the salmon fillets with oil and season evenly with kosher salt and black pepper. Grill the salmon skin side up over direct high heat with the lid closed, for about 4-6 minutes or until the fish lightens in color, becomes more firm to the touch and you can lift the fillets

The Perfect Grilled Salmon Every Time Read More »

Healthy Oven Baked Sweet Potato Fries

Healthy Oven Baked Sweet Potato Fries These healthy oven baked sweet potatoes are crispy on the edges but tender and sweet on the inside. What’s more, they’re super easy to make! Craving sweet potato fries but want to make them a little healthier than the deep fried ones at your favorite restaurant? Use the specific techniques that we talk about in this post to take your baked sweet potato fries to the next level. While not quite the same as the deep fried version, these baked sweet potato fries are crisp but tender on the inside.  These sweet potato fries are a go-to side for grilled burgers in the summer or served alongside (or on top!) of one of my healthy salad recipes! They’re also great dipping in a homemade sauce like a sriracha aioli or just some ketchup. You can make this recipe your own by experimenting with different seasonings for the fries before baking.  Ingredients You’ll Need Use these simple and fresh ingredients packed with nutritional value to make this delicious oven baked sweet potato fries recipe. Be sure to check out the recipe card for the exact amounts of each ingredient you’ll need.  Sweet potatoes: of course, you’ll need sweet potatoes to make these fries. For this recipe, you’ll need about 2 medium potatoes. You can also try this method with sweet potato wedges but they won’t be quite as crisp. Cornstarch: tossing the sweet potatoes in a bit of cornstarch before baking helps absorb the moisture in the potato and results in a crispier fry (without a fryer).  Avocado oil: you’ll be baking these at high heat in the oven so I recommend a cooking oil that can stand up to high heat like avocado oil rather than olive oil.  Sea Salt: sprinkle the fries with a bit of sea salt before baking to add flavor. You can add a sprinkle of black pepper too if you like.  How to Season Baked Sweet Potato Fries Feel free to experiment with a variety of different spices to season your sweet potato fries. Here are a few options to get you started:  Chili powder or chipotle powder Cinnamon and nutmeg Cajun seasoning Garam masala or curry powder Cumin and cayenne pepper How to Make Sweet Potato Fries This healthy baked sweet potato fries recipe is simple to put together in a few steps.  Preheat the oven: Preheat the oven to 425 degrees Fahrenheit and line the sheet pan with parchment paper. Prep the potatoes: Peel the sweet potatoes and cut them into ¼ inch thick fries. (I found that they turned out better when peeled so it’s worth the extra step.) Add to a large bowl and toss with cornstarch, avocado oil, sea salt, and paprika. Spread onto the baking sheet in a single layer, making sure that no fries are touching to ensure the best crisp. (Cooking time may vary slightly from batch to batch or depending on your oven.) Some recipes call for soaking the sweet potatoes in cold water, but I didn’t find this was really necessary for crispy fries.  Bake and serve: Bake for 20 minutes, flip and bake for another 10-18 minutes until the tips are dark brown. Serve right away with a small bowl of your favorite dipping sauce like ketchup, aioli, or barbecue sauce.  What to Serve with Sweet Potato Fries These yummy sweet potato fries make a great addition to a variety of our favorite meals. If you want to serve them as a side dish, try them with our healthy crockpot pulled pork, Greek turkey burgers with tzatziki sauce, pineapple glazed ham steaks, veggie baguette sandwiches They also make a great addition to salads like this healthy cobb salad or our southwest chicken salad. Want to make them into a meal? Serve these fries with some leftover loaded turkey chili on top with some shredded cheddar. Yum! Are sweet potato fries actually healthy? Yes! The deep fried sweet potato fries that you can pick up at your favorite restaurant aren’t really any better for you than French fries. However, these homemade sweet potato fries are oven baked so they are much lower in calories and saturated fat so they’re much better for you.  Sweet potatoes are a great source of fiber, vitamin A, vitamin C, and potassium. What’s more, you can ensure that your sweet potato fries are gluten-free since they aren’t being fried with other foods that may contain gluten, leading to cross contamination. Storage These fries taste best straight from the oven as they lose their crispiness once they cool. If you have leftovers, store in an airtight container in the refrigerator for up to 3 days. To reheat, bake in the oven at 425 degrees Fahrenheit for 7-10 minutes or until warmed through. My favorite way to reheat and crisp them up again is to throw them in my air fryer for 5 minutes or so at 400 degrees Fahrenheit.  More Delicious Sweet Potato Recipes Sweet potatoes are packed with health benefits. Check out even more delicious recipes to try below! Roasted Sweet Potato Soup Shepherd’s Pie with Sweet Potato Topping Roasted Sweet Potatoes Easy Chickpea Power Bowl Print Healthy Oven Baked Sweet Potato Fries Prep Time 10 minutes minutes Cook Time 27 minutes minutes Total Time 37 minutes minutes Servings 4 Calories 155kcal Ingredients 2 medium sweet potatoes 8 to 10 ounces each 1 ½ tablespoons cornstarch 1 1/2 tablespoons avocado oil 1/2 teaspoon sea salt 1/2 teaspoon garlic powder 1/2 teaspoon paprika Instructions Preheat the oven to 425 degrees Fahrenheit and line the baking sheet with parchment paper. Peel the sweet potatoes and cut them into ¼” thick fries. Add to a large mixing bowl and toss with cornstarch, avocado oil, sea salt, and paprika. Spread onto the baking sheet in a single layer, making sure that no fries are touching to ensure the best crisp. Bake for 20 minutes, flip and bake for another 10-18 minutes until the tips are golden. Nutrition

Healthy Oven Baked Sweet Potato Fries Read More »

Easy Chickpea Power Bowl

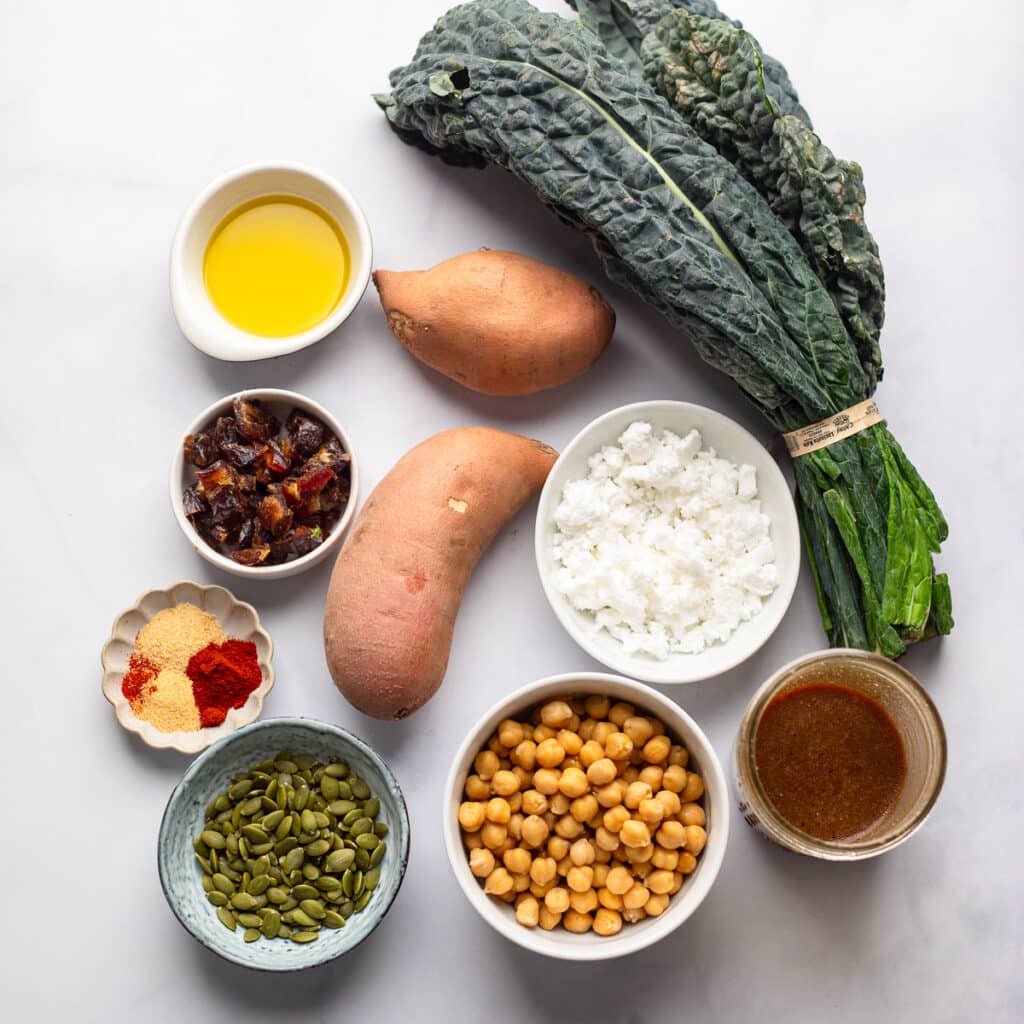
Easy Chickpea Power Bowl Looking for a meal prep-friendly healthy meal that you can add to your weeknight dinner rotation? You’re going to love these easy chickpea power bowls! They’re one of my favorite chickpea recipes. Whenever I’m standing with my fridge open wondering what to make for dinner, I turn to power bowls. (Specifically, these easy chickpea power bowls!) It’s an easy formula for mixing and matching ingredients I have in the kitchen to create a healthy, balanced meal.  To build a healthy bowl meal like these chickpea bowls, you’ll start with a base of greens then pile on roasted veggies, protein, and a flavorful dressing to pull it all together. Every element is super simple to make and can even be meal-prepped in advance.  I also love that these bowls are mix-and-match so everyone can pick their own toppings – perfect for feeding a family where everyone has different preferences. These bowls are vegetarian and gluten free; you can easily modify them to be nut free, dairy free, and vegan. Check out even more low calorie meals that fill you up! Chickpea Power Bowl Ingredients Use these simple and fresh ingredients packed with nutritional value to make this delicious chickpea power bowl recipe. Be sure to check out the recipe card for the exact amounts of each ingredient you’ll need.  Sweet Potato: I love adding roasted sweet potatoes to bowls like this one to make them feel heartier. Plus, they’re a blue zone food! Chickpeas: roasting the chickpeas along with the sweet potatoes helps them brown and crisp up a bit – adding another crispy element to these bowls. You can use lentils instead of chickpeas if you’d like, just add at the end rather than roasting them.  Seasonings (Garlic & Onion Powder, Smoked Paprika): you’ll use just a few simple seasonings for the roasted chickpeas and sweet potatoes. This spice blend is such a classic and I reach for it often when roasting a variety of veggies. Like heat? Add a dash of cayenne. Kale: to create a base for these bowls, you’ll add some massaged and chopped kale. I usually reach for lacinato kale (ie. dino kale) but you can use curly kale too. If kale isn’t your thing, use arugula or baby spinach instead.  Goat cheese: love the creaminess a bit of crumbled goat cheese adds to these bowls. Use a dairy free goat cheese or feta cheese to make these bowls vegan.  Pepitas: these little seeds add the perfect amount of crunch as well as some healthy fats. You can swap with other nuts or seeds like walnuts, pecans, slivered almonds, or pistachios.  Dates: adds chewy texture and a lovely pop of sweetness to these bowls. Get medjool dates if you can find them, they have the softest texture.  Simple Balsamic Dressing: to pull these bowls together, they’re topped with a simple balsamic vinaigrette with olive oil, balsamic vinegar, dijon mustard maple syrup, salt, and pepper. If you aren’t a fan of balsamic, you can swap the vinegar for apple cider vinegar, red wine vinegar, or even some fresh lemon juice.  Variations Add Chicken or Fish: add more protein to your bowls by topping them with some cooked chicken breast or canned salmon.  Add Different Dried Fruit: instead of dates, add dried cranberries or raisins.  Add a Cooked Grain: these bowls are also delicious with some cooked quinoa, brown rice, or wild rice.  Swap the Dressing: I love the flavor combination of balsamic with the kale, sweet potatoes, and dates in this chickpea bowl. However, you can swap with another favorite dressing, either storebought or homemade. These bowls would be yummy with this dressing from our wild rice salad or a simple tahini dressing. Or ditch the dressing altogether and add a spoonful of hummus.  How to Make this Chickpea Power Bowl  This healthy power chickpea bowl recipe is simple to put together in a few steps.  Roast the Sweet Potatoes & Chickpeas: Preheat the oven to 400 degrees Fahrenheit. Add the sweet potatoes and chickpeas to a bowl and toss with the olive oil, garlic powder, onion powder, smoked paprika, salt and pepper. Spread into a single layer on a baking sheet and bake for 20-25 minutes until the potatoes are tender. Make the Balsamic Dressing: While the potatoes are baking, make the dressing by adding all of the ingredients to a bowl and whisking (or to a mason jar and shaking well) to combine.  Build Your Bowls: Assemble the bowls by dividing the kale, roasted potato/chickpea mixture, pepitas, dates, and goat cheese between bowls. Drizzle with dressing to serve.  Tools You’ll Need Chef’s knife Cutting board Mixing bowl  Baking sheet Meal Prep and Storage Meal Prep: elements of these bowls can be prepped in advance to cut down on cooking time when you’re ready to eat them. They also make a great option for a packed lunch for work or school. The roasted sweet potatoes and dressing can be prepared and stored in the fridge for 3-4 days. You can also pre-chop the kale so that step is out of the way.  Storage: store assembled bowls in the fridge for up to 3-4 days (great for meal prep!). Since the base is kale, it holds up pretty well even when stored with the dressing already added. However, if you want to make sure nothing gets soggy, store the dressing separately.  More Healthy Chickpea Recipes Chickpeas are a powerful nutrient-packed ingredient. Explore even more healthy recipes that incorporate chickpeas below. Crispy Ranch Roasted Chickpeas Golden Turmeric Chicken Soup Viral Jennifer Aniston Salad Healthy Cookie Dough Dip Healthier Pasta Salad Mediterranean Chopped Salad Print Easy Chickpea Power Bowl Looking for a meal prep-friendly healthy meal that you can add to your weeknight dinner rotation? You’re going to love these easy chickpea power bowls! They’re one of my favorite chickpea recipes. Prep Time 10 minutes minutes Cook Time 30 minutes minutes Total Time 40 minutes minutes Servings 5 bowls Calories 410kcal Equipment Chef’s knife Cutting

Easy Chickpea Power Bowl Read More »

Trader Joe’s Thanksgiving Crowd Faves

Trader Joe’s Thanksgiving Crowd Faves The holidays are officially upon us! If you’re hosting Thanksgiving, it’s time to nail down the perfect spread. If you’re a guest, it’s time to decide what you’re contributing! Here are my favorite things from Trader Joe’s that make holiday cooking a little easier. Keep in mind these are my picks for convenience and yumminess. If you prefer to cook everything from scratch, go for it! But if you need to stress a little less and enjoy time with friends and family a little more, this list is for you. Credit for all images: Trader Joe’s Main dishes Maybe you’re hosting a small group. Maybe you’re hosting a large, diverse group of eaters. These main dishes will impress everyone, with minimal work required. 1. Brined Bone-In Half Turkey Breast The juiciest, most flavorful pre-cooked turkey breast I’ve ever had. These go fast, for a good reason! 2. Breaded Turkey-Less Stuffed Roast Even if you’re not vegan, definitely grab one of these. It’s so flavorful and cozy.   3. Balsamic Rosemary Beef Steak Tips If you’re not a fan of turkey or just want to go for something unconventional, these steak tips are delicious and ready to cook. Apps In my opinion, appetizers are the true star of the show at any gathering. Isn’t grazing while you mingle until it’s time to sit down at the table the best part?   1. Savory Squash Pastry Bites Bite-sized appetizers are always a good choice. These little cuties are filled with a lovely combo of pumpkin, butternut squash, and four different cheeses. All you have to do is bake and enjoy! And share, I guess.   2. Mini Brioche Bites These fluffy bites are filled with apricot and brie cheese. Yes, they will absolutely melt in your mouth. 3. Double Cream Brie Cheese Charcuterie may be “out” according to some Gen-Zers, but it’s still the perfect Thanksgiving app IMO (yes, I am a millennial). Trader Joe’s is my go-to for all grazing board necessities, but this Double Cream Brie is my favorite. If you’re not into the effort of an entire board, wrap this little wheel of goodness in puff pastry and bake it. Serve with your favorite crackers. 4. Chicken Uncured Bacon Ranch Dip Chicken, cheese, uncured bacon, and ranch. My advice? Bring at least two of these babies. Serve with chips and veggies. 5. Thanksgiving Stuffing Seasoned Popcorn This appetizer is a little unconventional, but delicious nonetheless. As a bonus, it’s sure to break the ice and spark conversation. Sides Tired of the same boring Thanksgiving sides? Can’t cook? No worries. 1. Harvest Apple Salad Kit What goes better with turkey and heavy, starchy sides? A crisp, zippy salad. This Harvest Apple Salad Kit is ready to go, with a spring mix, Unexpected Cheddar (IYKYK), crunchy apple chips and pecans, and a tasty apple vinaigrette. If you want to level this up, serve with fresh apple slices.   2. Herbs de Provence Potato Wedges These look and taste like you put in a lot of work. They’re crispy, herby, and delicious. You truly can’t go wrong with this Thanksgiving side.   3. Garlic Shiitake Green Beans Are you team fresh green beans or team green bean casserole? I’m team ALL green beans tbh, but I’m obsessed with these Garlic Shiitake Green Beans. Not only is the flavor amazing, but they look and taste like you made them from scratch.   4. Mashed Potatoes Nobody really talks about the PRESSURE that comes with making mashed potatoes for Thanksgiving. They aren’t as easy to master as you’d think! These potatoes are pre-cooked and mashed, and frozen into cubes so you can heat as much as you need and dress them up as you like. No chance of globby or dry potatoes.   5. Mashed Sweet Potatoes Plain, pre-cooked and mashed sweet potatoes, ready for you to add your own personal flavor. Will you keep them pretty basic with butter, or go all out with brown sugar and mallows? 6. Scallopini Potatoes The third and final potato in this series is the most extra. Cheesy, creamy Scallopini Potatoes. You could definitely make this from scratch if you have the time and motivation, but these are a yummy alternative.   7. Fresh Cranberry Sauce   If you’re in charge of cranberry sauce, this is the one. It’s made with simple ingredients (cranberries, sugar, and water) and doesn’t taste overly sweet. Desserts Perhaps the most important course of all? 1. Apple Crumble Pie   The oat crumble topping on this is so delicious my mouth is watering just thinking about it. If you pass it off as homemade, I won’t tell.   2. Nantucket Style Cranberry Pie A buttery crust topped with juicy, sweet, tart cranberry filling. The perfect compliment to traditional desserts like pumpkin pie.   3. Petit Fours Mousse Cakes   Light, sweet, and bite-sized.   4. Sweet Cannoli Dip Serve this in a cute little bowl topped with mini chocolate chips or berries, and a side of graham crackers. If you want to get fancy, use it to layer in a trifle.   5. Macarons   The easiest choice if you’re in a pinch or just looking to add a little variety to your dessert table. Macarons instantly elevate the vibe. The pistachio flavor is my fave.   Beverages If the food is covered, a yummy beverage is always a good choice. Trader Joe’s has an amazing selection of beer, wine, and non-alcoholic drinks. And… this new ready-to-drink espresso martini, which I will FOR SURE be grabbing! Before you check out, don’t forget to grab some flowers!   Here’s what’s in my Trader Joe’s fall haul. Breanna Woods MS, RD{authorlink}https://www.blogilates.com/blog/trader-joes-thanksgiving/Blogilates The official blog of Cassey Ho https://i0.wp.com/www.blogilates.com/wp-content/uploads/2021/02/fav-1.png?fit=32%2C32&ssl=1

Trader Joe’s Thanksgiving Crowd Faves Read More »