Training

Auto Added by WPeMatico

30-Minute Treadmill Workouts for Fat Loss, Metabolic Conditioning, and More

30-Minute Treadmill Workouts for Fat Loss, Metabolic Conditioning, and More Let’s face it: The treadmill (unfairly) gets a bad rap. Merely mentioning it as a cardio option can quickly cause your training partner’s enthusiasm to evaporate. After all, many people associate treadmill workouts with unflattering terms like boring, monotonous, and uninspiring. Yet even if your previous treadmill experiences failed to elicit motivation or effective results, it’s not too late to change your tune. Whether you’re focused on losing fat, improving your metabolic conditioning, or recovering efficiently, this popular piece of home gym equipment can help put you on a path to success. Credit: Dragon Images / Shutterstock Plus, you don’t have to invest what can seem like countless hours and steps to make physique, performance, or health improvements. Here are three goal-specific workouts that only take 30 minutes to complete and have the potential to transform your opinion about treadmills. 30-Minute Treadmill Workouts  For Fat Loss For Conditioning For Recovery 30-Minute Treadmill Workout for Fat Loss  While nutrition plays a major role in your ability to lose body fat, exercise can enhance your efforts to trim extra inches off your waistline. (1) However, if you have a limited window to hit the gym, it’s important to get the most bang for your fat-burning buck. When it comes to your next treadmill session, swap out the slow, steady-state approach for something that’s proven to be more efficient and effective: high-intensity interval training. (2)  Sprint Intervals  This type of workout isn’t for the faint of heart. Ultimately, though, sprint intervals provide a unique stimulus that simply can’t be replicated with steady-state cardio training. Combining brief periods (less than one minute) of high-intensity runs with a far less demanding walking interval of equal time will push you mentally and physically.  Most importantly, however, this method provides more fat-burning upside than simply going at the same speed throughout your workout. In fact, a study comparing calories burned during 30 minutes of HIIT, weight training, running, and biking showed that HIIT participants burned 25-30 percent more calories. (3) Considering you need to be in a calorie deficit to lose body fat, following a well-structured eating plan that prioritizes protein and engaging in strength training and HIIT-style cardio can be quite a powerful fat-loss solution. (4)  Credit: Dusan Petkovic / Shutterstock Keep in mind that you can make this workout more demanding in a number of different ways. Setting the treadmill on a low incline will put more stress on your quads and your glutes. As you improve, you can reduce the rest time between sets, which could give you room to fit a few more rounds within that 30-minute window.  Because this workout is ultra-demanding on just about every part of your lower body, it’s best to save it for a non-leg day. Additionally, while you can pencil it into your schedule two to three times per week, make sure to do so on non-consecutive days so you’re able to recover and hit the gym again.  Treadmill Interval  How to Do it: Set the treadmill to a flat position. Gradually build up speed until you reach a jogging pace. At the two-minute mark, increase the speed to a level in which you can safely maintain a sprint for the desired time. After you’ve hit your target time for the first part of the interval, decrease the speed and maintain a slow pace for an equal amount of time. Programming: Five sets of 30 seconds at a sprint pace, followed by 30 seconds at a slow pace (casual walk). Rest for two minutes, then repeat the circuit twice. Then, complete two sets of 45 seconds at a fast pace, followed by 45 seconds at a slow walking pace. Rest for two minutes, then repeat once. Rest Time: Rest two minutes after each completed circuit. 30-Minute Treadmill Workout for Conditioning  Metabolic conditioning may lead to fat loss, but that’s not the sole objective. Rather, this exercise methodology is all-encompassing in its mission to improve both your endurance and strength. Increasing your work capacity can allow you to shine brighter in your weightlifting sessions or give you the cardiovascular foundation to maintain an elevated heart rate for a longer period.  Incline Intervals  The treadmill presents a prime opportunity to get in better overall shape if you take advantage of the incline feature. Unlike the fat-loss workout, though, you don’t have to go top speed to get closer to your end goal.  That said, interval-style training reigns supreme when it comes to conditioning. You can take things to the next level (literally) through incline treadmill training, which has been shown to be effective for improving oxygen consumption, blood lactate responses, and muscle power. (5) Credit: LightField Studios / Shutterstock This 30-minute treadmill workout revolves around manipulating the incline and the speed in a pyramid-style fashion. Once you navigate through that portion, you’ll get a chance to finish on a high note with a run that’ll force you to push through every last step.  Treadmill Incline Intervals How to Do it: Begin with a three-minute warm-up at a comfortable walking speed with the incline at 3%. Every two minutes, increase the incline by 2% and the speed by 0.5 until you reach 15 minutes. Then, reduce the speed by 0.5 and the incline by 1% every two minutes until the 23-minute mark. At that point, ramp up the speed, set the incline between 3 to 5% and finish with a higher intensity run, followed by a brief cooldown interval. Sets and Reps: 10 “sets” of two-minute incline intervals, one five-minute running interval, and a two-minute cool-down period. 30 minutes total training time. Rest Time: No rest time between intervals. 30-Minute Treadmill Workout for Recovery  Not every treadmill program has to be interval-based. In fact, a no-frills, steady-state-style session is a great way to recuperate from a muscle-building workout. If you want to get your body primed to train again, a treadmill-centric approach is simple, yet effective.  Steady State and

30-Minute Treadmill Workouts for Fat Loss, Metabolic Conditioning, and More Read More »
Powerlifting Records: How to Compare Your Lifts to the All-Time Greats

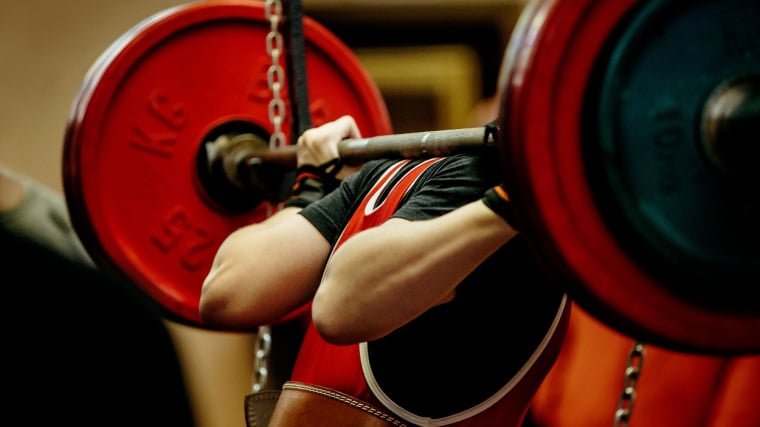
Powerlifting Records: How to Compare Your Lifts to the All-Time Greats Some people had a unique introduction to physical strength. At one point, they may have seen a person lift a heavy weight — whether it was a family member moving an “immovable” piece of furniture, a muscular athlete completing a “bench press challenge” on television, or a superhero hoisting a car overhead to save the day — and the spark was ignited. These feats of strength left an indelible impression and, sooner or later, they found their way into the gym and began developing their own muscular prowess. A few of the most straightforward avenues for lifters to test themselves is with “the big three” powerlifts — the squat, bench press, and deadlift. Credit: Real Sports Photos / Shutterstock Competitive powerlifting offers a chance for lifters of any age, size, or experience to compare themselves to modern day peers as well as legendary lifters of the past. Here’s a look at what it takes to complete remarkable powerlifting performances. Powerlifting Records What is Powerlifting? Powerlifting Divisions and Categories Current Powerlifting Records What is Powerlifting? To begin on page one, it’s important to understand what “powerlifting” actually is. While it might sound counterintuitive, powerlifting is distinctly different from weightlifting. The sport of weightlifting, as presented in the Summer Olympics, challenges athletes with the snatch and clean & jerk movements. Powerlifting tests athletes with the back squat, flat bench press, and deadlift (either conventional stance or sumo) to complete a “total” weight lifted for the contest. The sport of powerlifting formally began in 1964 with “The Powerlifting Tournament of America” being the first organized and recognized competition of the squat, bench press, and deadlift. Perhaps not coincidentally, the contest was held in York, Pennsylvania — home of US Olympic weightlifting coach and founder of York Barbell, Bob Hoffman. As powerlifting continued to grow, both across the United States and internationally. By the 1980s, it was considered a full-fledged, albeit niche, competitive sport. From the late 1970s until the early 2010s, it garnered enough widespread attention to warrant a dedicated print magazine, Powerlifting USA, which showcased sport-specific news and training features. View this post on Instagram A post shared by Mike J. Svilans (@magnoodles) As the sport of powerlifting grew in popularity, recreational lifters found a relatable outlet for testing their strength. While Olympic weightlifting is largely considered to rely on significant exercise technique, the big three powerlifts are relatively more simple to learn, making them more accessible to the average gym-goer. Powerlifting, in general, has nearly become synonymous with simply trying to build sheer strength in the gym. However, the sport itself has always revolved around three foundational exercises performed under specific criteria. If lifts are performed with different or “loose” technique, they’re ineligible for an official record. Squat In a powerlifting competition, the barbell back squat is the first of three movements tested. Depending on the specific federation and ruleset, the barbell is either supported on squat stands or in a monolift — a hydraulic-assisted machine which allows lifters to set up in a squat stance without repositioning their feet. Powerlifting squats are universally tested by requiring lifters to descend until their hip joint is parallel to their knee joint. This is where the common cue “squat to parallel” comes from. Contrary to some common opinions, “parallel” is not necessarily related to the lifter’s thigh position because heavily muscled legs may not appear to reach parallel when the hip is at a suitable depth. Lifters may use either a low bar or high bar setup, depending on their individual preference. The key performance factor is reaching the target depth, and the lifter’s body type and mobility will dictate their most efficient technique. Bench Press The flat barbell bench press is the sole test of pure upper body strength in a powerlifting competition. The majority of powerlifting federations have grip standards, often maintaining a grip that has at least one finger in contact with the pre-set ring markers on the barbell. Lifters must keep their head, shoulders, and glutes in contact with the bench throughout the entire press, while also keeping their feet touching the floor. The barbell is lowered to chest-level and must remain in contact with the athlete’s body until a judge gives the “press” command to begin the ascent. This ensures a consistent depth marker for each lifter while helping to prevent momentum from bouncing the bar off of the chest. The bar is then held in the locked out position until the lifter receives a judge’s command to “rack.” View this post on Instagram A post shared by IPF Powerlifting (@theipf) Controversially, lifters may initially set up with an arch in their lower back which may add pressing stability and reduce their range of motion, making the lift less challenging. However, some federations, such as the International Powerlifting Federation (IPF), have taken steps to limit the degree of arch lifters may use. Deadlift “The meet doesn’t start until the bar hits the floor,” is a common phrase heard in powerlifting circles to emphasize the importance of the contest’s final movement — the deadlift. With the bar beginning on the floor, lifters must complete a deadlift in one smooth motion. Jerking or “hitching” the bar up the thighs disqualifies the lift. Full lockout is achieved when the lifter’s legs are straight and their shoulders are behind the bar. In competition, powerlifters are not allowed to use lifting straps, but can grab the bar with a double-overhand, mixed (over/underhand), or hook grip (grabbing the thumbs along the underside of the bar). Internet meme culture seems to enjoy claiming that “sumo deadlifts don’t count,” but no actual powerlifting organization has fallen in line with that approach. Lifters are free to choose their own deadlift stance — conventional, sumo, or somewhere in between — according to their individual leverages and optimal power output. Total The powerlifter’s total is the sum of their best performance in each of the three lifts.

Powerlifting Records: How to Compare Your Lifts to the All-Time Greats Read More »

Free Weights vs. Resistance Bands: Challenge Your Muscles the Right Way

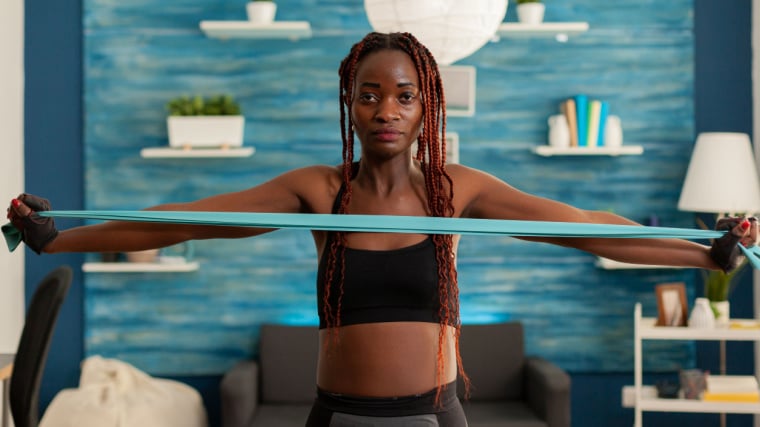
Free Weights vs. Resistance Bands: Challenge Your Muscles the Right Way Whether you’re aiming to sculpt your physique, enhance athletic performance, or simply get through daily challenges a little bit easier, resistance training has been shown to be the key to a more fit life. (1) “Resistance training”, however, is a broad term for many different ways to strengthen your muscles. Most people gravitate toward lifting free weights — barbells or dumbbells. However, there are other forms of resistance training that can elicit similar, sometimes even more beneficial, results. One of the most common alternatives, found both in commercial gyms and as a convenient addition to home workouts, is training with resistance bands.  In the big picture, free weights (which includes barbells and dumbbells) offer a straightforward load — a 100-pound barbell offers 100 pounds of resistance. Resistance bands provide dynamic tension and present a more significant challenge as the band is stretched into a longer position. Credit: DC Studio / Shutterstock Understanding how and when to choose the right tool for the right job is vital for creating an optimal workout that will get you closer to your goals. Free weights and resistance bands might seem to be worlds apart, but once you acknowledge their similarities and differences, you will have a better idea about how to implement them into your workout to take your fitness to the next level. In this article, we will elaborate on the debate of “free weights versus resistance bands,” explore their differences and similarities, and figure out the best times to use these modes of resistance training for better results. Free Weights vs. Resistance Bands Equipment Differences Equipment Similarities How and When to Use Free Weights How and When to Use Resistance Bands Choosing the Right Source of Resistance Differences Between Free Weights and Resistance Bands The differences between free weights and resistance bands seem noticeable at first glance. However, there are some less obvious differences to be aware of before incorporating free weights or resistance bands into your workout routine. Each modality has its unique advantages, and knowing how to leverage them effectively can help you achieve a well-rounded fitness regimen. Source of Resistance One of the biggest differences between free weights and resistance bands is the source of resistance. Free weights rely on moving against the force of gravity to challenge a lifter’s raw strength. The actual weight of the equipment itself is what is used to provide resistance for each exercise. This also means resistance remains consistent throughout the movement, and only your position of leverage and the direction of the weight will significantly alter the feel of resistance. It’s one reason why squats feel more difficult in the bottom and relatively easier as you approach a standing position. Credit: SOK Studio / Shutterstock When using resistance bands, the source of resistance comes through the use of a pliable band, commonly made from latex or rubber. The elasticity of the band means that, as you increase the band’s length, tension is increased which provides a more challenging and “heavier” stimulus. This varied resistance — with more challenge at the end range of motion and relatively less challenge in shorter positions — can be very useful for lifters who may have an injury or those want to train a specific aspect of the exercise. The resistance profile can allow you to recruit or emphasize muscles during certain ranges of motion within a specific exercise. Stabilization Requirement Working with free weights requires a higher degree of stabilization, as the weights are not connected to a fixed point. This relative freedom of movement engages additional muscles to maintain balance and control throughout the exercise. This would be an advantage for those who are looking to recruit more muscle groups and want to also improve their functional strength, such an athlete that requires total-body stability.  Resistance bands provide built-in stabilization due to their attachment points — bands are typically anchored to a fixed object which allows you to pull or push the bands’ handles. This can be advantageous for individuals looking to isolate specific muscle groups without focusing as much on stability. In certain situations, a high degree of stabilization is not desired, as an athlete might want to perform an easier exercise variation to focus on the target muscle without worrying about other variables such as the muscular coordination needed to control a barbell or dumbbell. Joint Stress Depending on the exercise, free weights can exert more stress on joints due to the constant pull of gravity on the levers of the body. Stress doesn’t have to be bad, though. You want to achieve a level of stress on the joints of the body to create fatigue for growing muscle. You can perform variations of exercises, such as pressing on a flat, incline, or decline angle to adjust this stress. In other instances, some populations might not be able to handle higher levels of stress during a particular movement. Resistance bands provide a smoother resistance curve that can reduce joint stress at the start of the movement and gradually increase stress as the band stretches. This can potentially make an exercise more joint-friendly for certain individuals who might be recovering from an injury or have limited mobility. Portability and Convenience When discussing portability, free weights (especially barbells) are known to be heavier and space-consuming pieces of equipment. Free weights can be bulky and require dedicated storage space. They are less portable, making them more suitable for gym environments or home setups with designated workout areas. Credit: SOK Studio / Shutterstock Resistance bands are highly portable and take up minimal space, making them ideal for home workouts with limited space, travel, and on-the-go training. They offer a versatile training option that can be easily adapted to different environments. Bands are also great for trainers who work with larger groups or “boot camps.” Similarities Between Free Weights and Resistance Bands For all of their significant differences, there are plenty of similarities between bands and free

Free Weights vs. Resistance Bands: Challenge Your Muscles the Right Way Read More »

Squat Stand vs. Power Rack: How to Choose Your Gym’s Command Center

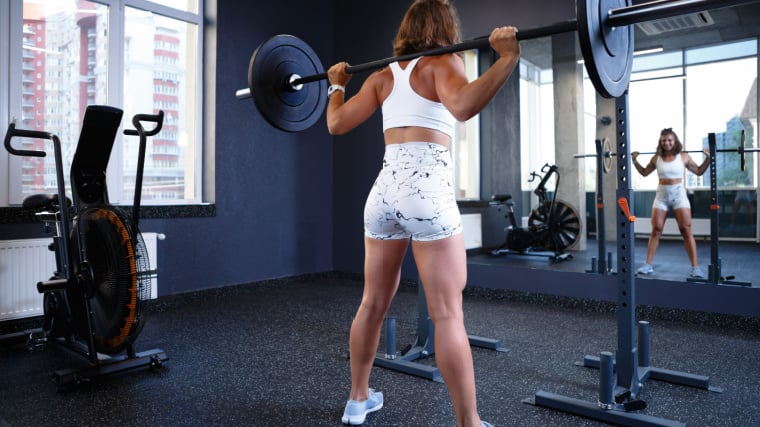
Squat Stand vs. Power Rack: How to Choose Your Gym’s Command Center Whether you’re setting up your own home gym or simply trying to figure out where to settle in for your next exercise at the neighborhood fitness center, you’ll likely be confronted with the choice between a squat stand and a power rack. Squat stands consist of two simple metal uprights to support a barbell — they are more compact and significantly lighter than power racks. A power rack, sometimes referred to as a squat rack, will typically have four to six metal uprights and offer more exercise options and accessories than a pair of squat stands. Credit: hurricanehank / Shutterstock While these two pieces of equipment are often used interchangeably, differences in their characteristics and intended usages are worth consideration. This article will help you make the most out of your home gym budget or your commercial gym workout by guiding you to the most appropriate and safest piece of equipment for your specific needs. Squat Stand vs. Power Rack Equipment Differences Equipment Similarities How to Use Squat Stands How to Use a Power Rack When to Choose the Right Piece of Equipment Differences Between Squat Stands and Power Racks At first glance, squat stands and power racks differ substantially in physical size — squat stands are smaller and power racks are bigger. Comparison done and dusted, right? Nope, not so fast. Differences in safety features, mobility, stability,potential exercises, and accessories are worthy of consideration. Safety Features A spotter is a trained and capable individual whose primary task is to ensure the safety of the lifter by assisting when necessary. One or more spotters are recommended for traditional strength training exercises when a barbell is held on the back or front of the body, when weight is lifted overhead, or when a weight travels over the face. (1) Under these guidelines, many common barbell exercises require the presence of a spotter — back squat, front squat, overhead press, bench press, incline press, and more.  No one wants to get pinned under a barbell, asphyxiate with a bar atop their windpipe, or catch a barbell to the face. Albeit unlikely, serious injuries or even death could occur if you train without appropriate safety precautions. But if you train alone or at home, you might not always have a trained spotter available. Now what? Credit: Hryshchyshen Serhii / Shutterstock Fortunately, a power rack, when properly set up and appropriately used, provides safety pins/pipes, arms, or straps that “catch” the barbell in the event of a failed lift. (2) Traditional squat stands, on the other hand, do not offer safety arms — even among squat stands that offer safety arms, the stability of the stands varies widely across designs and manufacturers. Some heavy-duty squat stands with safety arms are appropriate to handle the failed lifts of all but the strongest lifters, while lighter and smaller squat stands with safety arms might not be trusted. Altogether, lifters who train alone might benefit from the safety features of a power rack.  Mobility A key feature of squat stands is their mobility, or ability to be relocated from place to place. Traditionally, squat stands were used by Olympic weightlifters. Relatively lightweight squat stands could be carried or wheeled onto the platform for use then pushed back against a wall or into a corner when no longer needed. To further improve mobility, some squat stands have two-piece designs. Each upright has its own base, allowing it to be moved and positioned independently of the other. One piece squat stands commonly include or have the option of adding wheel kits, which allow the stand to be rolled around the gym with relative ease.  For individuals with a garage gym, the mobility of a squat stand may allow it to be stowed away when not in use, possibly allowing the garage to serve its original purpose — vehicle storage. Better yet, on a nice day, a squat stand might be moved outdoors. Sun’s out, guns out, right? Stability Power racks are typically more difficult to move around than squat stands. They tend to be big and heavy, with lighter power racks typically designed to be bolted to the floor. Most importantly, power racks tend to have a longer base of support, or footprint. This allows the lifter to perform squats, bench presses, and other exercises within the rack. Lifters tend to feel more “secure” when performing barbell exercises within a power rack — and for a good reason. Credit: Miljan Zivkovic / Shutterstock All exercise in the power rack is performed over the rack’s base of support, which allows effective use of the safety features. A missed lift is almost assuredly “caught” by the safeties and the rack won’t tip over. Moreover, the larger base of support, paired with the larger mass of the power rack, makes it less prone to tipping or moving while in use.  Note: The half rack is a design variant of the power rack. Half racks consist of two uprights in front, to support the barbell, and two additional uprights in back, which enhance the stability of the rack above and beyond the two-post squat stand design. While performing common barbell exercises in a half rack, the lifter remains over the rack’s base of support owing to the elongated base of the rack. Accessories and Exercise Options More space and more stability offer the ability to deck out power racks with accessories. In addition to safety equipment such as spotter arms, pins/pipes, or straps, power rack can offer attachments for additional exercises and equipment storage.  While taller squat stand designs may offer the option of a pull-up bar, multi-grip pull-up bars are routinely mounted on power racks. Multi-grip pull-up bars allow for traditional pull-ups, chin-ups, neutral-grip pull-ups, and more. Many power racks are compatible with rack-mounted dip bars and medicine ball targets. Attachments may also be affixed to the bases or uprights of power racks to perform a variety of landmine

Squat Stand vs. Power Rack: How to Choose Your Gym’s Command Center Read More »

10 Benefits of Cardio: Build Your Physique, Health, Performance, and More

10 Benefits of Cardio: Build Your Physique, Health, Performance, and More Many people who exercise tend to label themselves “lifters” because, well, they lift weights in the gym. However, what some people (conveniently?) overlook is that there’s a whole other world of exercise available to them — cardio training. While the thought of treadmills, ellipticals, recumbent bikes, and assorted machinery might trigger waves of muscle-burning trepidation, cardio workouts can be as simple as going for a walk outside. Yep, something people learned to do before they could talk can still be considered exercise if it’s programmed properly. Credit: Bignai / Shutterstock Here’s a closer look at some research-based reasons why you should consider being more than just “a lifter.” Benefits of Cardio Aerobic vs. Anaerobic Physical Benefits Performance Benefits Unexpected Benefits Frequently Asked Questions Aerobic Cardio vs. Anaerobic Cardio Cardiovascular exercise, in general, can be performed one of two ways: aerobically or anaerobically. Their benefits overlap in some respects while also delivering distinct advantages from each other. (1) The key difference is their inherent training intensities, or speed of movement, and the stimuli they trigger in the body. For clarity throughout this article, aerobic training will be the primary cardio method discussed in each subsequent point. Aerobic cardio is likely what most people imagine when they hear the phrase “cardio training.” Aerobic training is performed at a low to moderate intensity, such as walking or jogging. The relatively low intensity allows the body to continue the exercise for a relatively long duration. For example, Olympic race walking (yes, that’s a thing) has had races up to 50 kilometers (31 miles) with athletes moving non-stop for more than four hours. This potential for longer sessions is why aerobic work is often synonymous with “endurance training.” Anaerobic training is most notable for being relatively high intensity and short duration. The body cannot perform anaerobic training for an extended time because the heart rate is extremely elevated and the metabolic processes needed to fuel muscle contractions are short-lived. It’s like asking a car to drive 100 miles per hour while the low fuel light is on — neither smart nor safe. Credit: Jacob Lund / Shutterstock Anaerobic exercise is typified by high-intensity interval training (HIIT), sprinting, many “metcon” (metabolic conditioning) workouts, and any fast-paced movements that cannot be maintained for more than a few minutes, or even several seconds, without rest. A heavy set of three deadlifts or a set of 50 kettlebell swings, for example, are also cases of anaerobic exercise. Boost Your Health with Cardio Cardio exercise can be for more than just burning some extra calories or warming up before grabbing a barbell. As a reminder, “cardio” is actually short for cardiovascular, as in, your cardiovascular system which pumps blood throughout your entire body. Cardio training can have several significant health benefits, regardless of your goals in the gym. Cardiovascular Health This may seem like a statement that should go without saying, but cardiovascular training can improve your cardiovascular health. Just like biceps training can improve your biceps or lower body training can improve your leg strength, training your cardiovascular system can strengthen and improve your cardiovascular function. A stronger heart and better total-body circulation can improve cholesterol levels and blood pressure while decreasing the risk of potentially deadly cardiac events like stroke or heart attack. (2) Cardiovascular exercise is also associated with decreased total-body inflammation, which can further decrease the risk of cardiovascular disease. (3) While not directly related to cardiovascular health, performing low to moderate intensity cardio exercise after eating, especially after your largest meal of the day, has been associated with decreased blood sugar levels. (4) This can be an effective approach for people living with diabetes or prediabetes. Reduced Joint Pain For those dealing with joint pain, whether it’s from overuse in the gym or the onset of diagnosed arthritis, aerobic training has been shown to decrease pain and improve functional use of affected joints, particularly in the lower body (hips, knees, and ankles). (5)(6) Credit: YAKOBCHUK VIACHESLAV / Shutterstock Walking with knee pain may sound counterproductive, but a structured plan that carefully monitors intensity, duration, and frequency may improve symptoms and joint function. You certainly wouldn’t want to log miles while hobbling in agony, but a gradual approach performed with a deliberate and cautious approach could be incorporated into your general training plan. Similarly, moderate cardio training has been shown to stimulate bone density and potentially slow down the effects of osteoporosis. (7) This can be an ideal complement (or alternative) to weight training, which can also provide bone-strengthening similar results. Improved Immune System If you’ve ever been told to “go out and get some fresh air” after complaining about feeling poorly, it turns out you received some practical and science-based advice. Aerobic exercise, though not specifically outdoor exercise, has been shown to support a healthy immune system. (8) Exercising while sick is an often debated point, but regular exercise (including cardio training) performed consistently may help improve your overall immune function. This could give you a headstart in fighting common colds or even certain viral infections. (9) While exercise certainly can’t create a full-on immunity to any particular sickness, cardio exercise may stimulate an antibody response that supports your body’s natural immune system. Over the long-term, this type of “cellular reinforcement” may have a cumulative effect to put you in the most advantageous position to fend off common illnesses, especially when supported by a nutritious diet. Cardio for Better Gains For better or worse, some lifters are primarily interested in using cardio as a tool to support their efforts in the gym. Whether your priority is lifting heavier weights, building more muscle, or burning more fat, cardio workouts can be used in a performance-boosting context. Here’s why a bit of cardio can help, not hinder, your lifting. Increased Fat Loss Arguably the most common reason a lifter would decide to hop on a piece of cardio equipment — to burn some extra calories —

10 Benefits of Cardio: Build Your Physique, Health, Performance, and More Read More »

How to Do the Barbell High Row for a Powerful, Muscular Upper Back

How to Do the Barbell High Row for a Powerful, Muscular Upper Back In a quest for upper back size and strength, and the muscular silhouette that comes with it, lifters are increasingly finding room for a unique rowing exercise in their back-building routines. The barbell high row, sometimes called the wide row, is a bent-over barbell row performed with a distinctive setup and arm path that hammers the entire upper half of your back, especially your mid-back and shoulders. While bent-over rows and reverse flyes are traditional choices to target these regions, the barbell high row offers distinct mechanical advantages that promote targeted loading and honest form. Credit: Jacob Lund / Shutterstock The barbell high row is an old school exercise enjoying widespread recognition. Whether you use it to round out an intense back workout or to round out the backsides of your shoulders, the barbell high row is a solid addition to any lifting routine. Barbell High Row How to Do the Barbell High Row  Barbell High Row Mistakes to Avoid How to Progress the Barbell High Row Benefits of the Barbell High Row Muscles Worked by the Barbell High Row How to Program the Barbell High Row Barbell High Row Variations  Frequently Asked Questions Barbell High Row Video Guide Dr. Merrick Lincoln, the article’s author, provides an instruction video explaining the barbell high row. Watch the demonstration, then check out the step-by-step analysis with more form tips. How to Do the Barbell High Row Step By Step To get the benefits of the barbell high row, you’ll need to focus on crisp, strict form. Execute pristine barbell high rows with these four steps. Step 1 — Take a Wide Grip Credit: Merrick Lincoln, DPT, CSCS / YouTube The barbell high row uses a significantly wide overhand grip — specifically, a “snatch grip” similar to the Olympic weightlifting exercise. Your hands should grab the bar substantially beyond your shoulders and approximately the distance between the points of your elbows when your arms are outstretched at shoulder-height. Form Tip: Rather than getting the measuring tape, a simple technique to determine an appropriate grip width is to grab the bar in the “scarecrow position:” bend forward, flare your elbows to shoulder-height, and allow your forearms to hang with your elbows at an approximately 90-degree angle. Grab the bar at this width.  Step 2 — Stand Up, Then Hinge Down Credit: Merrick Lincoln, DPT, CSCS / YouTube Grip the bar firmly and stand up straight, allowing your elbows to straighten with the barbell resting near your hips. Hinge forward at your hips, letting your hips flex as your buttock travels backward to keep you balanced. The position of your spine should remain virtually unchanged — no rounding. Keep a slight bend in your knees throughout the movement. Form Tip: Lower until you feel a stretch in your hamstrings (behind your thighs) or when the plates are hovering just above the ground, whichever comes first.  Step 3 — Pull High and Wide Credit: Merrick Lincoln, DPT, CSCS / YouTube Hold the bent position and pull the barbell toward your upper chest, or just below your collarbone, by simultaneously driving your elbows out to your sides while drawing your shoulder blades together. Not all lifters will be able to touch the barbell to the upper chest, and that is okay. Form Tip: Think about “stretching” the bar or making it longer as you pull. This cue reinforces proper arm path. Ensure your elbows remain flared to the sides and not alongside your ribs. Step 4 — Lower With Control Credit: Merrick Lincoln, DPT, CSCS / YouTube Lower the barbell toward the floor by allowing your elbows to straighten and your shoulder blades to be pulled apart, moving forward around your ribcage. Maintain the hinged forward position and repeat the pull for additional rowing repetitions Form Tip: Don’t miss out on the stretch across your mid-back at the bottom. Ensure your trunk angle or hip hinge depth allows you to get a full range of motion without the barbell plates touching the ground. If you’re flexible and the weight plates hit the floor before you feel the stretch, reset your trunk angle by extending your hips or load the bar with smaller diameter plates. Barbell High Row Mistakes to Avoid The barbell high row involves stability and a degree of coordination between your upper and lower body. Keep exercise quality high by avoiding these recurring errors. Using Too Much Biceps Training your biceps is nice, but hitting the target muscles of your shoulders and back is nicer. It has been suggested that rowing with greater than 90-degrees of elbow flexion increases contribution of the biceps brachii. (1) Credit: Miljan Zivkovic / Shutterstock Moreover, rowing with excessive elbow flexion reduces the resistance arm, or perpendicular distance between the barbell and the shoulder joint, which ultimately reduces demand on the shoulder musculature.  Avoid it: Avoid letting your biceps steal the row by using appropriate grip placement, setup, and technique. First, ensure your grip is overhand and spaced approximately the distance between your elbows when your arms are at shoulder-height. Second, when you hinge forward to set up, ensure the bar is hanging underneath your upper chest. Finally, pull toward your upper chest, not your stomach. Poor “Scapulohumeral Rhythm” As you pull your arms back, or horizontally abduct your shoulder joint, your shoulder blades ought to come together, or retract. The coupling of shoulder joint motions with appropriate shoulder blade motions is called scapulohumeral rhythm. If your blades aren’t working with your shoulder joints, well, you’ve got no rhythm. Credit: Jasminko Ibrakovic / Shutterstock Avoid it: Draw your shoulder blades back as you perform the upward movement phase of the row. A useful cue is to create progressively more space between the front of your shoulder and the floor as you row. (2) Then, allow this space to shrink as you perform the downward movement phase. Momentum from Your Hips or Trunk While the upward movement phase

How to Do the Barbell High Row for a Powerful, Muscular Upper Back Read More »

Your Beginner Barbell Workout: A Starter Plan for Strength and Muscle

Your Beginner Barbell Workout: A Starter Plan for Strength and Muscle Something magical happens near the beginning of every dedicated lifter’s love affair with resistance training. There’s a period of unprecedented gains in strength and size. Some refer to the muscular adaptations realized during this stage as “newbie gains.”  Don’t let the derogatory connotation fool you. Newbie gains are awesome. You’ll hit frequent personal bests, stack on pounds of lean muscle mass, and dial-in natural lifting technique.  Credit: Ground Picture / Shutterstock What’s the best way for a new lifter to take advantage of this honeymoon period of gains? Easy. Get your hands on a weight set and train consistently with the basic barbell lifts. Built around barbell basics, this program provides everything you need for serious muscle. Beginner’s Barbell Workout Warm-up to Prepare for Power Total-Body Workout for Size and Strength How to Warm-up for Your Barbell Workout Starting a workout cold may lead to reduced performance, so learn good habits from the start. Don’t skip your warm-up. Warm-ups typically begin with a four-to-six-minute session of cardio to increase body temperature and circulation, ultimately improving oxygen delivery to your muscles and improving metabolite clearance. Common options for the cardio warm-up include skipping rope, riding a stationary bike, or taking a quick jog.  Next, mobilize and activate the joints and muscles of the body involved in the upcoming workout. Since you’re warming up for a full-body workout, you could burn a lot of gym time here, so it’s best to focus on a few key areas such as your hips, shoulders, and spine. Below is a two-movement mobility and activation sequence for these regions. Perform three rounds of following movements: Plank to Pike with Alternating Reach: Assume a “high plank” position — the top position of a push-up — then use your upper body to push your hips back over your heels until you feel a hamstring stretch. This “upside down V” is called the pike position. Maintain the pike position and reach your right hand toward your left foot, return your hand to center, then reach your left hand toward your right foot. Return to a high plank by lowering your hips. That’s one repetition. Perform 8 repetitions. Plank to Deep Lunge with Rotations: Begin in the high plank position and drive your left leg forward and plant your foot as close to the outside of your hand as your mobility allows. Then, lift your left hand and reach out and up toward the ceiling as you rotate your trunk to the left as far as you can. Rotate back and return your hand to the floor, then step back to high plank. Repeat on the right side. That’s one repetition. Perform 8 repetitions.  Once you finally get your hands on the barbell, remember to perform several “work-up sets” of each exercise using lighter weights. Work-up sets allow you to dial-in technique and help you to identify appropriate weights for the sets that count. Barbell Basics for Size and Strength A barbell with plates is possibly the most versatile tool for resistance training. In addition to being the requisite piece of equipment for common exercises, it’s loadable, allowing you to scale the intensity of your training to your current level of strength. Paired with an adjustable bench and sturdy rack, a barbell set gives you the means to train your entire body.  Fortunately, beginner lifters don’t need to live at the gym to experience newbie gains. A large meta-analysis compared the effects of less than five weekly sets per muscle group, five to nine weekly sets, and ten or more. (1) For hypertrophy and strength results, this analysis concluded beginners and novice lifters should target five to nine sets per week per major muscle group. (1) Of course, this recommendation does not imply all sets should be performed in the same workout. Full-body workouts help to maximize training frequency, or the number of times each muscle group is trained per week. Higher frequency training allows for greater weekly sets while avoiding marathon-length workouts.  The workout below consists of 15 sets of barbell exercises. If repeated two or three times per week, this workout puts beginner and novice lifters squarely into the target range for weekly sets. (1) It might be the only resistance training program you need to take your physique from entry-level to next-level. Barbell Basics Workout Plan Front Squat — 3 x 6-10 Bench-Supported Barbell Row — 3 x 8-12 Romanian Deadlift — 2 x 8-12 Incline Bench Press — 3 x 6-10 Barbell Rollout — 2 x 12-16 Barbell Curl — 2 x 8-12 Front Squat Set the tone of your workout by hitting squats first. Specifically, front squats, which hammer your thighs and glutes. The front squat differs from the back squat in several ways. First, as the name implies, the front squat requires carriage of the bar in front of the body, while back squats are performed with the bar across the upper back. The front carriage or “front rack” position may be more forgiving for those with shoulder instability, and it tends to promote a more upright trunk position. Compared to back squat, the front squat also tends to require relatively less weight to elicit a similar training effect. (2)  Why favor an exercise that uses less weight? This is a full-body workout, and we are just getting started. Less load spares the body from excessive fatigue accumulation, which might interfere with subsequent exercises. Front squats will toast your quads without burning through all your matches.  How to Do it: Set up for the front squat by placing the bar at chest height in the rack. For safety, set the spotter arms to approximately one increment below the lowest point you anticipate the bar reaching during the movement. Place your fingers over the bar, slightly outside shoulder-width and dip under the bar as you point your elbows straight ahead. Step back a half step from the rack, place your feet approximately shoulder

Your Beginner Barbell Workout: A Starter Plan for Strength and Muscle Read More »

Is CrossFit Bad for You? 4 Points to Consider Before Stepping into a Box

Is CrossFit Bad for You? 4 Points to Consider Before Stepping into a Box In the realm of fitness, few training methodologies have ignited as much debate, and enthusiasm, as CrossFit. CrossFit is characterized by its emphasis on constantly varied functional movements performed at a high intensity. CrossFit workouts typically blend elements from Olympic weightlifting, endurance sports, and gymnastics. Yet, despite drawing from largely niche sports that require relatively high levels of skill, CrossFit has infiltrated mainstream fitness and promotes itself as an accessible form of training that anyone can do. Credit: Jacob Lund / Shutterstock With its surge in popularity, CrossFit has also faced criticism about the foundational principles upon which it was formulated, along with outright skepticism about its ability to be implemented in an effective, safe, and sustainable fashion. Critics raise concerns about the potential injury risk of performing complex movements while under fatigue, the efficacy of trying to improve all aspects of fitness simultaneously, and the seemingly random nature of the workouts. However, those who regularly participate in CrossFit do see impressive physical benefits in multiple areas. And the feats accomplished at the CrossFit Games each year continue to be astonishing. So, does a training style that produces these results really deserve such a bad rap? Let’s review some of the strengths and weaknesses of CrossFit as a training regimen for developing overall fitness. While doing so, we might be able to answer the question of whether or not CrossFit is “bad” or if it holds up to the claims of accessibility and appropriateness for everyone. A Review of CrossFit Training Strengths of CrossFit Training Weaknesses of CrossFit Training How to Make the Most of CrossFit Training Strengths of CrossFit Training Having been an established force in the fitness world for more than two decades, and still steadily growing in popularity, CrossFit brings several clear benefits to the table. While these same benefits could sometimes be found with other training methodologies, they are inherently “built-in” to CrossFit training, delivering greater overall results. Building Cardiovascular Fitness Let’s face it, most people in the gym probably need to do more aerobic work, aka “cardio.” Even if you are primarily interested in building strength or muscle, it would likely benefit you to not only add cardiovascular training, but to do it via different methods, modalities, and intensities. (1) CrossFit excels at this. More often than not, a CrossFit workout will require you to row, bike, run, or jump rope. Even workouts that don’t have these specific elements will develop some aspect of aerobic fitness or endurance due to their structure, often by incorporating circuit-style training. But if your primary goals are developing strength and increasing muscle, won’t this hurt your progress or even cause you to lose your gains? Probably not. In fact, there’s a good chance it will help your long-term progress. Flamingo images/Shutterstock The common fear that aerobic exercise will hurt strength, power, and muscle gain is rooted in what’s known as the interference effect. This is the notion that, if multiple physical qualities are developed simultaneously, none of them are developed very well because they interfere with each other on a physiological level. It’s a “jack of all trades, master of none” situation. The effect is most pronounced if the qualities require vastly different physiological adaptations, which is the case with strength/power and aerobic adaptations. However, if there is one thing CrossFit has shown us, it’s that the interference effect is not an issue for most trainees. Even fairly advanced trainees can experience significant gains in strength, power, and muscle while simultaneously improving aerobic fitness. (2) So if aerobic work isn’t hurting these gains, how is it helping them? Improving aerobic fitness will help you recover faster between sets, which can allow you to do more overall work (i.e. volume) in your sessions. This will have benefits regardless of your training style or specific goal. It can allow you to get more reps if your goal is hypertrophy and decrease the amount of rest needed between heavy sets if your goal is strength. The outcome in both scenarios is more high-quality work which can result in a novel stimulus for new gains. Sure, if you are already at a high level and want to be elite in a specific strength sport such as bodybuilding, powerlifting, or Olympic weightlifting, your training should be specific toward those goals most of the time. But if you’re training for general fitness or to be bigger, stronger, or leaner than most people, improving your aerobic fitness is going to be beneficial. Emphasis on Bodyweight Movements Another area that tends to get neglected in many peoples’ training is the use of bodyweight exercises. Now, it’s not like you’re going to build the same levels of muscle or one-rep max strength using bodyweight movements compared to utilizing external load. But your skill and ability in movements using external loads, like free weights, have little carryover to bodyweight-only movements and methods. Not convinced? Try getting through the bodyweight exercise portion of the popular CrossFit workout “Murph” — complete a total of 100 pull-ups, 200 push-ups, and 300 unweighted squats. The full workout bookends those 600 reps with a one-mile run before and after, and it’s typically performed wearing a weighted vest. But, for an eye-opener, try the exercises on their own. Credit: oleksboiko / Shutterstock Murph doesn’t care how much you bench or what your muscular endurance is like with heavy, high-rep squats. It will become apparent, very quickly, that those things don’t help you much. If you truly want to develop holistic fitness that helps you look good, feel good, and perform well under a variety of circumstances, you should regularly include some bodyweight exercises in your regimen. (3) Again, this is one area where CrossFit excels. It’s all but guaranteed that you will be doing some form of unweighted squat, push-up, or pull-up every week. But it’s not just the fitness and work capacity aspect of this that’s beneficial. Many of

Is CrossFit Bad for You? 4 Points to Consider Before Stepping into a Box Read More »

What Is a Good Bench Press Weight For a 15 Year Old?

What Is a Good Bench Press Weight For a 15 Year Old? Is my bench press good for a 15 year old? Often times people get occupied in trying to figure out if there lift is good for their age, weight etc. It is important to try not to get caught up in this (unless you are a competetive powerlifter). Your goal should be to focus on improving from where you currently are at. There are 4 major factors which will help you to improve your bench press or any lift! What factors will help improve your bench press? The following factors will help you imrove your bench press and get stronger! Progressive Overload Form Improvement Nutrition Rest Progressive Overload Simply put progressive overload is increasing your total work volume over time. Volume is sets x reps x weight. There are multiple ways to improve your volume which include doing more sets, doing more reps or when ready increasing the weight. Form Improvement Especially with compound movements like squats, bench and deadlifts improving form will correlate to higher numbers. Focus on creating a consistent setup, and mainting tension throughout the whole lift. The video below will show you how to setup your bench press for strength training! Nutrition It is important to make sure you are getting the right balance of macronutriens. You need fuel to workout and enough protein to aid in your recovery. Check out the article Nutrition For Powerlifters for more insights. Rest Rest is huge! Furthermroe, rest is one of the biggest factors when it comes to maximizing recovery from workouts. Try to aim for 7-9 hours of sleep a night. A lot of professional athletes prioritize sleep above all else. The post What Is a Good Bench Press Weight For a 15 Year Old? appeared first on Kafui Fitness. Is my bench press good for a 15 year old? Often times people get occupied in trying to figure out if there lift is good for their age, weight etc. … The post What Is a Good Bench Press Weight For a 15 Year Old? appeared first on Kafui Fitness. Kafui Hotsonyame{authorlink}https://kafuifitness.com/what-is-a-good-bench-press-weight-for-a-15-year-old/Kafui Fitness Your Number One Source For Fitness https://i0.wp.com/kafuifitness.com/wp-content/uploads/2019/04/Untitled.png?fit=23%2C32&ssl=1

What Is a Good Bench Press Weight For a 15 Year Old? Read More »

Introducing the Ultimate Notion Workout Journal

Introducing the Ultimate Notion Workout Journal Introducing the Ultimate Notion Workout Journal Share: Facebook Twitter Pinterest Are you tired of juggling multiple workout resources and struggling to stay on track with… The post Introducing the Ultimate Notion Workout Journal appeared first on Chape Fitness. Introducing the Ultimate Notion Workout Journal Share: Facebook Twitter Pinterest Are you tired of juggling multiple workout resources and struggling to stay on track with… The post Introducing the Ultimate Notion Workout Journal appeared first on Chape Fitness. David{authorlink}https://chape.fitness/introducing-the-ultimate-notion-workout-journal/Blog – Chape Fitness Changing lives one workout at a time https://i0.wp.com/chape.fitness/wp-content/uploads/2022/08/cropped-Chape-Fitness-100-1.webp?fit=32%2C32&ssl=1

Introducing the Ultimate Notion Workout Journal Read More »