Yoga

Auto Added by WPeMatico

Learn How to Do the World’s Greatest Stretch

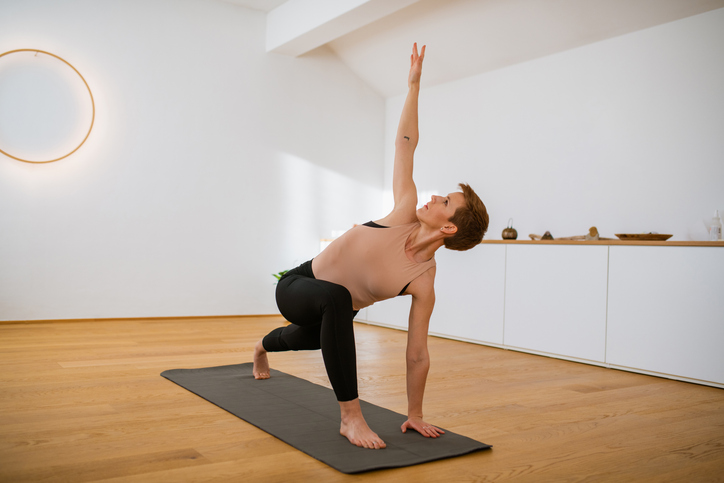
Learn How to Do the World’s Greatest Stretch Although there are many outstanding stretches in a dynamic-warmup that can prepare you for a workout, only one holds the title of the “world’s greatest stretch.” That’s because this particular move hits multiple muscle groups and improves range of motion, which plays a underrated role in exercise performance and injury prevention. The stretch pairs a lunge with a torso twist toward the bent front knee, along with outstretched arms — one on the floor, the other in the air — providing a blend of strength, balance, and released muscle tension. Why Is It Called the World’s Greatest Stretch? The world’s greatest stretch earned its name by engaging so many muscles simultaneously, explains strength and conditioning coach Reda Elmardi, CSCS. “The world’s greatest stretch is highly regarded for its comprehensive approach within a single flow,” Elmardi says. “Its efficiency in targeting multiple muscle groups is a standout feature, as it addresses several key muscle groups crucial for overall mobility and flexibility.” These key areas include the hamstrings, hip flexors, glutes, core, and shoulders. Even the feet get a stretch since the one behind you in a lunge will be in a heel-raised position, providing elongation in the foot muscles. Not only does it help improve mobility, but it’s also a great addition to a dynamic warm-up. Before a workout, dynamic stretching helps the body get ready for specific movements and that can fire up the right muscles in a way that keep them protected even during intense workouts. For example, a 2018 study in the Journal of Exercise Rehabilitation suggests that dynamic stretching increases the range of motion for joints, and that reduces the risk of injuries to muscles and tendons. World’s Greatest Stretch: Step-by-Step Instructions Stand on a mat with your feet about hip-distance apart. With your knees slightly bent, bend forward at your waist and place your palms next to your feet. Step your right leg backward until you’re in a runner’s lunge position, with your left knee forward and bent at a 90-degree angle. Keeping your right hand on the mat (or on a yoga block), twist your torso to the left, opening up your chest toward your left leg and extending your left arm toward the ceiling with your palm facing to the left. Tips for the World’s Greatest Stretch Your approach to this stretch will depend on whether you’re using it as a dynamic or static stretch. For dynamic stretching When performing the world’s greatest stretch as part of a dynamic warm-up, you don’t need to hold each position for a long time, according to Elmardi. “Instead, move smoothly through each part of the stretch for about three to five seconds per position, focusing on fluid movement rather than static holding,” he says. “This approach helps increase blood flow, warm up the muscles, and prepare your body for the workout ahead.” For static stretching After a workout, when you’re focusing more on improving flexibility and cooling down, you can hold each position of the world’s greatest stretch for a longer duration, he adds. That might mean 15 to 30 seconds per position. “This allows your muscles to relax and stretch more deeply, aids in recovery, and helps improve overall flexibility,” says Elmardi. “Keep in mind that the ideal hold time can also vary based on individual flexibility and comfort levels. Adjust as needed to ensure the stretch feels beneficial, not painful.” Benefits of the World’s Greatest Stretch Because so many muscles are engaged at once, this stretch is a boon for active muscle recruitment and strength development, Elmardi says, but that’s not all. He says the stretch has more advantages to offer: 1. Enhances flexibility By targeting multiple joints and muscle groups, you can improve overall flexibility and range of motion, which can contribute to better performance in physical activities and reduce the risk of injury, he says. 2. Promotes functional movement The world’s greatest stretch includes elements that mimic real-life movements, such as lunges and twists, promoting functional flexibility that translates into everyday activities. 3. Increases blood flow The dynamic nature of the stretch helps increase blood flow to the muscles, aiding in muscle recovery and reducing soreness. 4. Helps with body coordination The complexity of the movements requires concentration and coordination, engaging the mind as well as the body, which can help improve overall body awareness. Mistakes to Avoid During the World’s Greatest Stretch Although the stretch might seem simple and straightforward, Elmardi suggests focusing on form at every step. Here are some common mistakes to avoid: Rushing through the movements: Given its dynamic nature, moving too quickly can lead to improper form and reduce the effectiveness of the stretch. Improper alignment: In the lunge position, make sure your front knee is directly over your ankle, not extending past your toes. This will help you avoid excess strain on the knee. Also, aim to keep the hips square to the front, which can help maintain balance and ensure the stretch targets the intended muscles. Not engaging the core: Failing to engage your core throughout the stretch can lead to lower back strain, especially during the twist and reach portions. Along with aiding stability, a strong, engaged core helps support the spine. Overextending during the twist: When performing the twist portion, be careful not to over rotate, which can strain the back. The twist should come from the thoracic spine (upper and mid-back) rather than the lower back. Skipping breathing: Not breathing properly can create tension in your muscles, making them less receptive to stretching. Deep, controlled breaths can help deepen the stretch and increase relaxation. Pushing yourself too far: “Most of all, listen to your body, particularly if you’re experiencing pain,” says Elmardi. “Pain beyond mild discomfort is a sign that something may be wrong, and pushing through pain can lead to injury. If this is happening, adjust the stretch or seek professional advice if something feels off.” How to Make the World’s Greatest Stretch Easier If you’re

Learn How to Do the World’s Greatest Stretch Read More »
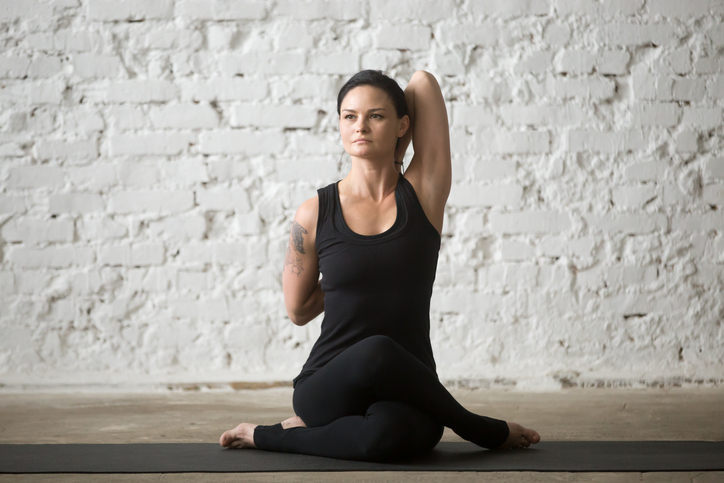
Stretch Your Shoulders and Hips Simultaneously With Cow Face Pose

Stretch Your Shoulders and Hips Simultaneously With Cow Face Pose Cow face pose (gomukhasana in Sanskrit) is a wonderful posture that opens the shoulders and stretches the glutes. If this seated pose asks more than your knees and hips can fully deliver, the upper-body portion of the pose is still an amazing stretch that can be practiced anywhere from a hot shower (the warm water helps prepare and warm up the deltoids and triceps) to the waiting area of an airport, especially before a long flight. Gomukhasana is an amazing physical antidote to how much time the spine spends in constant flexion, be it hunched over a computer, looking down at a phone, or seated behind the wheel. Whether we realize it or not, life is a forward bend. If you take on this pose and consider it a daily vitamin for your shoulders, you can create mobility and freedom in your chest and upper back in equal measure. Cow Face Pose (Gomukhasana): Step-by-Step Instructions Start in tabletop position: Get on all fours, with your hands directly below your shoulders and your knees directly below your hips. Cross your right knee over your left knee, and sit your hips back on to the floor, evenly distributing your weight on both butt bones. The sides of your feet or ankles should be on the floor, equidistant to either side of your pelvis. Reach your left arm out to the side and internally rotate it so your palm faces behind you, then bend your left elbow and work your left hand up your back without pulling your left shoulder down lower than the right. Your left fingers should point up toward your neck, palm still facing behind you. Extend your right arm toward the ceiling, and keep your biceps close to your ear as you bend your right elbow and reach down your back toward your left hand. Clasp them if possible. Hold for a minute, then gently reverse the pose and switch sides. Tips for Doing Cow Face Pose Don’t worry if your hands don’t come together. “Instead, focus on reaching your arms in opposite directions to activate your upper chest,” says Brent Laffoon, one of the instructors in BODi’s Yoga52. With time and practice, your hands may eventually move closer to each other. Once in the pose, challenge yourself to create and maintain a level pelvis both side to side and front to back. Ideally both sides of your waist are evenly long and your shoulders are level. If your butt bones are uneven on the floor, sit on a blanket or a block. You are trying to make an intrinsically asymmetrical pose symmetrical. How to Make Cow Face Pose Easier The classic pose is quite challenging in terms of balance and flexibility, but there are a few ways to modify it to make the posture accessible for every body. What makes this pose so challenging is how much flexibility is required in both the shoulder girdle and the outer hips simultaneously. Consider working on your upper and lower body separately before doing the full pose. Use a yoga strap as an arm lengthener. If your hands don’t touch somewhat effortlessly, then toss the strap over one shoulder. Once your arms have moved as close to one another as they can without forcing it, grasp the strap in each hand and work them toward one another. No strap? No problem. Laffoon says, “You can still get a good stretch and really feel the difference between your active and passive range of motion.” How to Deepen Cow Face Pose In the classic pose, the hips aren’t actually on the floor. To make cow face more of a challenge in terms of balance, bring your feet together underneath you and try balancing on your heels. The post Stretch Your Shoulders and Hips Simultaneously With Cow Face Pose appeared first on BODi. Cow face pose (gomukhasana in Sanskrit) is a wonderful posture that opens the shoulders and stretches the glutes. If this seated pose asks more than your knees and hips can fully deliver, the upper-body portion of the pose is still an amazing stretch that can be practiced anywhere from a hot shower (the warm water helps […] The post Stretch Your Shoulders and Hips Simultaneously With Cow Face Pose appeared first on BODi. Kayne Toyosato{authorlink}https://www.beachbodyondemand.com/blog/cow-face-pose-gomukhasana-yogaBODi BODi is a Health Esteem platform to help you embrace the person you are today so you can take action to achieve all your health and fitness goals. https://bodiblog.wpenginepowered.com/wp-content/plugins/bod-blog/assets/vendor/beachbodydigital/wordpress-core-plugins/beachbody.png

Stretch Your Shoulders and Hips Simultaneously With Cow Face Pose Read More »

Want to Improve Cardio and Strength? The Answer Is Power Yoga

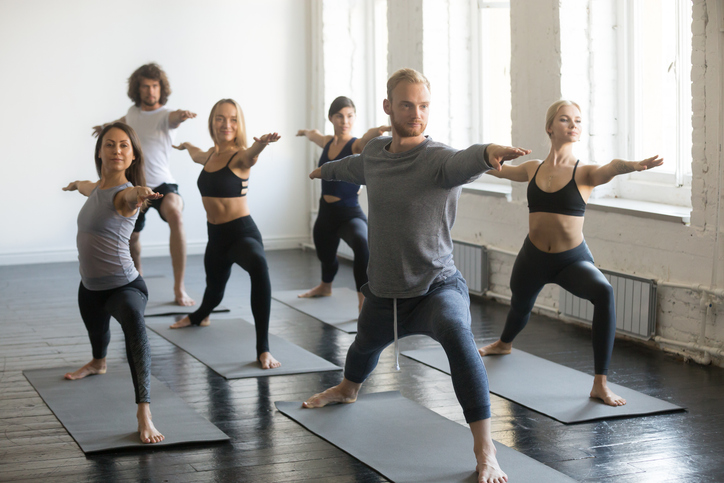
Want to Improve Cardio and Strength? The Answer Is Power Yoga Love the mindful benefits of yoga but crave a more intense workout? Power yoga delivers both in a single practice. “The flows can be more physically demanding on the body (and sometimes mind), and the class moves at a faster pace,” explains Robin Diamond, RYT 200, a Miami-based power yoga instructor. The sequencing and speed are “designed to keep your heart rate elevated and your muscles working,” she adds. A mix of cardio yoga and yoga for strength, this 20th-century update on an ancient practice is perfect for those who want their workouts to pull double duty. Read on to learn about power yoga, how it’s connected to vinyasa yoga, and which poses you can expect in a typical class. What Is Power Yoga? Power yoga is any type of high-intensity yoga in which the pace and movements are more challenging than in a traditional yoga practice. While yoga’s roots date back millennia as a meditative practice, power yoga is a distinctly modern type of yoga. In 1995, Beryl Bender Birch wrote the book Power Yoga, named for her signature athletic method of teaching the equally intense (but much more rigid and traditional) Ashtanga yoga. Bender Birch was the first to teach yoga to athletes, and power yoga has been the official yoga program of the New York Road Runners Club since 1980. In the ’90s, yogis Bryan Kest and Baron Baptiste each put their own spin on the power practice, but these days “power yoga is a more general term,” Diamond says, adding that it’s linked to vinyasa (a.k.a. flow) yoga. You’ll also see “power vinyasa yoga” listed on studio class schedules. As a decidedly Western practice, participants can expect music and energy, with a mix of English and Sanskrit names for poses. Be prepared to move — and sweat — without letting go of your “yogic breathing.” “In a power class, you are linking breath with movement, just at a quicker pace,” Diamond says. A lifelong yogi, she found power yoga about seven years ago. “My strength increased tremendously, and my mind was quiet when I was on my mat,” she says, explaining that the intensity actually helps with focus. “When the classes are physically demanding, you’re so focused on the flow that you totally disconnect from other thoughts,” Diamond says. That’s the essence of the upcoming program BODi LAVA, which fuses power yoga and primal movements for low-impact, high-intensity workouts that build strength and cardiovascular endurance. Power Yoga Benefits For those with a foundation in yoga, a power yoga practice can amplify its existing benefits: 1. Muscle strength and development “All forms of yoga can provide an incredible mental workout, but power yoga is a great physical practice,” Diamond says. “By using your own bodyweight through a series of poses like push-ups (chaturanga), arm balances, and even standing poses, you’re able to sculpt your muscles if you practice consistently.” 2. Increased calorie burn The brisk, steady pace of power yoga burns more calories than a slower yin or restorative practice, as your fitness tracker can confirm. In 2020, researchers examined the benefits of vinyasa yoga for cardiovascular health. They answered the question of whether yoga is cardiovascular exercise: Doing 90 minutes of vinyasa yoga can, over time, be an effective alternative to other forms of cardiovascular workouts. 3. Mood boost Any time you unroll your mat, it can help you manage stress, bounce back from tough blows, and build resilience. Even one session of power yoga has been shown to reduce salivary cortisol, a marker for stress, according to research conducted on college-age women published in 2019. 4. Cardiovascular health Dancers who practiced power yoga for eight weeks boosted their anaerobic endurance — as well as upper-body strength (compared with a control group who did not add yoga to their routine) — according to research published in 2019. 5. Greater mobility Yoga can, of course, yield benefits for flexibility, mobility, and overall health of joints and connective tissues, and power yoga is no exception. 6. Weight management Power yoga may help with weight loss, and, according to a 2016 review of studies, it’s a safe and effective addition to a weight-loss routine. What Is a Typical Power Yoga Sequence? “Every teacher brings their own special traits to their class,” Diamond says, but expect to kick off your power yoga practice with sun salutations after a quick, gentle warm-up. (But not 108 of them — don’t worry!) As with other flow yoga, expect to link power yoga poses with a “vinyasa” or the combo of chaturanga (chaturanga dandasana), upward facing dog (urdhva mukha svanasana), and downward facing dog (adho mukha svanasana), which are all part of a sun salute. Here are a few other poses you can expect in a power vinyasa yoga sequence. Move through each after a breath or two to boost the cardio yoga benefits of the practice. Warrior 1 (Virabhadrasana 1) Start in mountain pose (tadasana). Step your left foot back three to four feet, at a 45-degree angle. Give yourself as much space between your feet as needed. If you’re able, align your back left arch with your right heel. Keeping your chest and hips facing the front of the mat throughout the posture, bend your front knee 90 degrees directly over the ankle, with your knee and toes pointing forward. Press your back foot into the ground. Lengthen your spine and engage your core. On an inhale, sweep your arms forward and up, palms facing each other. Keep your arms in line with your ears, engage your triceps, and press your shoulders down and away from your ears. Look forward or up toward your hands. Exhale to move out of the pose, to mountain pose, or directly to the other side. Warrior 2 (Virabhadrasana 2) Start in mountain pose. Step your left foot back three to four feet, at a 45-degree angle, following the same alignment as warrior 1. Bend your

Want to Improve Cardio and Strength? The Answer Is Power Yoga Read More »

How to Do Eagle Pose in Yoga (Garudasana)

How to Do Eagle Pose in Yoga (Garudasana) Eagle pose (garudasana in Sanskrit) makes you feel like you’re being twisted like a pretzel but in the best possible way. The classic version of garudasana requires focus and balance, which is among the first things to go as we age. Eagle pose is an excellent and playful way to access and strengthen your core muscles, work your legs and hips, and open your shoulders and upper back. Brent Laffoon, an instructor in BODi’s Yoga52 series of practices, loves the story of the eponymous Garuda, a mythological Hindu figure who was half-man, half-bird. “As Garuda came of age, he diminished himself so he wouldn’t scare people,” Laffoon says. “Then one day a gang of deceitful snakes took his mom hostage, and Garuda summoned all of his powers to save her. Thus, eagle pose reminds us not to make ourselves smaller, and to protect the feminine in order to not be taken advantage of.” Eagle Pose (Garudasana): Step-by-Step Instructions Start in mountain pose (tadasana), standing tall with your feet together or hip-width apart and your hands at your sides. Bend your knees to lower your hips down and back, as if sinking into chair pose (utkatasana). Shift your weight onto your left foot and lift your right foot, crossing your right knee over your left knee. If possible, hook the top of your flexed right foot around the inside of your left ankle. Squeeze your legs together to maintain balance, and level your pelvis by drawing your left hip back and your right hip forward. Once your legs are established, cross your arms in front of you — right arm under the left — bend both elbows, and try to press your palms together. Lift your elbows to shoulder height, keeping them bent at 90 degrees. Hold the pose for five breaths, and reverse the sequence to return to mountain pose. Repeat with the opposite crossing of legs and arms. How to Make Eagle Pose Easier It’s easy to get frustrated while attempting garudasana. Fortunately, there are many ways to modify and/or prepare for eagle pose that can help demystify the posture. 1. Use a wall for balance Stand a foot away from a wall, facing it. Place your fingertips (not your whole hand) on the wall at shoulder height. Bend your knees as deeply as you can, keeping your weight in your heels. Practice picking up one leg and crossing it over the opposite leg, then switch. Use a free hand to help wrap your legs more tightly. When you feel steady enough, try taking your hands off the wall. Don’t drop your arms down by your side, rather try to keep them lifted so you can start practicing adding the arms component when you feel like your legs are fully supporting you. 2. Do ankle rotations Even beyond their value at working up to garudasana, ankle exercises like this one are great to do regularly. Lie down on your back and lift your right leg. Bend your right knee and interlace your hands behind the back of your thigh. Keeping your leg stationary, perform a dozen or so very slow ankle circles clockwise, then counterclockwise. Slow is key. Decelerate when you find a sticky spot in your ankle mobility. Practice exploring where there is lack of movement rather than speeding past it. Switch legs and repeat. 3. Try reclined eagle pose When you lie down on the floor for baddha garudasana, your nervous system quiets and balance is taken out of the equation. Using the feedback of the floor underneath your torso and lower body helps you to understand where you are in space and how to adjust your hips and shoulders to line up more evenly. 4. Be patient with your progress Laffoon reminds us: “Wrapping the ankles requires a lot of mobility in the hips, and some people have such strong legs that the thighs and calves get in the way. There’s always value in just doing the best you can!” How to Deepen Eagle Pose As soon as you feel like you’ve “nailed” a pose, you may want to make it more challenging. Challenge your balance and try closing your eyes once you are in the pose. Maybe that means a long blink. Make garudasana even more interesting by playing on different surfaces. Try standing on a block or a bolster. If you don’t have yoga props, stand on your couch or your bed. Any unstable surface will further test your ability to support yourself and prepare you for life off the yoga mat. Another fun way to play in eagle pose, once you feel stable, is to gently move your elbows up and down. Again, disturbing your balance is the way to improve it. How to Avoid Injury in Eagle Pose Foremost when attempting to perform garudasana safely, do NOT force your knees to cross beyond their limits. Because you’re asking your legs to internally rotate while standing on one foot, you may find yourself cranking yourself into the pose quickly. Slow down and don’t force anything. The post How to Do Eagle Pose in Yoga (Garudasana) appeared first on BODi. Eagle pose (garudasana in Sanskrit) makes you feel like you’re being twisted like a pretzel but in the best possible way. The classic version of garudasana requires focus and balance, which is among the first things to go as we age. Eagle pose is an excellent and playful way to access and strengthen your core muscles, work […] The post How to Do Eagle Pose in Yoga (Garudasana) appeared first on BODi. Kayne Toyosato{authorlink}https://www.beachbodyondemand.com/blog/eagle-pose-garudasana-yogaBODi BODi is a Health Esteem platform to help you embrace the person you are today so you can take action to achieve all your health and fitness goals. https://bodiblog.wpenginepowered.com/wp-content/plugins/bod-blog/assets/vendor/beachbodydigital/wordpress-core-plugins/beachbody.png

How to Do Eagle Pose in Yoga (Garudasana) Read More »

How to Do Bow Pose in Yoga (Dhanurasana)

How to Do Bow Pose in Yoga (Dhanurasana) Bow pose (dhanurasana in Sanskrit) is a very challenging yet satisfying backbend. Its difficulty lies in the amount of strength required of the body’s posterior. Similarly shaped postures like camel pose and bridge pose are often easier to access because of how much leverage the body can exert by pressing down with the limbs. Dhanurasana, on the other hand, offers only the abdomen as a contact point. Because of your body’s relationship to gravity, the strength required for bow pose must come from the glutes, hamstrings, and upper back to lift your upper and lower body off of the floor. With repetition and perseverance, your body will understand how to move into this pose and experience the benefits of a more mobile spine. Bow Pose (Dhanurasana): Step-by-Step Instructions Lie face down on your mat, legs hip-width apart, forehead resting on stacked hands. Press the tops of your feet into the floor and straighten your legs as you tuck your tailbone toward the floor. Observe a subtle lift underneath your navel. Lift your forehead off of your hands and lift your chest as you simultaneously firm your buttocks and the backs of your legs toward the floor. Reach both of your arms behind you simultaneously, rotating them so your palms face each other, and bend your knees. Lift your chest and legs high enough that you can grab the outsides of your ankles or the tops of your feet. Keeping your knees hip-width apart, hold your ankles or feet firmly so the backward resistance of your legs helps to keep your chest lifted. If your upper back is moving well and you’re able to look upward, give that a try. Avoid throwing your head back, and work on moving your shoulder blades down and away from your ears. Hold for 5 to 10 deep breaths. You will be tempted to come out of the pose by simply letting go of your feet. Rather than releasing your body like a slingshot, slowly resist gravity, with the upper and lower bodies landing at the same time. Beginner Tips for Doing Bow Pose Play with moving your focus from opening your chest by pulling your legs farther back. Then, try letting your chest move down toward the floor a bit to focus on lifting your legs higher. Brent Laffoon, instructor in BODi’s Yoga52 series, says, “There’s value in doing it both ways. There’s also a lot to be gained by keeping your weight centered on your belly and trying to lift both the legs and the chest evenly.” How to Make Bow Pose Easier Instead of bending your knees and reaching for your ankles, keep your legs straight and strengthen them by pressing them into the floor and strongly engaging your glutes. This teaches you how to support and lengthen your lower back, rather than hinging at the lumbar spine, the most vulnerable and often injured part of the spine. Working your legs straight, practice various arm positions: Interlace your hands behind your back and work to lift your chest up by pulling your arms back (also known as bound locust pose). Extend your arms straight behind you, and press your palms strongly down into the floor to lift the fronts of your shoulders. Move your shoulder blades toward each other, spreading your collarbones wide apart. To modify the full pose, place a long bolster or two folded blankets under the tops of your thighs. Starting off with your legs already lifted shortens the distance needed to reach your feet. How to Deepen Bow Pose Rather than pushing yourself further into bow pose, try holding it longer. Then practice coming out of the pose as slowly and gracefully as possible. Once entering and exiting bow pose becomes more effortless, continue to deepen dhanurasana by lifting your feet and the crown of your head toward each other, creating an even higher vertical line. Try taking the pose to the side into parsva dhanurasana, or side bow. Maintaining the grip on your ankles, gently rock over completely to one side. In this very different relationship with gravity, feel the floor underneath your side body and tighten up the pose, tucking your tailbone and opening your chest even more. With even amounts of momentum and control, rock back onto your abdomen, take a full cycle of breath, then gently rock to the other side. The post How to Do Bow Pose in Yoga (Dhanurasana) appeared first on BODi. Bow pose (dhanurasana in Sanskrit) is a very challenging yet satisfying backbend. Its difficulty lies in the amount of strength required of the body’s posterior. Similarly shaped postures like camel pose and bridge pose are often easier to access because of how much leverage the body can exert by pressing down with the limbs. Dhanurasana, on the […] The post How to Do Bow Pose in Yoga (Dhanurasana) appeared first on BODi. Kayne Toyosato{authorlink}https://www.beachbodyondemand.com/blog/bow-pose-dhanurasanaBODi BODi is a Health Esteem platform to help you embrace the person you are today so you can take action to achieve all your health and fitness goals. https://bodiblog.wpenginepowered.com/wp-content/plugins/bod-blog/assets/vendor/beachbodydigital/wordpress-core-plugins/beachbody.png

How to Do Bow Pose in Yoga (Dhanurasana) Read More »

Start Your Day With This 10-Minute Morning Yoga Flow

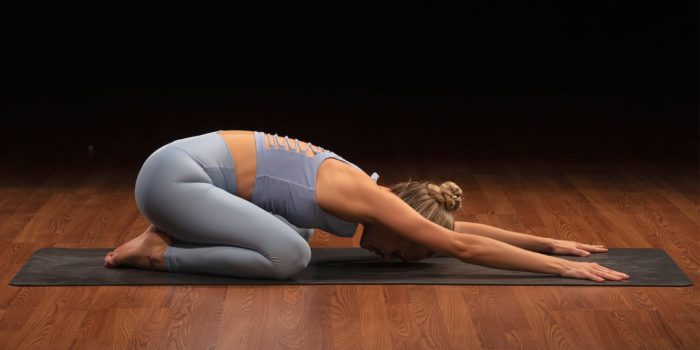
Start Your Day With This 10-Minute Morning Yoga Flow Rise and shine, yogis! It’s is time to wake up, roll out of bed, and unroll your yoga mat. A morning yoga flow is the perfect way to awaken your mind and body to start your day. There is no reason to shell out thousands of dollars on fancy yoga retreats to reap the benefits of yoga. Even five to 10 minutes of yoga in the morning can have you feeling refreshed and invigorated to handle anything that comes your way. Benefits of Yoga in the Morning While yoga can be beneficial at any time of day, practicing yoga in the morning can be especially helpful. “A morning yoga routine can serve as a perfect way to gradually warm and awaken the mind and body after a restful night’s sleep, preparing you for whatever the day might have in store,” says Jessica Matthews, DBH, E-RYT 500, award-winning yoga educator and author of Stretching to Stay Young. Here are some other benefits of yoga that can help jumpstart your day: Boosts mood Helps improves cognitive function, like focus and processing speed Helps with energy Builds resilience, AKA our defense against stress Which Type of Yoga Is Best in the Morning? There are many different types of yoga, and each style may appeal to different people. When it comes to morning yoga stretches, though, we recommend vinyasa yoga. This type of yoga links breath with movement and allows you to create a “flow” as you move from one pose to the next, Matthews explains. “Much like a warm-up at the start of a workout, this type of dynamic yoga practice energizes the mind and body, gradually preparing the body as an integrated unit by utilizing exploratory movements and foundational postures linked with the natural rhythm of the breath to establish optimal joint stability and mobility,” Matthews says. “Practicing asana dynamically and in an intelligently sequenced manner gradually raises the body’s internal temperature and enhances neuromuscular efficiency, helping to develop more effective, pain-free movement patterns and improved body awareness,” she adds. Morning Yoga Routine This 10-minute morning yoga sequence developed by Matthews begins with a moving breath exercise called Bellow’s Breath. “Sometimes referred to as ‘yogic coffee’, this energizing breathing technique increases mental activation and alertness,” Matthews says. Go at your own pace throughout this sequence, following your breath. 1. Bellow’s breath (bhastrika) with overhead reach Assume a comfortable seated position of your choosing, such as easy seated pose (sukhasana). Bend your elbows at shoulder height. Align your elbows with your shoulders. Stack loose fists over your wrists. Maintain the length of your spine, and take two-to-three deep, diaphragmatic breaths through your nose. On the next inhalation, inhale through the nose while extending your arms overhead, palms meeting above your head at the top. On the exhalation, breathe out your nose, bending your elbows to lower your arms back to the starting position. Repeat for even breath cycles (one inhale, and one exhale counts as one cycle). Rest with your hands on your thighs. Turn your palms up to receive the energy around you. 2. Bridge pose Lie down on your back and bend your knees. Track your knees over your ankles. Separate your feet hip-distance apart. Reach your arms long toward your toes. Inhale to lift the hips toward the ceiling. Keep your hips lifted and touch your head, neck, and shoulders to your mat. (Avoid gazing right or left to protect your neck). Exhale, slowly lower to the starting position. 3. Cat/cow pose Come to all fours. Stack your shoulders above your wrists and your hips over your knees. Neutralize your spine, draw your abs toward your spine. Inhale for cow pose, opening up your chest and dropping your head back between your shoulder blades. Think about compressing your hips and shoulders toward one another. Exhale for cat pose, rounding your spine and drawing your hips toward your chest. Pull your chin down towards your chest. Repeat the motions to warm-up your spine. 4. Crescent lunge variation From all fours, step your right leg forward between your palms, and extend your left foot long behind you. Inhale, sweep your arms above your head with your biceps by your ears. Sink your hips down low. Drop to your back knee. Exhale, release your right arm alongside your body, and reach your left fingertips over your head. Push your hips forward to deepen the stretch in your hip-flexors, while you stretch your left side. Come back through the center and return to all fours. Switch sides, repeating with the left foot forward and right arm reaching up and overhead. 5. Child’s pose with a twist From tabletop, touch your big toes together and place your knees hip-distance apart. Sink your hips toward your heels, draw your belly down to the mat, and reach your arms forward (option to wrap your hands around your heels). Inhale, lift your right arm away from the mat. Exhale, thread your arm underneath your left arm to twist your torso and stretch your right shoulder. On the next inhalation, unthread your right arm. Exhale to repeat the movements on the left side. Return to child’s pose with both arms extended. 6. Plank to downward facing dog Return to all fours. Assume a plank position, stacking your shoulders over your wrists, lengthening your spine, and straightening your legs behind you. Straighten your arms and send your chest toward your thighs as you pike your hips toward the ceiling to make a pyramid shape with your body. Try to drop your heels toward the mat (it’s OK if your they don’t touch the floor). Option to transition between downward-facing dog and plank pose to warm up your shoulders. 7. Star pose to goddess pose  From downward-facing dog, walk your feet to your hands. Slowly rise to a standing position, uncurling your spine until your shoulders stack over your hips. Step your feet three-to-four feet apart in a wide split-leg stance.

Start Your Day With This 10-Minute Morning Yoga Flow Read More »

How to Do Boat Pose in Yoga (Navasana)

How to Do Boat Pose in Yoga (Navasana) It’s no wonder many yogis have a love-hate relationship with boat pose. Known also as navasana, this yoga pose requires you to hold your balance, keep your core engaged, and avoid straining your neck — all while keeping your breath steady and strong. Among other benefits (see below), navasana is one of the best-known yoga poses for abs. Just a few breaths in this V-shaped posture are sure to have your belly feeling the burn. And learning how to do it correctly can not only build core strength, but also focus and concentration. (It’s not easy!) Boat Pose (Navasana): Step-by-Step Instructions Boat pose is also sometimes called paripurna navasana. (Paripurna = full or complete; nava = boat; asana = seat or pose). Here’s how to do it correctly. Sit on a yoga mat, with your feet flat on the floor, hip-width apart. Keeping your spine straight (don’t let it round!) and your abs engaged, find your balance by leaning back between your sitting bones and tailbone. Lift your feet so your shins are parallel with your mat. Then, if possible, straighten your knees so your legs form a 45-degree angle with the floor. Extend your arms in front of you, with your palms facing in and your shoulders away from your ears. Hold the pose for five breaths or up to one minute. How to Make Boat Pose Easier Keep your knees bent. Bending your knees brings you to half boat pose, or ardha navasana. If that still feels too intense, keep the balls of your feet lightly touching the mat with your heels lifted. Hold the backs of your thighs. If you struggle to keep your back straight or feel strain in your low back, grab your hamstrings or place your hands behind you on the mat for additional support. Use a strap. To reduce the load on your abs and hip flexors and to help you find your balance and strength in boat pose, loop a yoga strap around the balls of your feet. How to Make Boat Pose Harder If you want to intensify boat pose, start by holding it for more breaths. You can then progress to these other ways to amp up your navasana. Twisting boat. While in boat pose, twist to your right as you inhale, extending your right arm behind you without moving your lower body. Return to center after an exhale, and repeat on the other side for five to 10 reps. Boat in the storm. Place a yoga block between your knees and, while in boat pose, draw your knees to the right until your left glute lifts off the mat. Balance on your right glute, holding for a full breath. Return to center on an inhale, then repeat on the other side, for five to 10 full repetitions. Boat crunches. From full boat pose, exhale and lower your legs and upper body until they hover just above your mat. (This is sometimes called “canoe” pose.) Inhale to return to boat pose and repeat as desired. Additional Tips for Doing Boat Pose Consider these helpful tips to get stronger and more confident in navasana. Keep your shoulders down and engaged. When you get tired in boat pose, you may find your delts are up around your ears. Relax your shoulder muscles and lengthen your neck, casting your gaze past the tip of your nose. Focus on your balance. Boat pose can be a challenge for your balance, so start by rolling up and back on your spine with your knees bent. “You’ll find the place where you’re no longer fighting gravity and are not placing all of the pressure on your sacrum,” says Stephanie Saunders, BODi vice president of fitness programming. Sit on a blanket. If you ain’t packin’ much back, boat pose may feel uncomfortable. So pad your rear with a blanket folded to the desired thickness. Benefits of Boat Pose There’s no doubt about it: Boat pose will work your core. But there’s much more to the pose than that. Here are some reasons why boat pose is a staple in any yoga practice. 1. Strengthens hip flexors While navasana is among the best yoga poses for abs, it’s also good for your hip flexors, too. Keeping your legs lifted strengthens the psoas and iliacus muscles, two primary hip flexors. “The abdominals are responsible for keeping your torso lifted, but it’s flexion in the hip that is responsible for the movement,” says Saunders. 2. Strengthens quadriceps Engaging your quads in boat pose helps make them stronger and more toned. 3. Strengthens shoulders Keeping your arms extended will work your deltoids, particularly the anterior head of the muscle. 4. Strengthens abdominals Of course, navasana strengthens the rectus abdominis, along with the deeper muscles of the abdomen and obliques that frame it. The post How to Do Boat Pose in Yoga (Navasana) appeared first on BODi. It’s no wonder many yogis have a love-hate relationship with boat pose. Known also as navasana, this yoga pose requires you to hold your balance, keep your core engaged, and avoid straining your neck — all while keeping your breath steady and strong. Among other benefits (see below), navasana is one of the best-known yoga poses for abs. […] The post How to Do Boat Pose in Yoga (Navasana) appeared first on BODi. Kayne Toyosato{authorlink}https://www.beachbodyondemand.com/blog/boat-pose-yoga-navasanaBODi BODi is a Health Esteem platform to help you embrace the person you are today so you can take action to achieve all your health and fitness goals. https://bodiblog.wpenginepowered.com/wp-content/plugins/bod-blog/assets/vendor/beachbodydigital/wordpress-core-plugins/beachbody.png

How to Do Boat Pose in Yoga (Navasana) Read More »

How to Do Extended Side Angle Pose in Yoga

How to Do Extended Side Angle Pose in Yoga If you’ve been seeking a great side stretch, look no further than the extended side angle pose in yoga, also known as utthita parsvakonasana in Sanskrit. Not only does it stretch the side of your torso, but it also stretches the side of your legs, and it even gives you a deep stretch in your groin. How does this all work? Utthita parsvakonasana creates a long side angle all the way from your back heel to the tips of your fingers as you bend deeply in your front leg. It’s a preparatory pose for many wide legged-poses, as it’s great for opening the hips, and is found most often in the warrior vinyasa flow sequences. Here’s how to get into it and perform it with proper form. Extended Side Angle Pose (Utthita Parsvakonasana): Step-by-Step Instructions Set up Start in mountain pose. On an exhale, step your left foot back three to four feet into Warrior 2 pose, with your foot turned 90 degrees so that your left arch is in line with your right heel. Bend your right knee to a 90-degree angle directly over the ankle, with the toes of your right foot pointing forward. Reach your right arm forward and your left arm back to create a “T” shape with your palms facing down. Press your left foot firmly into the ground, and square your chest and hips to the left side. Getting into the pose On an inhale, engage your core and reach forward with your front arm to lengthen your waist. Place your right hand to the outside of your ankle, on a yoga block, on the floor, or bring your right forearm to your thigh. Then, exhale and reach your left arm up and forward, bringing your biceps by your left ear to stretch your side even more, keeping as much length through the left side of your body as possible. Your body should form a straight line from your fingers to the heel of your back foot. Alignment Align your front knee over the center of your foot. Press your back heel down, firmly into the ground. Engage your core and keep your torso facing to the side. Create a long, extended line from your heel to your left fingertips. If possible, turn your gaze to your top hand. How to Make Extended Side Angle Pose Easier If you can’t reach the floor with your hand, use the variation of the forearm on the thigh or a block outside the ankle to help support your hand. To reduce the stress on your hips, step your back foot closer to your front foot . If your neck is tight, look down at the ground or to the side instead of up at your top hand. If reaching up and forward proves too difficult, just reach for the ceiling. How to Intensify Extended Side Angle Pose To deepen the pose, continue to engage your abs and spin your torso open to the side, instead of the collapsing the chest toward the floor. Reach your top hand forward so your arm is closer to your head. This will create a longer line from your heel to hand, and create more of a stretch on the side of your body. Benefits of Extended Side Angle Pose Stretches your ankles, legs, groin, back, and sides of your torso. Helps to open your chest as you twist to reach your arms wide. In addition to stretching, it also strengthens your leg muscles and your core as you fight for stability and balance in the pose. The post How to Do Extended Side Angle Pose in Yoga appeared first on BODi. If you’ve been seeking a great side stretch, look no further than the extended side angle pose in yoga, also known as utthita parsvakonasana in Sanskrit. Not only does it stretch the side of your torso, but it also stretches the side of your legs, and it even gives you a deep stretch in your groin. […] The post How to Do Extended Side Angle Pose in Yoga appeared first on BODi. Kayne Toyosato{authorlink}https://www.beachbodyondemand.com/blog/extended-side-angle-pose-utthita-parsvakonasanaBODi BODi is a Health Esteem platform to help you embrace the person you are today so you can take action to achieve all your health and fitness goals. https://bodiblog.wpenginepowered.com/wp-content/plugins/bod-blog/assets/vendor/beachbodydigital/wordpress-core-plugins/beachbody.png

How to Do Extended Side Angle Pose in Yoga Read More »

The Yin-Yang Workouts That You’ll Want to Pair Together

The Yin-Yang Workouts That You’ll Want to Pair Together Humans are creatures of habit. We tend to find a routine that works and stick with it. That’s fine for your daily coffee order, but when it comes to exercise, doing just one type of workout is a surefire way to shortchange your fitness. There’s no single discipline that can offer everything you need to be physically fit. One form of exercise that offers cardiorespiratory benefits may fall short in mobility, while another mobility-focused workout may never get your heart pumping. Plus, isn’t it a little boring to move your body the same exact way, day after day? To help you round out your fitness routine (and keep your head in the game), we paired up popular workouts that complement each other and, when done in tandem, provide a holistic approach to exercise and cross-training. Here are six “yin-yang” combos to try. 1. Yoga and Cycling Jaclyn Alterwein, senior manager of music and content at BODi, combines indoor cycling with yoga in her personal workout routine. Yoga, she explains, helps strengthen many of the muscles used in cycling. “It also helps open up the entire body and improve posture, which is advantageous to executing proper riding form,” she says. And yogis who have yet to try cycling may find that time in the saddle brings more ease to their practice. “Because cycling improves both cardiovascular health and lower-body strength, it will help those yoga postures that require lower-body strength and cardio efforts,” Alterwein says. Aside from the physical benefits of this pairing, the combination of yoga and cycling can offer a sense of energetic balance. “It’s great to balance the high energy required for cycling with the calm energy that practicing yoga provides,” Alterwein says. BODi’s Yoga52 is a series of practices led by four world-class trainers that you can do right at home. With descriptive cues and precise instruction, you’ll never have to look up from the mat so you can stay focused on your breath and body. 2. Cycling and Running This combo was made for cardio enthusiasts. Both cycling and running are excellent options for building endurance and maintaining heart health, but running is a high-impact exercise while cycling is a relatively low-impact activity. Alternating between the two can help prevent injuries and minimize rest time, explains Brett Durney, a certified personal trainer and co-founder of Fitness Lab. Pairing cycling and running “will provide you with the ability to train on consecutive days while allowing body parts such as ligaments and tendons to recover from the high-impact effect of running,” Durney says. “As we age, impact becomes incredibly important for bone health, but it also becomes something that we need to watch and monitor closely. Managing the amount of impact you are placing on your body by utilizing a combination of cycling and running means that you can work out frequently and recover at the same time,” he adds. 3. Running and Strength Training If you want an example of a well-rounded athlete, find a runner who regularly strength trains. Or a lifter who also runs. This pairing delivers that sought-after “strength + cardio” combo that’s often considered the gold standard for a workout regimen. “There are so many reasons for runners to strength train, particularly because strength training prevents injuries, improves muscular endurance, and promotes strong bone health, which are all excellent benefits for runners,” Alterwein says. Additionally, the stronger your glute, core, and leg muscles, the faster you’ll tick off those miles. And if your happy place is the weight room, it makes sense to occasionally trade your lifting shoes for running sneakers, as pounding the pavement will boost your cardiovascular capacity in a way that strength training won’t, says Alterwein. 4. Strength Training and Cycling Combining cycling and strength training is one way to keep your body (and brain) guessing, says Alterwein. “Mixing up your workouts is not only a great way to prevent boredom in your fitness routine, but the variety of the demands placed on your body forces it to constantly adapt, which leads to consistent changes and growth,” she says. Pair strength training with cycling, and you’re also likely to see improvements in both disciplines. “The cardiovascular benefits of cycling can help in those moments when your breath is so important to lifting weights,” Alterwein says. For cyclists, strength training can help improve posture and efficiency. “An efficient ride improves your power,” she says. “Strength training also improves cadence, or how fast you can get that pedal around, both in and out of the saddle. I often advise those who are struggling to maintain a quicker pace out of the saddle to strengthen their legs and core.” With the BODi Bike, you’ll get access to hundreds of heart-pumping rides, which also include Cycle & Strength classes that utilize the bike’s swivel screen monitor to incorporate strength training into your cycling workouts. 5. Cycling and Pilates Like yoga, Pilates can help balance out a high-energy sweat session on the bike. While Pilates workouts are challenging, their focus on breath, form, and control can have a calming effect on the body. Conversely, cycling will ramp up your heart rate in a way that Pilates simply can’t. Additionally, Pilates workouts can improve flexibility, posture, and core strength. “All of these improvements can be utilized to improve form on the bike, which provides a more efficient ride and prevents injury,” Alterwein says. “Pilates can ‘fine tune’ those muscles required for maximizing your bike performance.” If you’re looking to get started with a Pilates practice, Beginner Pilates With Lisa Hubbard is a three-week program designed to teach you the basics of Pilates exercises and breathwork. Building on what you learn in previous classes, you’ll create a strong foundation of movement and stability that you can take into all other types of workouts. 6. Pilates and Running For avid runners, Pilates can bring their form and technique to the next level, as it builds strength and stability throughout the entire body, especially in the core, back, and

The Yin-Yang Workouts That You’ll Want to Pair Together Read More »

How to Do Frog Pose in Yoga (Mandukasana)

How to Do Frog Pose in Yoga (Mandukasana) After building up a good sweat during a long yoga class, I like to put students right into pigeon pose. But this isn’t the only hip-opening option before savasana: The glute stretch from pigeon pose pairs perfectly with the inner thigh stretch of frog pose or frog stretch (mandukasana in Sanskrit). Considering how much time we spend seated, our glutes are inactive for large portions of our days, which can cause tightness. Inner thighs suffer a similar fate, yet are rarely targeted for a stretch like the one enjoyed in frog pose. That ends now! Frog Pose (Mandukasana): Step-by-Step Instructions Start in tabletop position: Get on all fours, with your hands directly below your shoulders and your knees directly below your hips. Slowly begin walking your knees out to the sides, keeping your feet flexed and your ankles in line with your knees. Keeping your spine neutral, let your pelvis sink as the inside edges of your feet touch the mat. Come down onto your forearms, if comfortable. Let gravity do the work; just breathe and feel the stretch for five breaths. To come out of the pose, gently rock your hips forward, walk your knees in, and press from your palms back up to the starting position. How to Make Frog Pose Easier Mandukasana is an intense inner-thigh stretch, so it’s important to avoid going too deep before you’re ready. There are a few ways to minimize the stretch without reducing its effectiveness. Turn frog pose into a restorative posture. Place a firm pillow or bolster between your legs and lower your chest onto it. Place blocks under your hips to support you as you lower into mandukasana. The simplest way to make frog stretch easier is to withhold lowering yourself as far. If your breath feels short, you may have gone too deep. How to Deepen Frog Pose For an advanced yoga practitioner, the inner thighs might be less tight than for others. There are a few ways you can intensify mandukasana. Lower your body farther, bringing your pubic bones to the floor. Lightly press your hips back toward your heels to intensify the inner-thigh stretch. Beginner Tips for Doing Frog Pose If you’re practicing frog pose for the first time, here are some ways to prepare for and get the most out of this stretch. Before getting into frog pose, warm up your knees in child’s pose. Don’t be afraid to fidget. It’s OK to move back and forth gently to open your hips. You can also lightly cat and cow your spine to find a more comfortable position. If you struggle with knee pain, place a blanket under your knees. Benefits of Frog Pose Mandukasana is chiefly a hip opener that really encourages mindful breathing. According to BODi Vice President of Fitness Programming Stephanie Saunders, “This deep stretch can be an exercise in patience, as most people want to get out of it after about 30 seconds. However, if you breathe into it, and let gravity do the work, you will be surprised at how much your hips and groin can open. “It can be an awkward position, but it requires little effort once you’re in it. And if you aren’t sure of your positioning, using a wall against which to press your feet will not only assist in your alignment, but can help to deepen the stretch as well.” The post How to Do Frog Pose in Yoga (Mandukasana) appeared first on BODi. After building up a good sweat during a long yoga class, I like to put students right into pigeon pose. But this isn’t the only hip-opening option before savasana: The glute stretch from pigeon pose pairs perfectly with the inner thigh stretch of frog pose or frog stretch (mandukasana in Sanskrit). Considering how much time we spend seated, […] The post How to Do Frog Pose in Yoga (Mandukasana) appeared first on BODi. Kayne Toyosato{authorlink}https://www.beachbodyondemand.com/blog/frog-pose-yoga-mandukasanaBODi BODi is a Health Esteem platform to help you embrace the person you are today so you can take action to achieve all your health and fitness goals. https://bodiblog.wpenginepowered.com/wp-content/plugins/bod-blog/assets/vendor/beachbodydigital/wordpress-core-plugins/beachbody.png

How to Do Frog Pose in Yoga (Mandukasana) Read More »