Uncategorized

Auto Added by WPeMatico

My favourite post partum bliss balls

My favourite post partum bliss balls The first few weeks (months?? yearrrrs??) after giving birth pass by in a blur that feels like forever but also like five minutes. Days and nights are interchangeable, dry shampoo is your best friend and you’re so focused on this tiny, defenceless human you’ve been tasked with keeping alive that it’s easy to forget to look after yourself. Whether you’re breastfeeding or not, you need to fuel your body with good quality food, and that’s why these post partum bliss balls should be within reach at all times. I’ve adapted them from an Ayurvedic cookbook and they’re so super quick and easy to make you could do it while your babe is asleep (even if he’s in a carrier snoozing on your chest). Better yet, forward the recipe to your partner or a friend and ask them to do it for you. And Team, if you’re off to visit a new mum anytime soon, make a batch and take them with you; I know I feel incredibly grateful to every friend and family member who dropped food off to us in those early days. Oat and almond post-partum bliss balls Ingredients2 heaped Tbsp coconut oil 2 Tbsp nut butter 3-4 Tbsp maple syrup (depends how sweet you like it – taste and adjust) 1 Cup almond meal 1 Cup oats (I use quick oats for best texture) 1 tsp vanilla extract Generous pinch of salt Method1. Melt the coconut oil 2. In a large bowl, combine melted coconut oil, nut butter, maple syrup and vanilla 3. Add the almond meal, oats and salt 4. Mix well and roll into balls 5. Store in freezer. Why are these oat and almond post-partum bliss balls so good for new mums? Almonds are thought to be galactagogues (helping to increase quantity and quality of milk). They’re also a source of protein, calcium and minerals. Oats are also said to help increase milk supply. They’re also low GI, anti-inflammatory and full of nutrients. They’re high in healthy fats thanks to the nut butter, and low in sugar.         The post My favourite post partum bliss balls appeared first on Lazy Girl Fitness. The first few weeks (months?? yearrrrs??) after giving birth pass by in a blur that feels like forever but also like five minutes. Days and nights are interchangeable, dry shampoo is your best friend and you’re so focused on this tiny, defenceless human you’ve been tasked with keeping alive that it’s easy to forget to… Read More » The post My favourite post partum bliss balls appeared first on Lazy Girl Fitness. LazyGirlFitness{authorlink}http://lazygirlfitness.com.au/2021/09/22/my-favourite-post-partum-bliss-balls/Lazy Girl Fitness fun, accessible workouts for women https://i2.wp.com/lazygirlfitness.com.au/wp-content/uploads/2014/09/cropped-Logo-LGF.jpg?fit=32%2C32

My favourite post partum bliss balls Read More »

Blueberry and lemon muffins

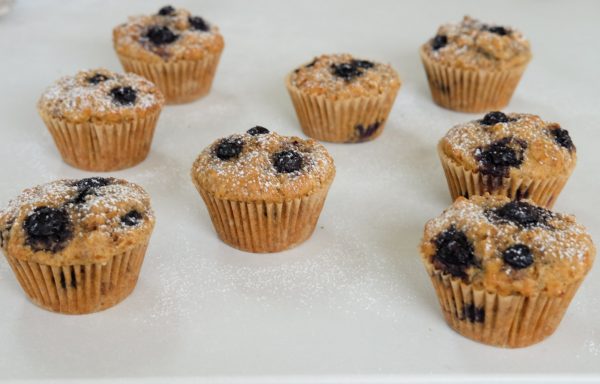
Blueberry and lemon muffins Blueberry and lemon muffins are on regular rotation in the snack department at the moment. This year one of my aims was to spend less at the grocery store.  It’s a work in progress, that’s for sure (I’m terrible at going back and buying extras I don’t really need!) but one thing I have been consistent with is making more snack foods. Not only does it cost less, you also avoid excess packaging and plastic.  I keep these muffins in the freezer and they store well.  My daughter and husband both enjoy these lemon and blueberry muffins.  They’re not overly sweet so the juicy blueberries and lemon flavour shine through.  I created these using Sujon blueberries.  Their berries originate from British Columbia in Canada and are big, sweet and are great quality.   You can pick them up at New World supermarkets across the country.     The yoghurt in the muffins make them nice and moist and the wholemeal flour and linseed add a bit of a fibre boost.   Here’s the recipe: Print Blueberry and Lemon Muffins Course Snack Prep Time 15 minutes minutes Cook Time 15 minutes minutes Servings 12 muffins Author Nicola Ingredients 1 1/3 cup wholemeal flour 2/3 cup standard flour 4 teaspoons baking powder ½ cup coconut sugar or brown sugar 2 tablespoons ground linseed 1/3 cup neutral flavoured oil Juice and finely grated rind from 2 lemons 1 cup natural yoghurt ¼ cup milk 1 egg beaten 1 cup of Sujon blueberries Instructions In a large bowl, mix together the dry ingredients. Make a well in the middle. In another medium sized bowl, mix together the oil, yoghurt, milk and egg. Pour the wet ingredients into the dry, and add the berries. Fold the ingredients together, being careful not to overmix. The ingredients should just be combined. Place the mixture into medium sized muffin pans, either lined with baking cases or well greased. Bake for 15-20 minutes, until cooked in the middle. This post was sponsored by Sujon berries. You may also like…… Blueberry and banana loaf The post Blueberry and lemon muffins appeared first on Eat Well NZ. Blueberry and lemon muffins are on regular rotation in the snack department at the moment. This year one of my aims was to spend less at the grocery store.  It’s a work in progress, that’s for sure (I’m terrible at going back and buying extras I don’t really need!) but one thing I have been… Read More The post Blueberry and lemon muffins appeared first on Eat Well NZ. Nicola{authorlink}https://eatwellnz.co.nz/blueberry-and-lemon-muffins/Eat Well NZ Intuitive & mindful eating nutritionist

Blueberry and lemon muffins Read More »

How to make your own kefir

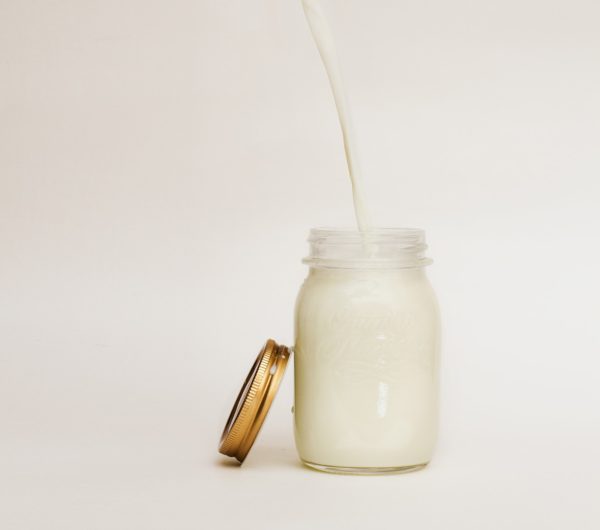
How to make your own kefir What is kefir? Kefir is a probiotic rich milk drink that is simple to make yourself. While it’s traditionally made with milk, you can also make it with coconut water, coconut milk and rice milk. Kefir and yoghurt are both fermented milk products, but the difference is in the cultures used. Kefir contains a much wider variety of probiotic bacteria and yeasts. It’s also fermented at room temperature, whereas yoghurt fermentation is started at a higher heat. Taste wise, kefir is similar yet quite distinct to the taste of yoghurt. It’s slightly sour and can be a little tangy. I use it in smoothies, pour it on my porridge or just have it for a drink. Kefir can be made from grains, or you can buy culture – which I do. Kefir culture is freeze-dried bacteria/yeast that can be added directly to your liquid and doesn’t need ‘looking after’. You can re-culture up to two times. To make your own kefir you’ll need: Kefir starter. I get mine from HealthPost here (affiliate link) Milk (or coconut/rice milk or coconut water) Instructions: Place 1L of milk in a clean, sterilised jar. Sprinkle over the kefir starter, replace the lid and shake to combine. Loosely fit the lid again. If you want a fizzy kefir (for example if you’re using coconut water, tighten the lid. This means no gas from fermentation will escape) Leave for 24 hours, then refrigerate. In colder temperatures, it may take a little longer than 24 hours. According to Mad Millie, the starter brand I buy, it should last for up to two weeks in the fridge. I have always used mine before then! To learn more about kefir culture vs kefir grains – click here I’ve also got a post on how to make coconut yoghurt at home – here’s my instructions for an easy method. This post contains some affiliate links which means I make a small profit if you choose to purchase something. It doesn’t cost you any extra and helps keep this site running. The post How to make your own kefir appeared first on Eat Well NZ. What is kefir? Kefir is a probiotic rich milk drink that is simple to make yourself. While it’s traditionally made with milk, you can also make it with coconut water, coconut milk and rice milk. Kefir and yoghurt are both fermented milk products, but the difference is in the cultures used. Kefir contains a much… Read More The post How to make your own kefir appeared first on Eat Well NZ. Nicola{authorlink}https://eatwellnz.co.nz/how-to-make-your-own-kefir/Eat Well NZ Intuitive & mindful eating nutritionist

How to make your own kefir Read More »

The State of Coaching 2023

The State of Coaching 2023 Eric Malzone is one of my favorite people. I first”met” Eric several years ago when he invited me to take part in an invite only mentorship he was offering alongside several other fitness professionals he invited to take part. It was a lovely experience and I met a handful of lifetime friends from that group. Eric is a genuine soul and he’s given more to the industry than he’s taken. I love my chats with him, and my recent one with him – on his Future of Fitness Podcast – was no different. The State of Coaching 2023 I can’t recall verbatim what we discussed in it’s entirety – I mean, we recorded this episode back in March – but what I CAN tell you is that we had an authentic conversation on what it means to be a coach and what it means to actually be coaching. And, in all likelihood, there was a reference or two (or three) to deadlifts and Lord of the Rings. You can listen to the episode wherever it is you tend to listen to such things: Apple – HERE Spotify – HERE An Alternate Universe Where Everyone Who Claims to Have Squatted 405 (for reps) In High-School Must Provide Video Evidence – HERE The post The State of Coaching 2023 appeared first on Tony Gentilcore. Eric Malzone is one of my favorite people. I first”met” Eric several years ago when he invited me to take part in an invite only mentorship he was offering alongside several other fitness professionals he invited to take part. It was a lovely experience and I met a handful of lifetime friends from that group…. Read more The post The State of Coaching 2023 appeared first on Tony Gentilcore. Tony{authorlink}https://tonygentilcore.com/2023/05/the-state-of-coaching-2023/Tony Gentilcore Because Heavy Things Won’t Lift Themselves

The State of Coaching 2023 Read More »

Blueberry Swirl tart

Blueberry Swirl tart Dessert is always my favourite part of a meal and I love to make them too.  Even though the weather is getting cooler,  you can still make the most of berries by buying frozen.  I created this yummy tart using Sujon blueberries.  The  Blueberry swirl tart is kind of a cross between a cheesecake (but with no cream cheese!) and a posett.  It looks impressive but is really simple to make. The filling is predominately thick greek yoghurt and coconut cream, together with blueberries. It’s light, creamy and delicious.    It could be made dairy free by substituting the greek yoghurt for coconut yoghurt – I haven’t tried it but let me know if you do!    The base is made of a wholesome mix of oats, nuts and coconut  and is blended together with dates, honey and coconut oil which works well with the flavours of the filling.   The beautiful deep blue colour of the tart is courteous of Sujon blueberries.  These yummy blueberries are grown in British Columbia in Canada and are  delicious, large and juicy.   The Sujon blueberry packaging has also had an upgrade.  They now come in a stand up pouch with a convenient reclosable zip and the best part is that it’s recyclable.   Sujon blueberries can be found at New World supermarkets.   Serve this dessert with some extra Greek yoghurt and blueberries. Print Blueberry Swirl Tart Course Dessert Servings 8 Author Nicola Ingredients For the base 1 cup rolled oats 1/2 cup ground almonds 1/4 cup dates finely chopped 1/2 cup coconut 2 tablespoons honey 4 tablespoons melted coconut oil 1 tsp vanilla essence For the filling 1 400g can of coconut cream (reseve 1/4 cup) 3 tsp gelatine 1/4 cup sugar juice and rind from 1/2 a medium size lemon 3/4 cup thick Greek yoghurt 1 dessertspoon honey 1 cup Sujon frozen blueberries + extra to serve Instructions For the base: Add all base ingredients into a food processor or blender.  Blend until well combined.  Press into a greased flan tin with a removable base.  I used an oblong one, but you can also use a round dish.  Place in the fridge while you prepare the filling. For the filling Pour the coconut cream into a medium sized pot and heat on a medium temperature. When the coconut cream begins to lightly bubble, sprinkle over the gelatine and whisk to combine. Add the sugar, lemon juice and rind.  Mix well and remove from heat.  Pour into a bowl and place in the fridge until it begins to cool.  While the mixture is cooling,  in a clean pot add the blueberries, remaining ¼ cup coconut cream and honey.  Place on an element over a medium heat, stirring regularly until the berries are defrosted and the mixture is warm.  Blend until smooth. Take care to make sure it’s only warm and not hot for safety reasons. Take the yoghurt mix from the fridge. Add half the yoghurt mix to the blueberry mixture and stir until combined. Remove the base from the fridge. Alternate placing large spoons of the yoghurt mixture and blueberry mixture and swirl to combine the colours. Place in the fridge until set then cut into pieces and serve with extra berries and yoghurt. This post was sponsored by Sujon Berries The post Blueberry Swirl tart appeared first on Eat Well NZ. Dessert is always my favourite part of a meal and I love to make them too.  Even though the weather is getting cooler,  you can still make the most of berries by buying frozen.  I created this yummy tart using Sujon blueberries.  The  Blueberry swirl tart is kind of a cross between a cheesecake (but… Read More The post Blueberry Swirl tart appeared first on Eat Well NZ. Nicola{authorlink}https://eatwellnz.co.nz/blueberry-swirl-tart/Eat Well NZ Intuitive & mindful eating nutritionist

Blueberry Swirl tart Read More »

Banana Blueberry Loaf

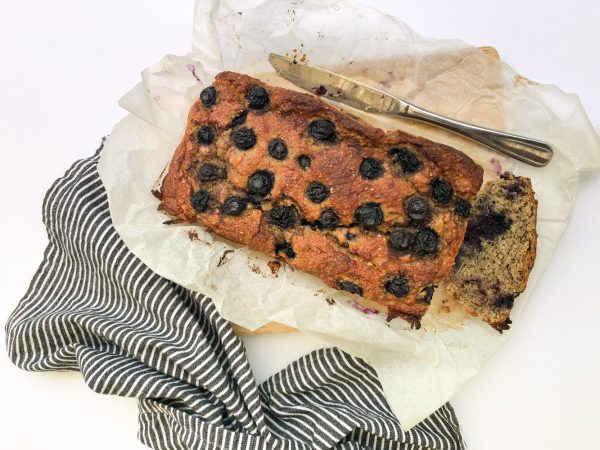
Banana Blueberry Loaf There’s something calming about baking.   Maybe it’s because you naturally slow down, or the rhythm of mixing and the magic of creating something delicious from scratch – like this yummy banana blueberry loaf.   Whatever it is, in these difficult times, baking is something I like to do to relax and unwind.  In a way, it’s almost a type of mindfulness. You’re paying full attention to the experience of measuring, mixing and noticing taste and smell of what you’re making.   The tasting bit is probably the best! When the team at Sujon asked if I’d like to create a recipe with their blueberries, of course I said yes please! Sujon frozen blueberries are top quality. They source their blueberries from British Columbia in Canada, and they are consistently delicious, sweet and juicy!    Blueberries are rich in antioxidants and also provide some vitamin C, vitamin E and dietary fibre.  I have a huge supply of overripe bananas in the freezer so I put these to use, along with frozen blueberries from Sujon to make this delicious banana and blueberry loaf.  The Sujon blueberry packaging has also had an upgrade.  They now come in a stand up pouch with a convenient reclosable zip and the best part is that it’s recyclable.   This loaf uses a mix of coconut flour and wholegrain flour which make it moist and also a source of dietary fibre.  Fibre is important for our gut heath. This banana blueberry loaf is one of those recipes which is hard to get wrong – you simply mix everything together and pop it in the oven.  Now that’s my kind of recipe. Print Banana Blueberry Loaf Prep Time 15 minutes minutes Cook Time 1 hour hour Author Nicola Ingredients 3 ripe bananas mashed 2 large eggs 1/3 cup neutral flavoured oil 1/2 cup Greek yoghurt 1/2 cup coconut flour 3/4 cup wholemeal flour 2 tbsp chia seeds 1/4 cup sugar (or honey or maple syrup) 2 tsp baking powder 2 tsp cinnamon 1 1/3 cup blueberries Instructions Preheat oven to 160 degrees Celcius on fanbake. Mix together the mashed bananas, eggs, oil and yoghurt in a large bowl.  I like to use a stick blender to get it smooth, but you can just whisk it if you don’t have one. Add the flours, chia seeds, baking powder, cinnamon and sugar and fold into the wet ingredients. Fold through the 1 cup blueberries. Place into a lined, greased loaf tin.   Top with the remaining blueberries. Cook for 50-60 minutes, or until a skewer comes out clean when inserted to the middle. This post was sponsored by Sujon Berries The post Banana Blueberry Loaf appeared first on Eat Well NZ. There’s something calming about baking.   Maybe it’s because you naturally slow down, or the rhythm of mixing and the magic of creating something delicious from scratch – like this yummy banana blueberry loaf.   Whatever it is, in these difficult times, baking is something I like to do to relax and unwind.  In a way,… Read More The post Banana Blueberry Loaf appeared first on Eat Well NZ. Nicola{authorlink}https://eatwellnz.co.nz/banana-blueberry-loaf/Eat Well NZ Intuitive & mindful eating nutritionist

Banana Blueberry Loaf Read More »

Top 5 Push Up Variations The Best Pressing Variations for Strength, Size, and Power!

Top 5 Push Up Variations The Best Pressing Variations for Strength, Size, and Power! 5 Push Up Variations For Strength, Size, and Power Oftentimes the Barbell Bench Press is hailed as the king of pressing exercises and while I may be tempted to agree; I still to this day believe the Push Up and it’s many variations to remain the undisputed champion for the press category. Why? Simply put, the push up offers a tailored approach to the person, freeing the shoulder blades, enforcing total body stability and allowing for a variety of actionable goals with little to NO equipment. I see that as an absolute WIN! The massive benefits to programming push ups should NEVER be overlooked in any type of health, fitness or performance program. The push up pattern creates an ideal environment for improving your pressing strength and skill due to the closed chain biomechanics of the shoulders. With hands stable on a solid surface, kinematics of the shoulder complex change, freeing the shoulder blades to dynamically stabilize and move on the thoracic cage while reducing stress on the front side of the true shoulder joint. In addition, the lower body and core are automatically in play during push ups, making it a full body integrated movement pattern. In order to get strong AND build muscle, we will aim to progress push ups with load, NOT just more reps. People will tend to claim that loading push ups is too inconvenient or hard to setup but realistically, simply adding range of motion, instability, or pauses can easily reduce the load needed to efficiently train the Push Up. If you’re an absolute machine at push ups, adding a little bit of load can go a long ways in addition to these other nuances! However, keep the plates off your shoulder blades, as it negates the benefits of freely moving shoulder blades with closed chain pushing. Load plates, chains, whatever you got over the lower back instead. This will work the core harder AND integrate the lower body. Train for strength in the 6-12 rep ranges and muscular hypertrophy in the 12-20 rep range while adding appropriate load. Without further ado, let’s dive right in to my top 5 favorite Push Up variations for MORE gains! 1. Deficit Stretch Push Up The traditional push up is inherently trained through partial range of motion, with chest or face being blocked out by the ground before the shoulders can fully extend and rotate. Fix this by elevating your hands to achieve a deeper range of motion that works the pecs through more of a stretch, improving shoulder mobility and strengthening the undertrained end ranges which also happen to be the most restricted and vulnerable ranges of motion predisposing pain and injuries. Our height for the deficit doesn’t have to be much, either. Simply placing the hands on a single bumper plate with your head and torso directly above the ground will offer just enough additional range to get a thorough stretch through the pectorals. Now, as if this wasn’t challenging enough, I do often like to add either a pause to the bottom of this variation to extended the amount of time spent in that loaded, stretched position or load across my lumbar. Remember, with load placement, a little goes a long way (Have a training partner load and remove the plates for you) and keep the load off of the shoulder blades- free the scaps! 2. Suspension Trainer Push Up Next up on this list is probably one of my favorites for specifically training dynamic total body stability and up regulating motor control and coordination for the shoulder complex. That is, the suspension trainer push up! What I enjoy so much about this variation is the sheer amount freedom involved throughout the hands, shoulders, and torso position. The ability to allow the hands to rotate mid-repetition and subsequently the arm to rotate and remain close to the rib cage allow us to maintain a HIGHER level of joint centration at the shoulder, and in turn, higher force output from the pecs, delts, and triceps. With this exceptional level of novelty, we can also adjust the handle height to accommodate different levels of push up strength or skill. The higher the handles, the more vertical we are, the “easier” this variation will be. Comparatively, the lower the handles, the more horizontal we are, the more “difficult” this will be. If you’re truly out for blood on this variation, trying getting declined by using a low (shin level) handle position and elevating the feet on a bench or box- tell me that won’t provide a proper challenge for you! 3. Banded Plyometric Push Up Ready for some power priming action? The Band assisted plyometric push up is my go to explosive press variation for it’s surprisingly easy setup and effectiveness of priming the pressing muscles while incorporating total body pillar stability. You will simply set up in a rack with a light to medium resistance band anchored horizontally via band pegs. If you don’t have a set of band pegs for this super easy setup, you can opt for a longer (or lighter) band and loop it overhead on the crossbar. You’ll have MORE assistance this way most likely but that’s not necessarily a bad thing because you will want to keep these repetitions FAST and POWERFUL for this specific variation. With your bands set up appropriately, place the band across the pecs so that they wrap underneath your armpits. Starting from the top, drop down fast into the bottom of the push up and as you make contact with the ground immediately press to take advantage of the stretch reflex on top of the band assistance to launch yourself off of the ground. Not so fast- keep those hands in place directly in front of you to catch yourself upon landing. No fancy parlor tricks here like clapping behind your back or over your head. Maximize your efficiency by keeping
Top 5 Push Up Variations The Best Pressing Variations for Strength, Size, and Power! Read More »

Arnold Palmer Press For Shoulder Strength & Stability

Arnold Palmer Press For Shoulder Strength & Stability Here’s What You Need To Know… 1. What do you get when you combine a legendary bodybuilding exercise with a functional flare for shoulder health and performance? Introducing the best press you’re NOT doing, the Arnold Palmer Press. 2. Using a single kettlebell in the palm of your hand and press it overhead with elements of rotation and abduction out of a half kneeling position. There you have it, the perfect shoulder friendly upgrade from the traditional Arnold Press. 3. The beauty of the Arnold Palmer Press is its asymmetrical setup, increased surface area contract of the palm on the bell, combined with rotational ranges of motion being stabilized by the fascial sling system. 4. Program the Arnold Palmer Press in higher rep ranges (8-20) with a strength and hypertrophy emphasis. This move is best trained as an accessory exercise, or as a core emphasized pressing finisher to any upper body training day. A Mix of Lemonade, Iced Tea And Sweet Shoulder Stability Ah, the golden age! The 1960’s were nothing short of superb. The legendary golfer Arnold Palmer invented his namesake drink combining lemonade with iced tea in Latrobe, Pennsylvania. And adonis Arnold Schwarzenegger was originating now classic bodybuilding exercises at Gold’s Gym in Venice Beach, California. All seemed right with the world. But little did these 2 sporting icons know that it would take another 52 years for their innovative efforts to be combined into the ultimate shoulder saving exercise, by our very own coach Taylor Van De Loo, that combines elements of the original with a new age functional flare on shoulder mobility, stability and health. And with that said, I’m proud to present… Introducing The Arnold Palmer Press The Arnold Palmer Press combines an unconventional single arm kettlebell palm press with the rotational elements of the classic shoulder building Arnold Press to create synergy out of natural asymmetry. Both the palm placed on the bell AND the rotational functional sling system range of motion work together to ease structural shoulder stress while unlocking mobility and range. Add in the half kneeling stance and base of support, and there you have it, the most effective shoulder friendly functional finisher you’ve ever used that will improve your mobility, build your shoulders AND help to challenge hip and core stability simultaneously. Looking for a catch all upper body shoulder finisher? Here’s one of the best I’ve ever used. Your How To Guide To Overhead Press Like The King Coaching Notes: Get into an active half kneeling 90-90 position with your front leg opposite of the side you’re kettlebell pressing with. Actively engage your glutes and adductors while gripping BOTH feet into the ground. Brace your core with 360 degree tension linking the mid section to the legs Place a kettlebell in your hand holding the “bell” portion of this weight. Start the kettlebell in front of your face with tension throughout the body. Note the opposite arm should be strong, braced and out to the side like a cross. Press the kettlebell “out and up” overhead in a controlled range of motion. Achieve full overhead range of motion with biceps next to ear without compensating. Lower the weight eccentrically in the exact same rotational range you pressed with. Continue pressing for the desired rep range, then switch to the opposite side. Arnold Palmer Press Training & Programming Considerations The Arnold Palmer Press is best programmed for upper strength (8-12 reps) or traditional hypertrophy (12-20 reps) rep ranges to challenge the shoulders, hips and core with more total time under tension and technical skill proficiency. Multiple sets with approximately 30-60 second rest periods (make sure to train both sides!) will be ideal for eliciting the desired training effect. Due to the rotational components of the dynamic overhead kettlebell palm press, the anterior, middle and posterior aspects of the deltoid, along with the posterior chain scapular stabilizers will all be directly targeted as the dynamic muscular movers. But an overhead press is build on a foundation of a rock solid core and lower body. The half kneeling stance should kick on stability from the glutes, adductors and ground foot contract, while irradiating tension up chain into the core and abdominals to link up this kinetic chain from the ground to the fingertips upon the press. Like any other pristinely executed functional exercise, key attention should be placed at ALL areas of the body to gain, maintain and scale static tension at the legs, hips and core, and smooth articulate motion at the shoulders and arms. Tack the Arnold Palmer Press onto the tail end of your next upper body training day as a brutal metabolic stress finisher to give those shoulders a little more love through a complete range of motion while challenging the core and heart rate. OPTIONAL: Drink an ice cold Arnold Palmer as a post-workout carbohydrate replacement for best results About The Author Dr. John Rusin is a sports performance specialist and injury prevention expert that has coached some of the world’s most elite athletes, barbell sport competitors, and over 10,000 clients from all walks of life with his innovative pain-free performance programs and systems, which has gained him the reputation as the go-to industry expert for rebuilding after pain, injuries or plateaus. Dr. Rusin is also the founder of the Pain-Free Performance Specialist Certification (PPSC) that has certified over 10,000 personal trainers, strength coaches and rehab pros from across the globe in the pain-free performance training system since 2019. The post Arnold Palmer Press For Shoulder Strength & Stability appeared first on Dr. John Rusin – Exercise Science & Injury Prevention. Here’s What You Need To Know… 1. What do you get when you combine a legendary bodybuilding exercise with a functional flare for shoulder health and performance? Introducing the best press you’re NOT doing, the Arnold Palmer Press. 2. Using a single kettlebell in the palm of your hand and press it overhead with […] The post

Read More »